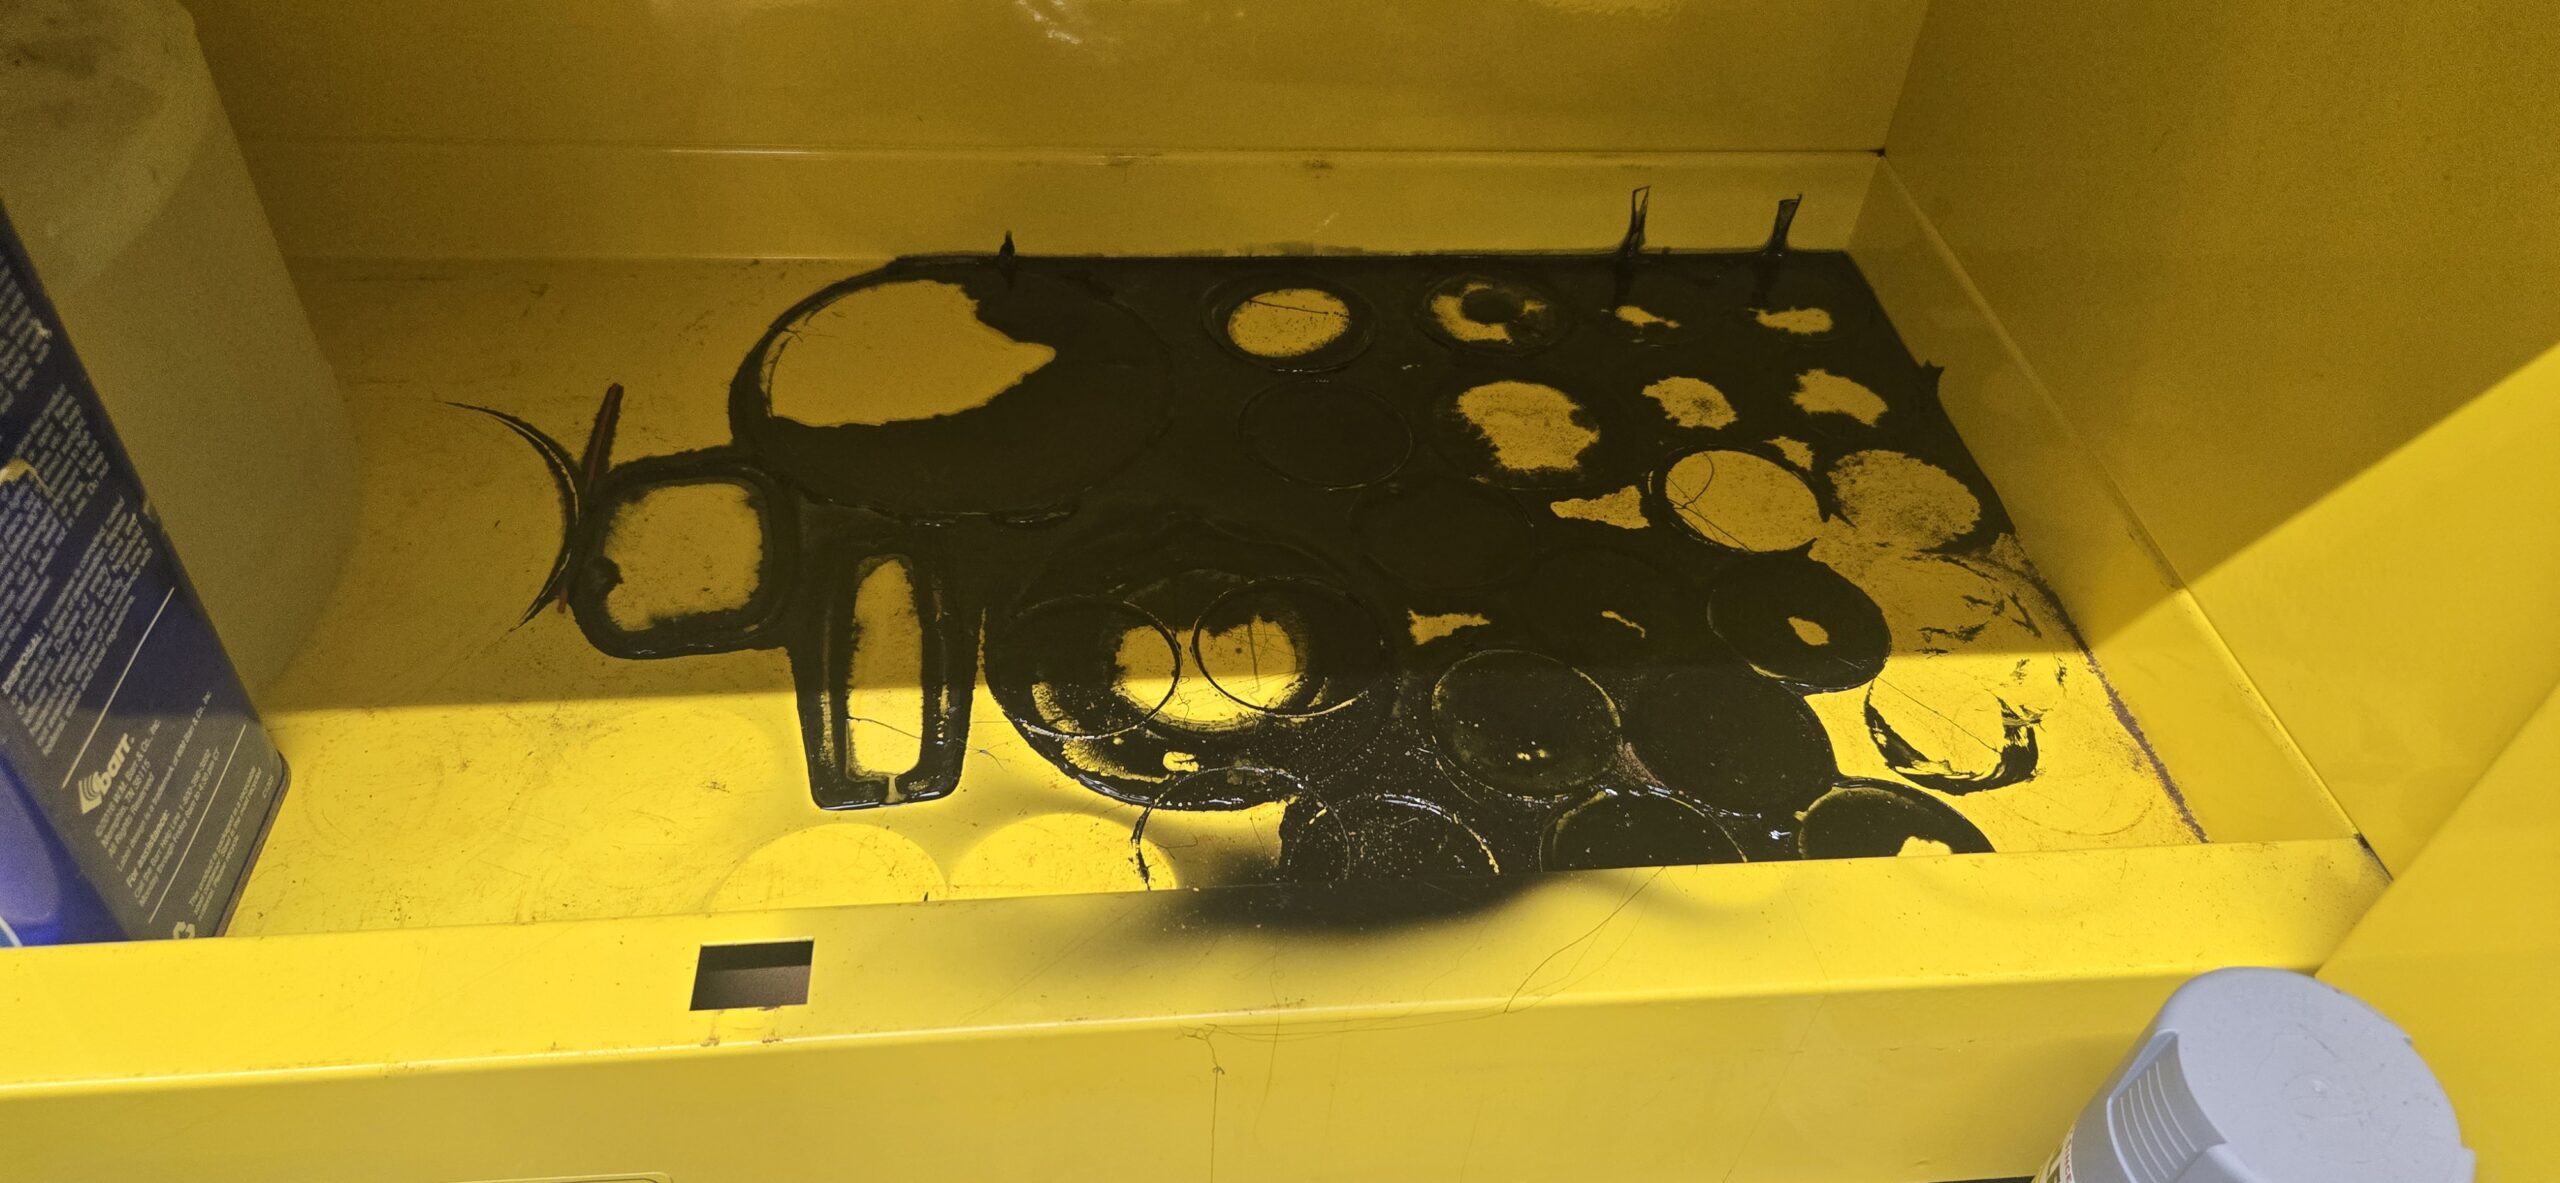
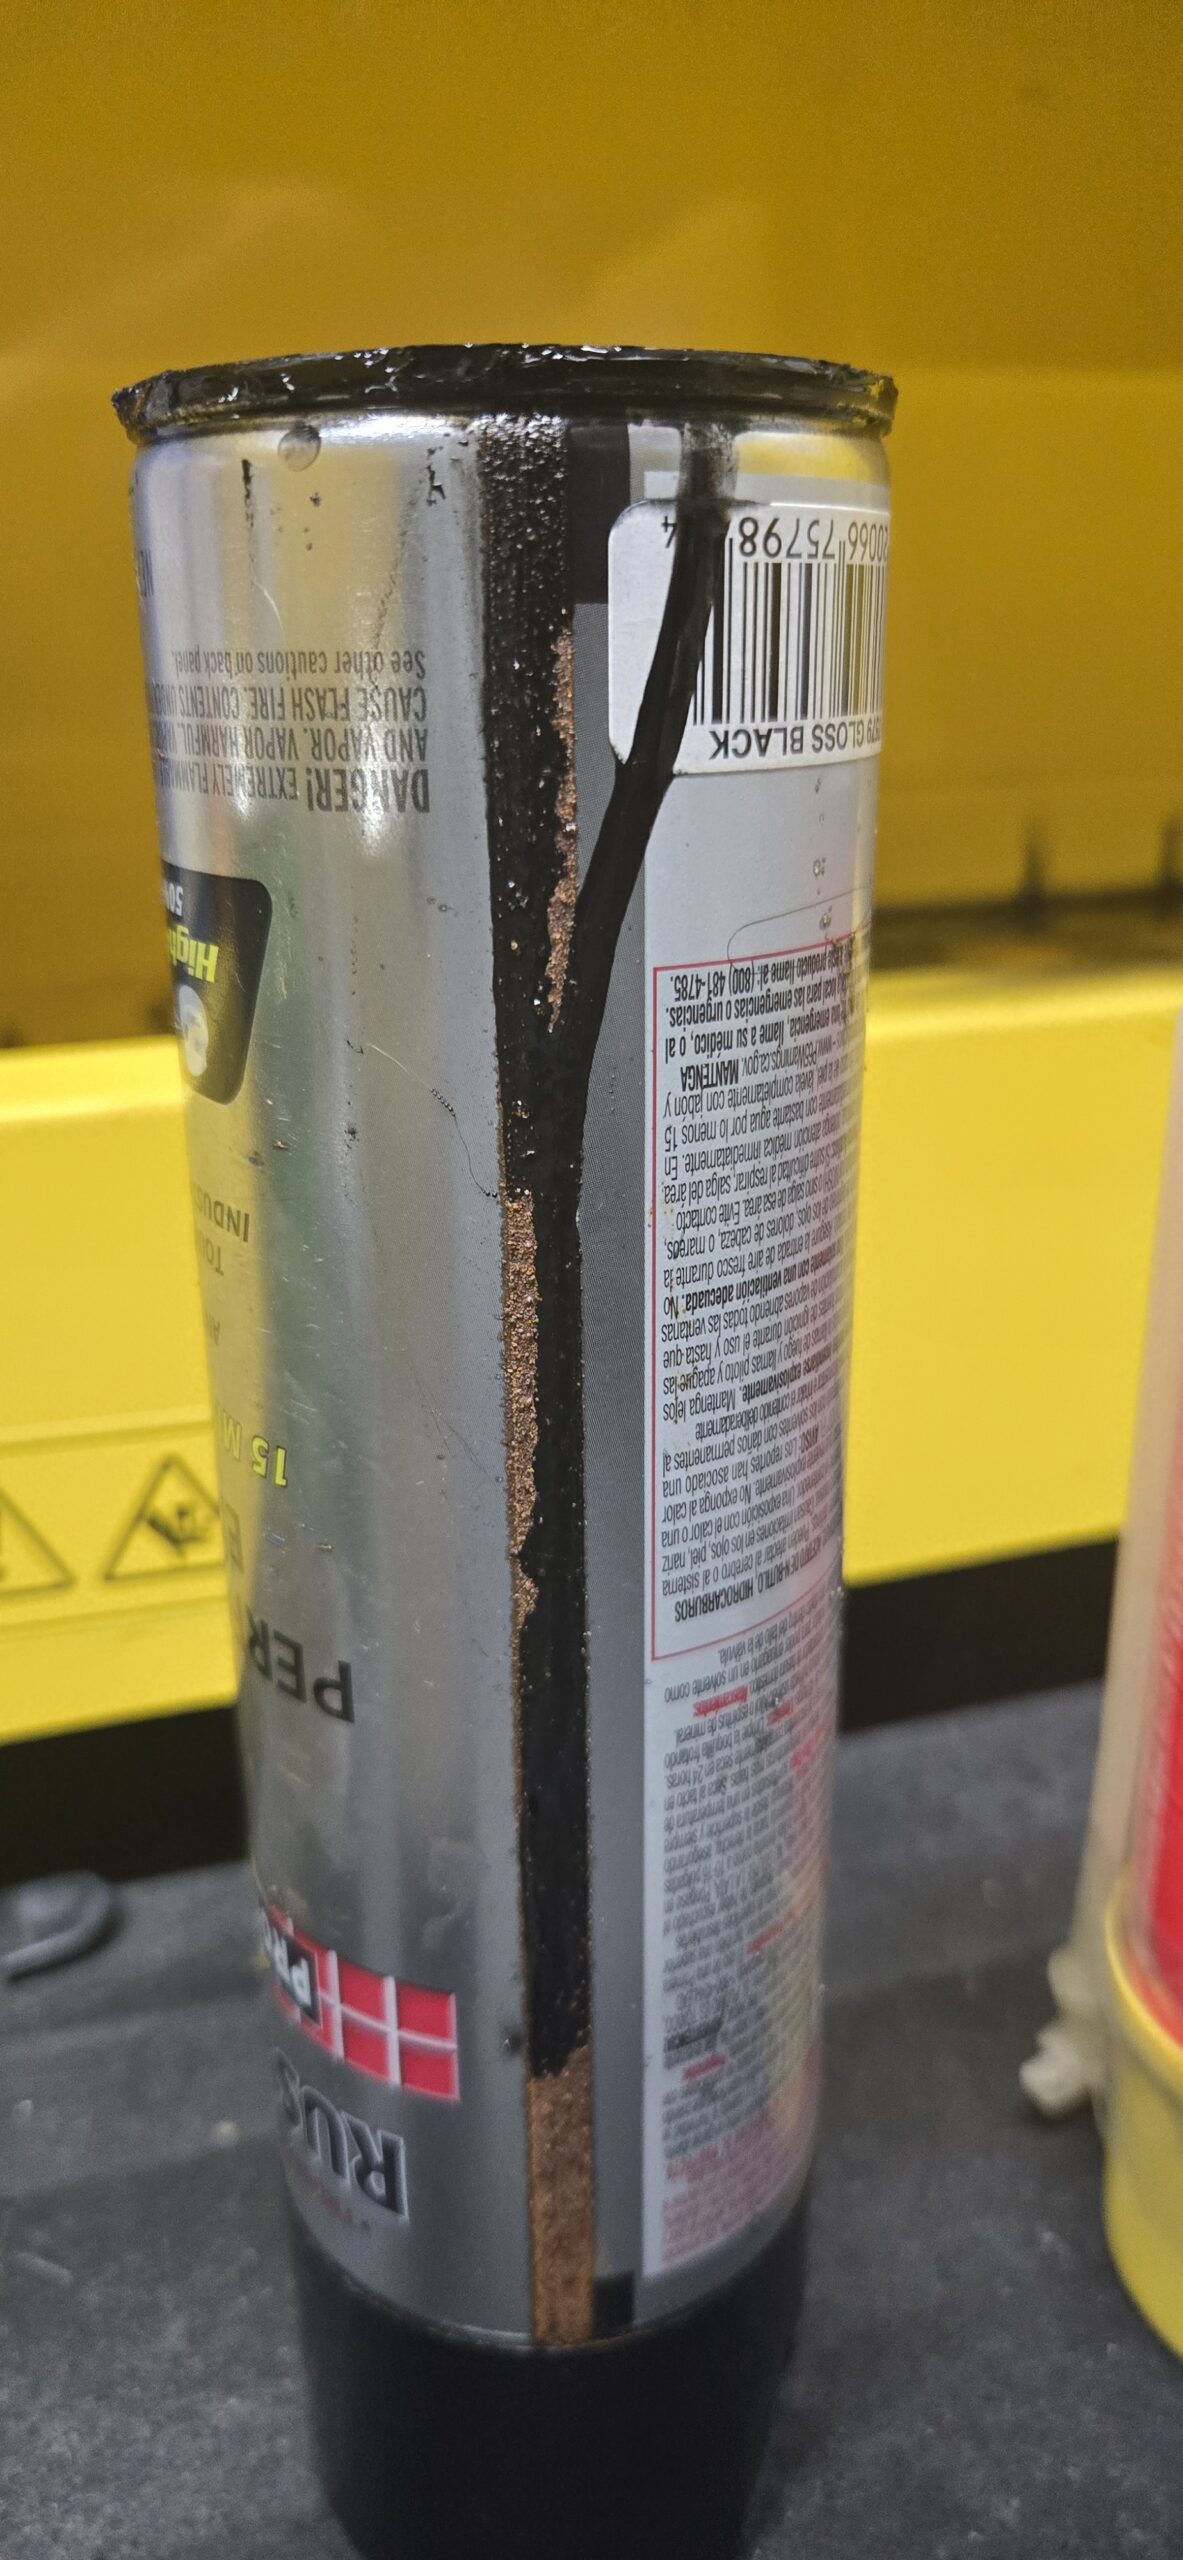
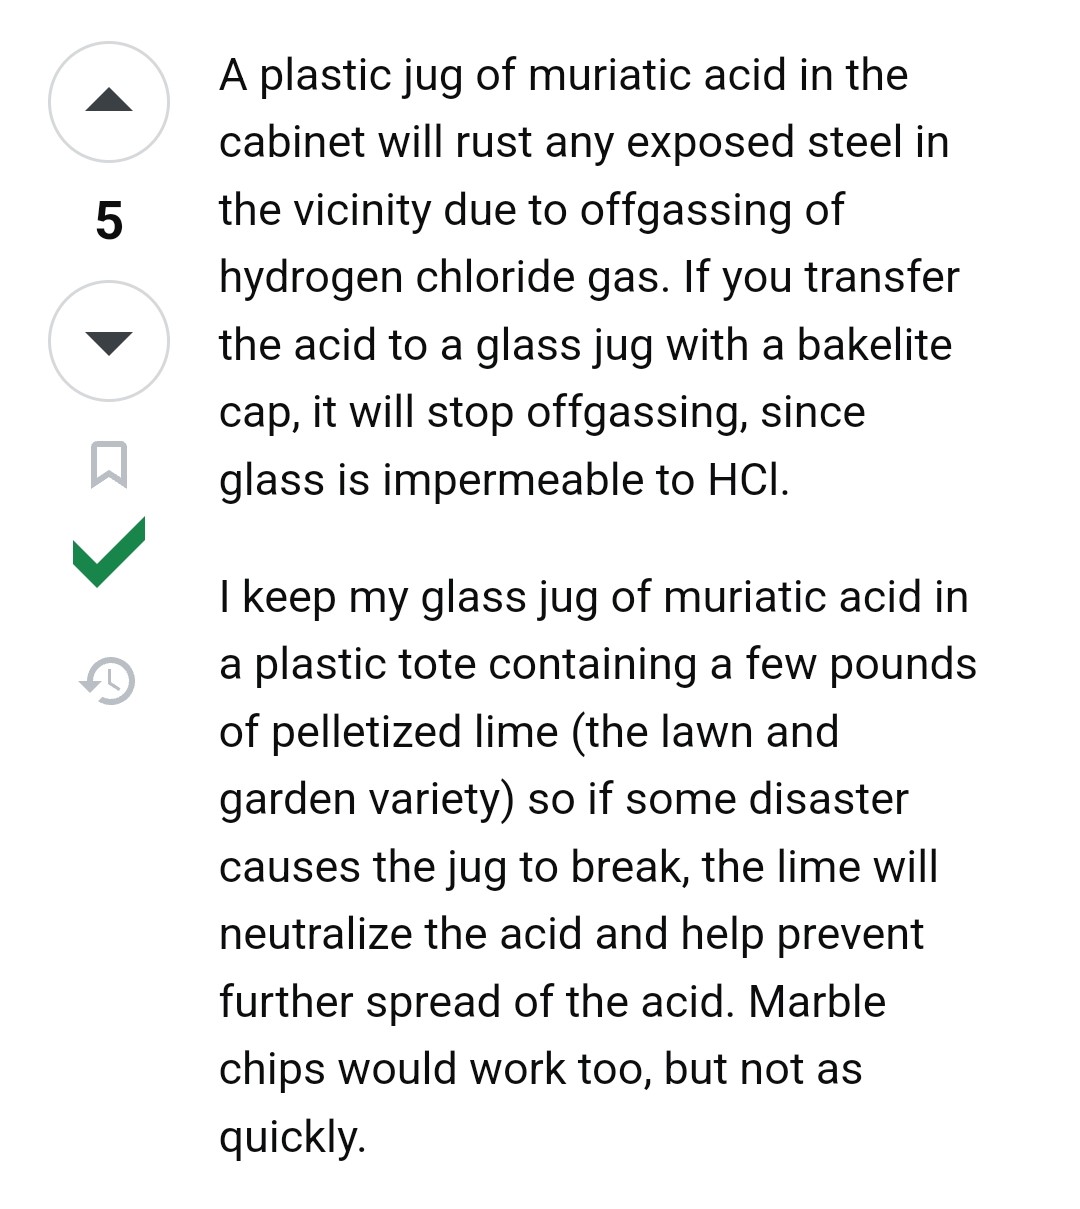
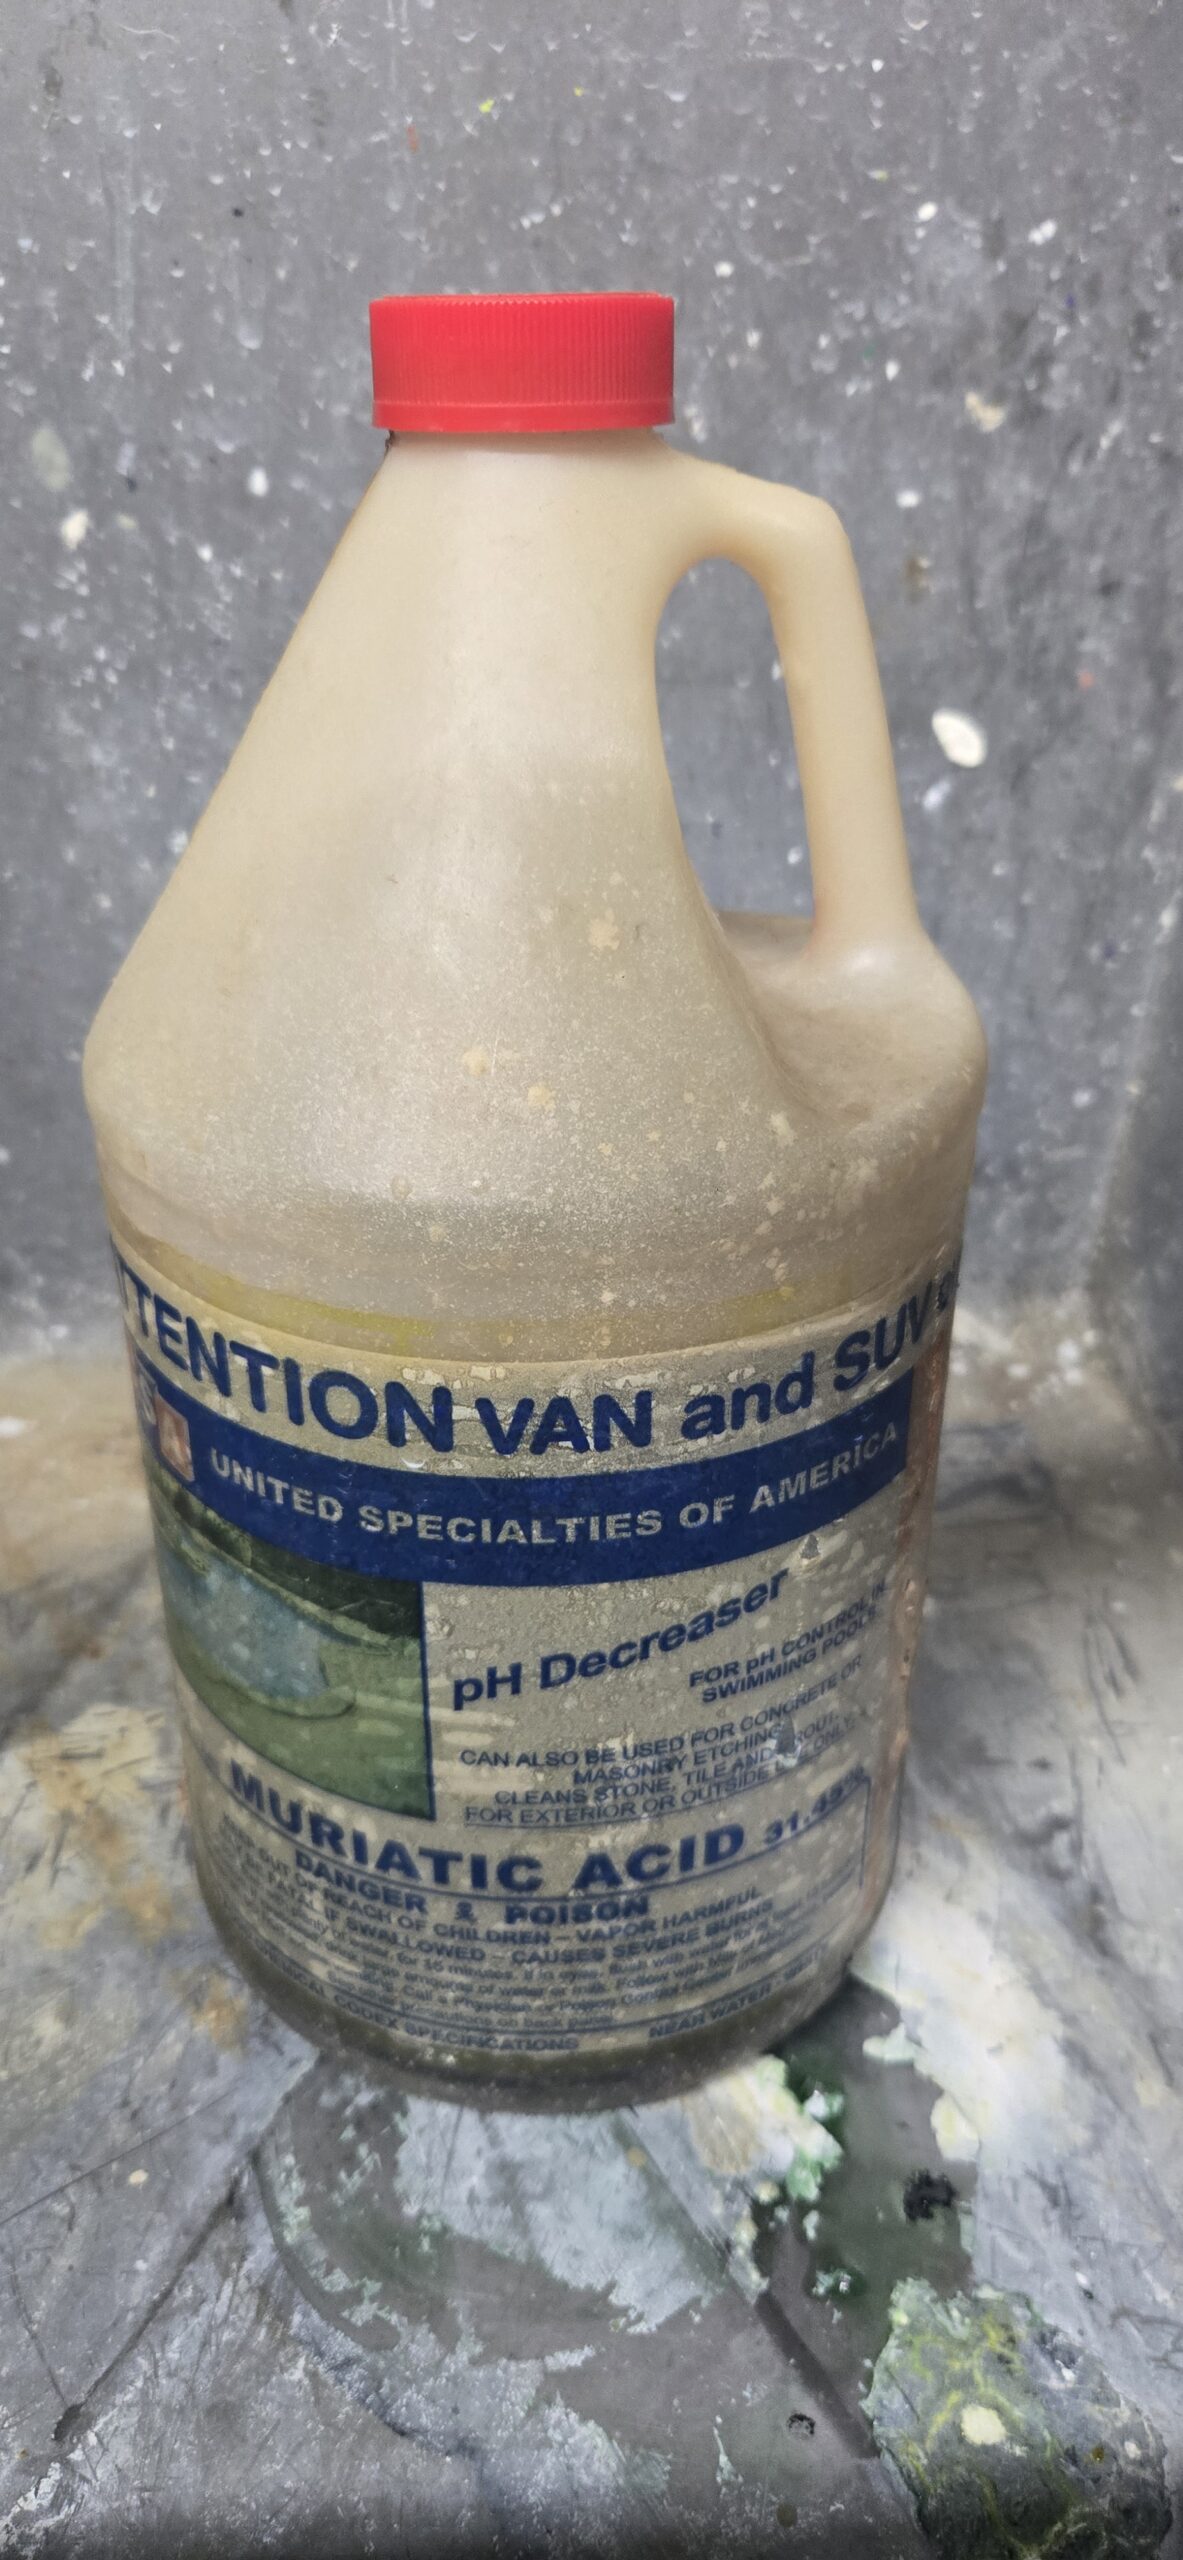
I had noticed some of the cans rusting in our flammable storage cabinet but kept telling myself, “that is a tomorrow problem.” Well today is tomorrow… or something like that. I opened up the cabinet to grab some spray paint and saw a mess. One of the black enamel cans rusted through and leaked all over. I opened it up to let everything dry and started to google why. It did not take long to find a Stack Exchange post for a similar issue. A reply said “HCI stored in plastic will off gas HCI and will rust anything near by”. It might be time to invest in a separate acid cabinet, but for now I will store it in the shed.
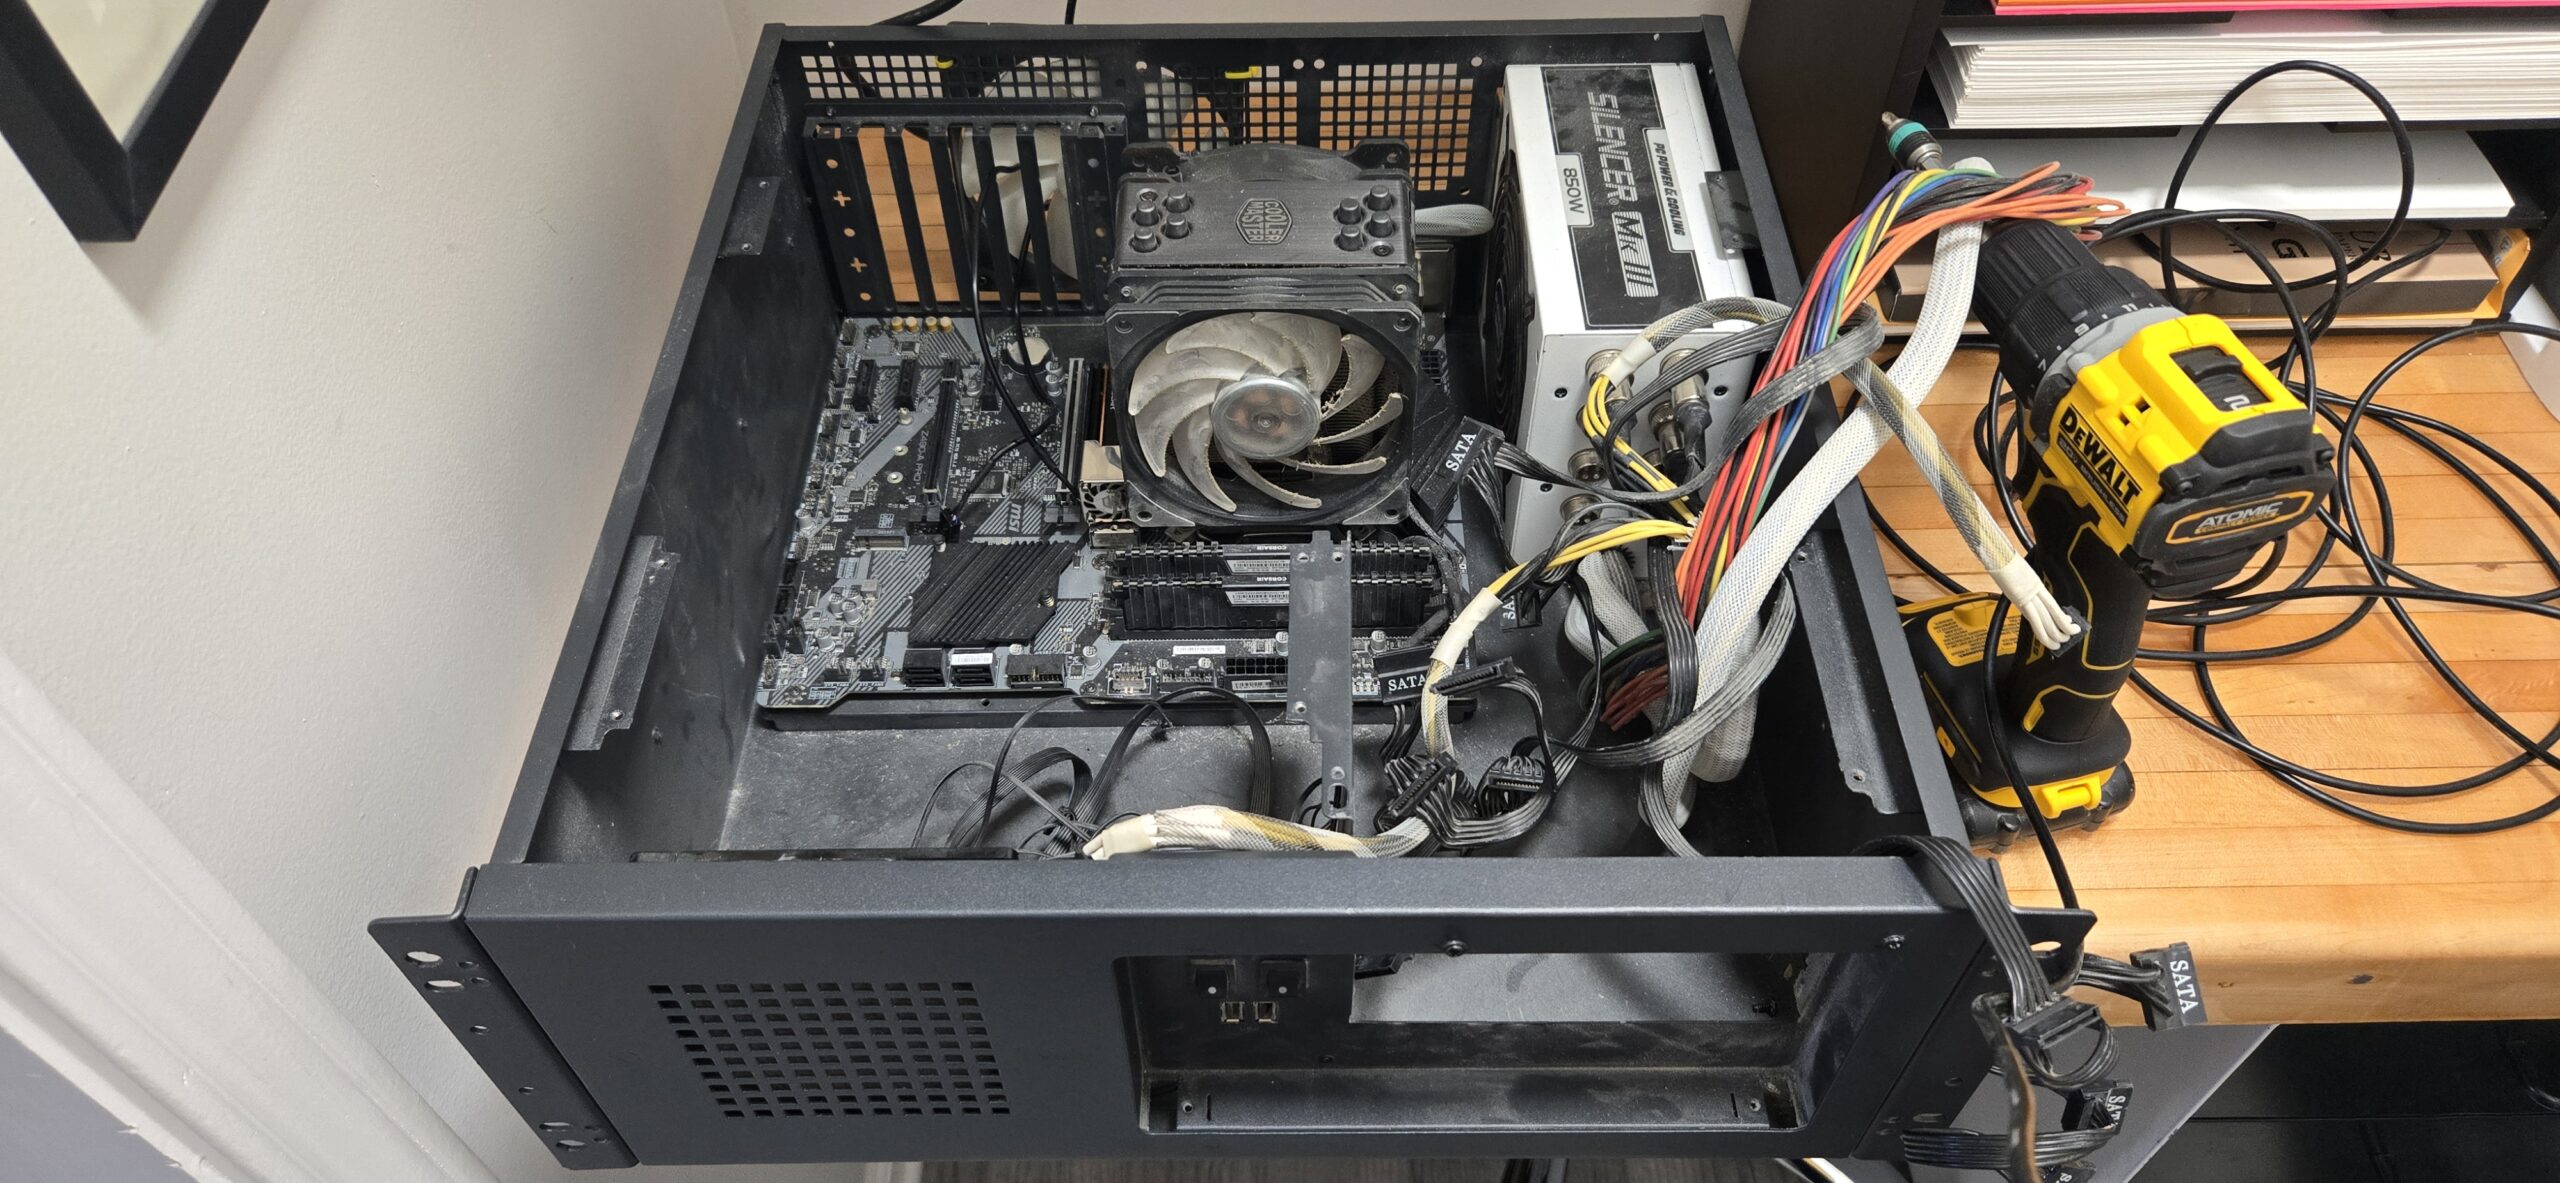
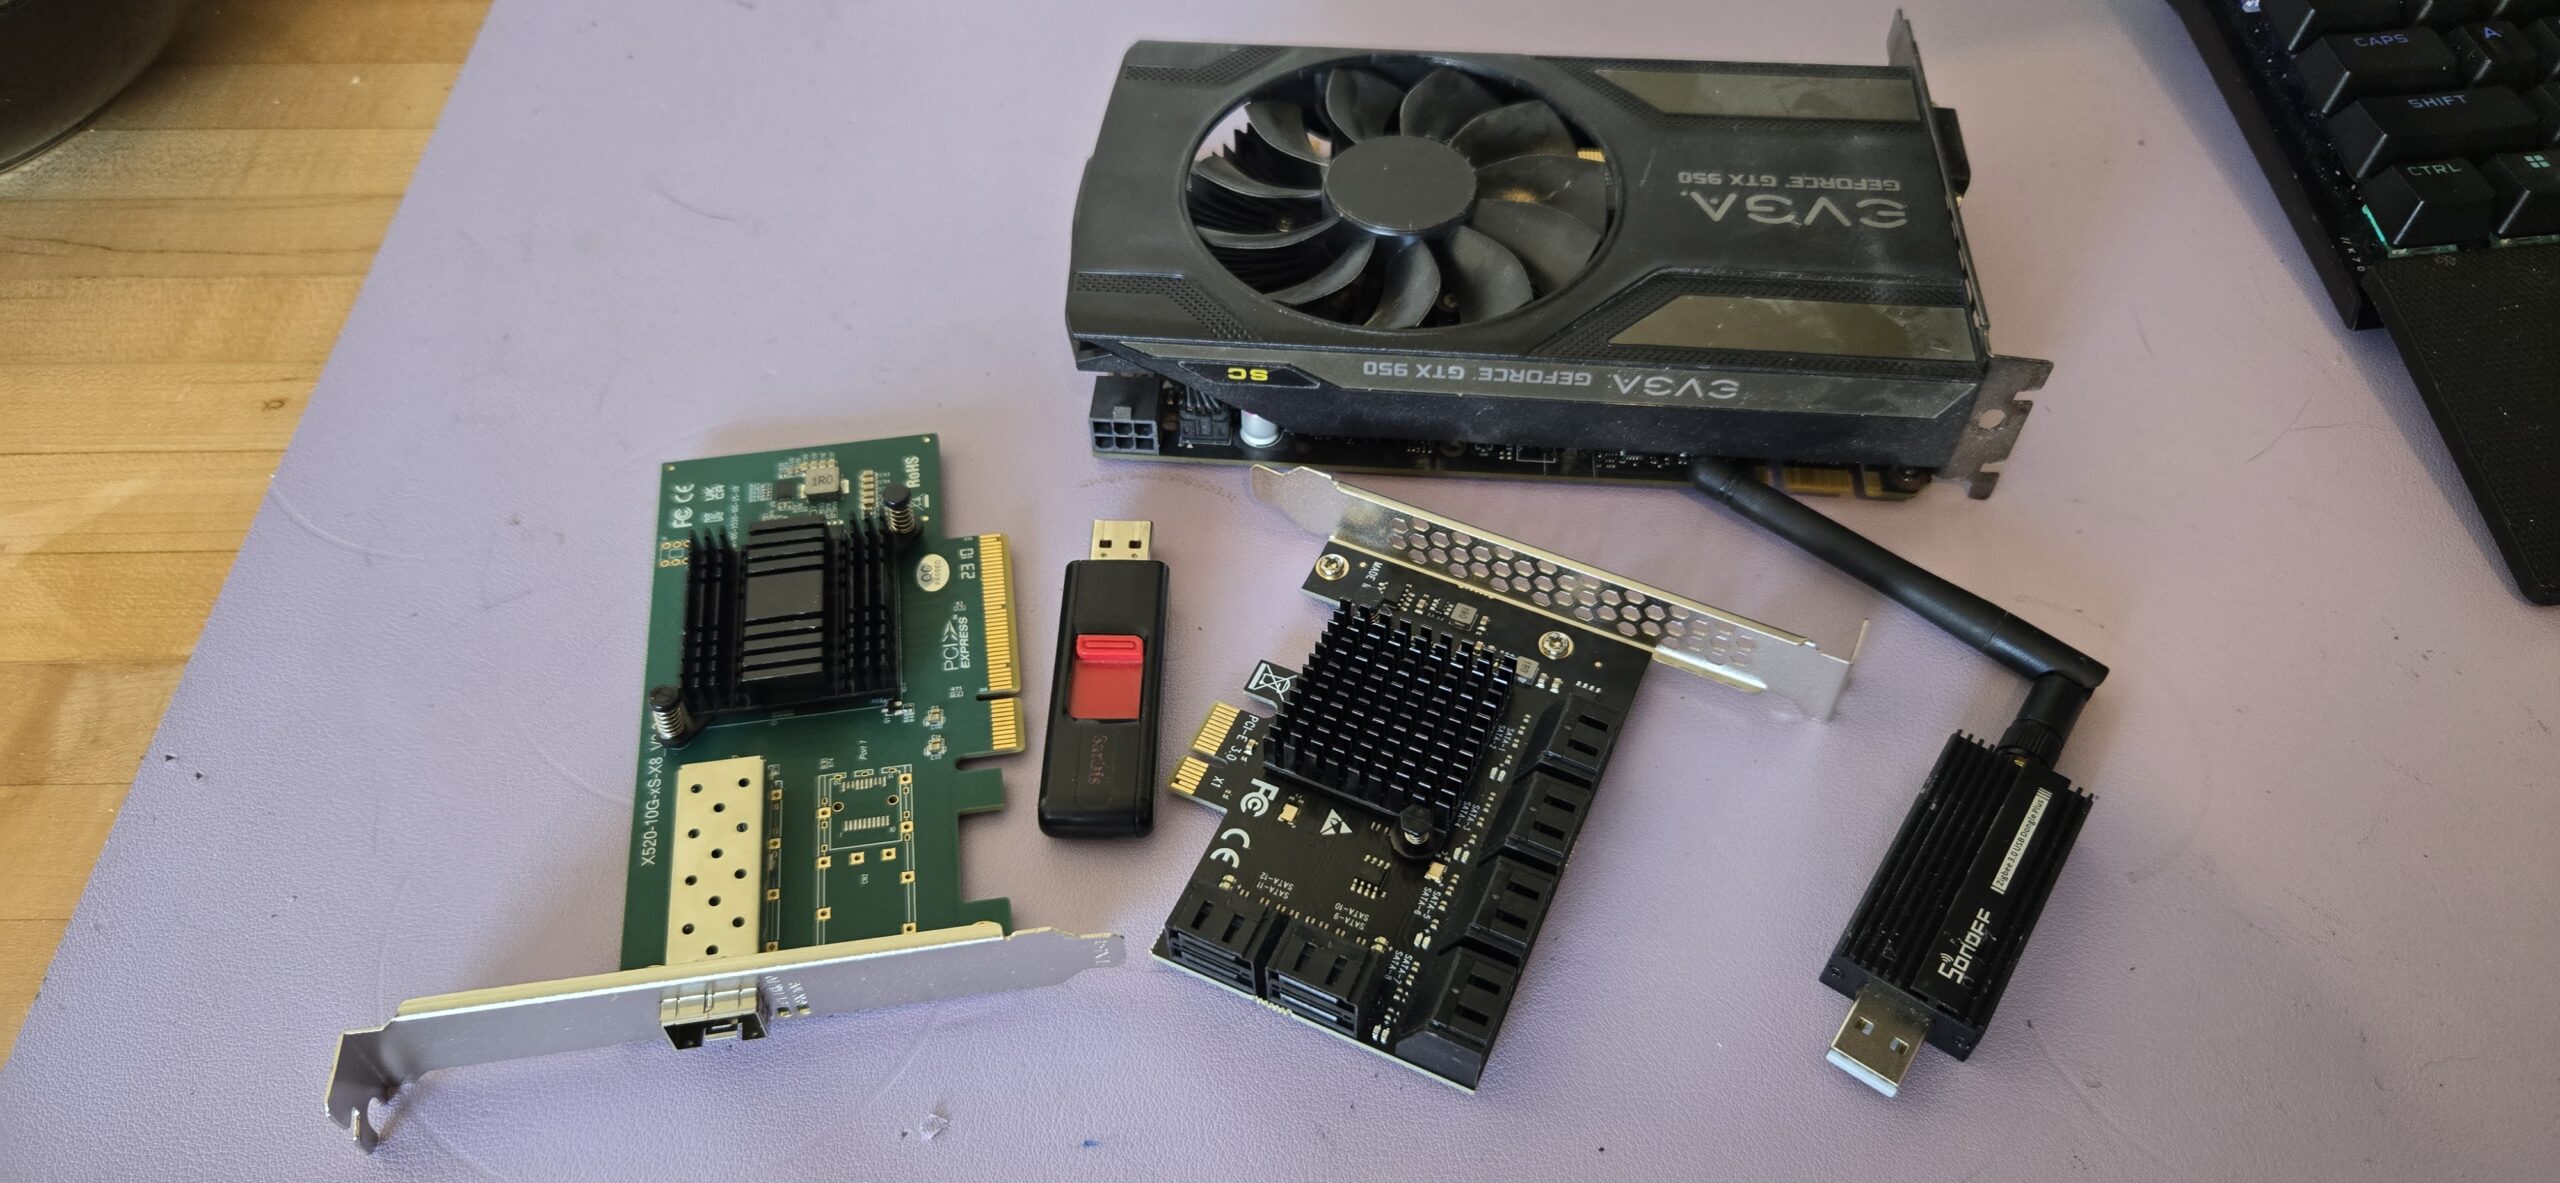
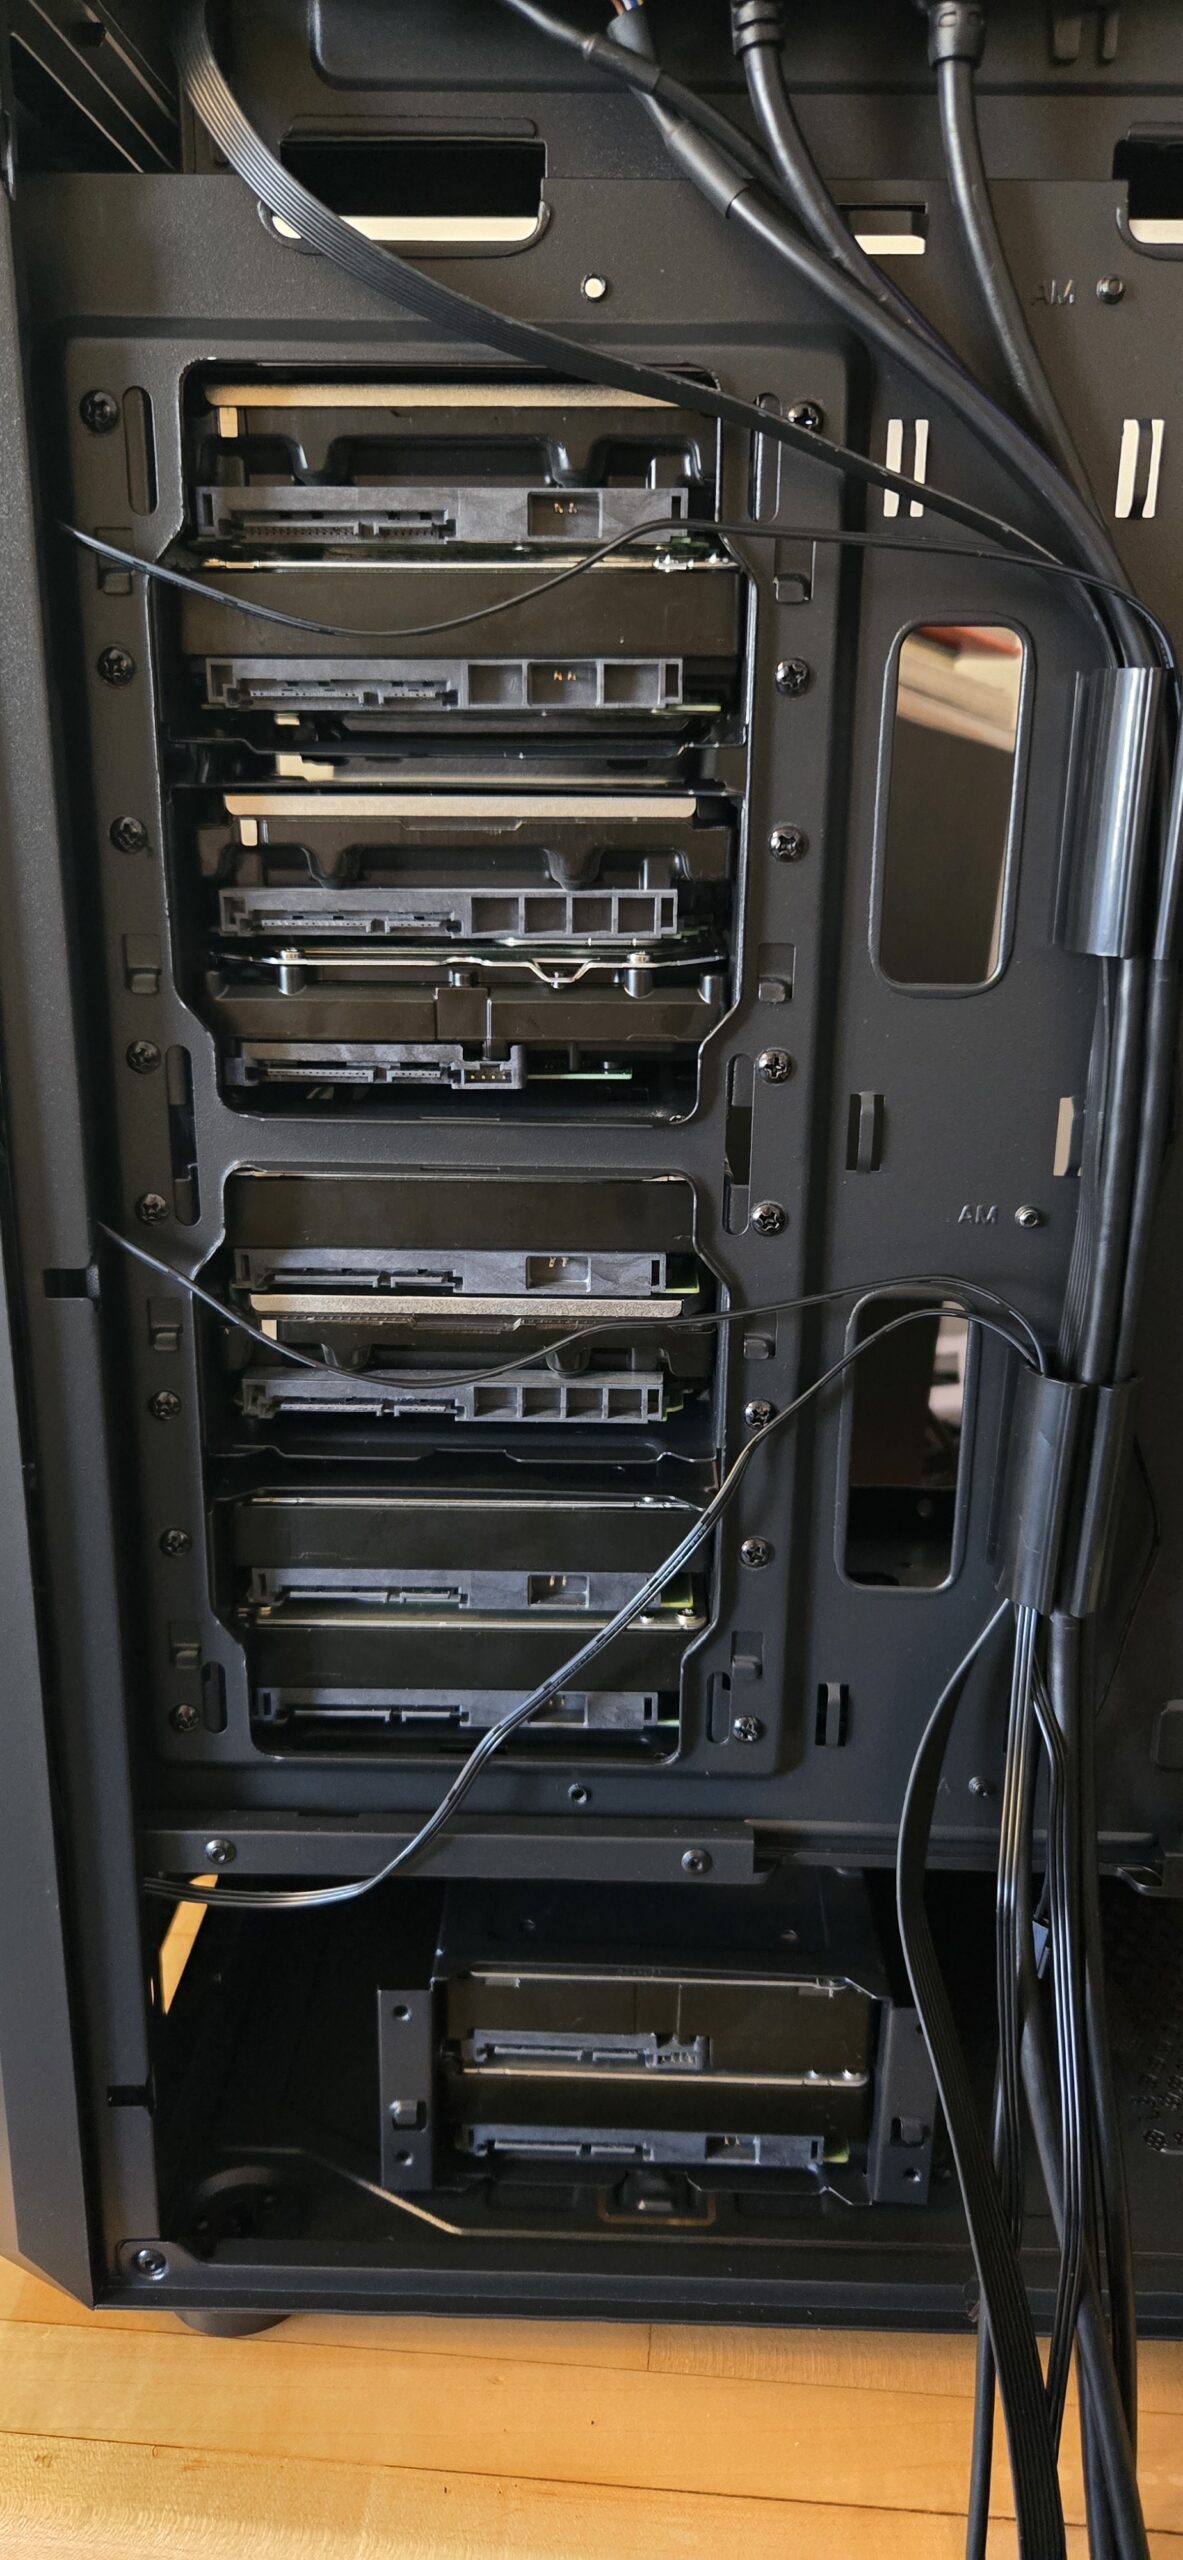
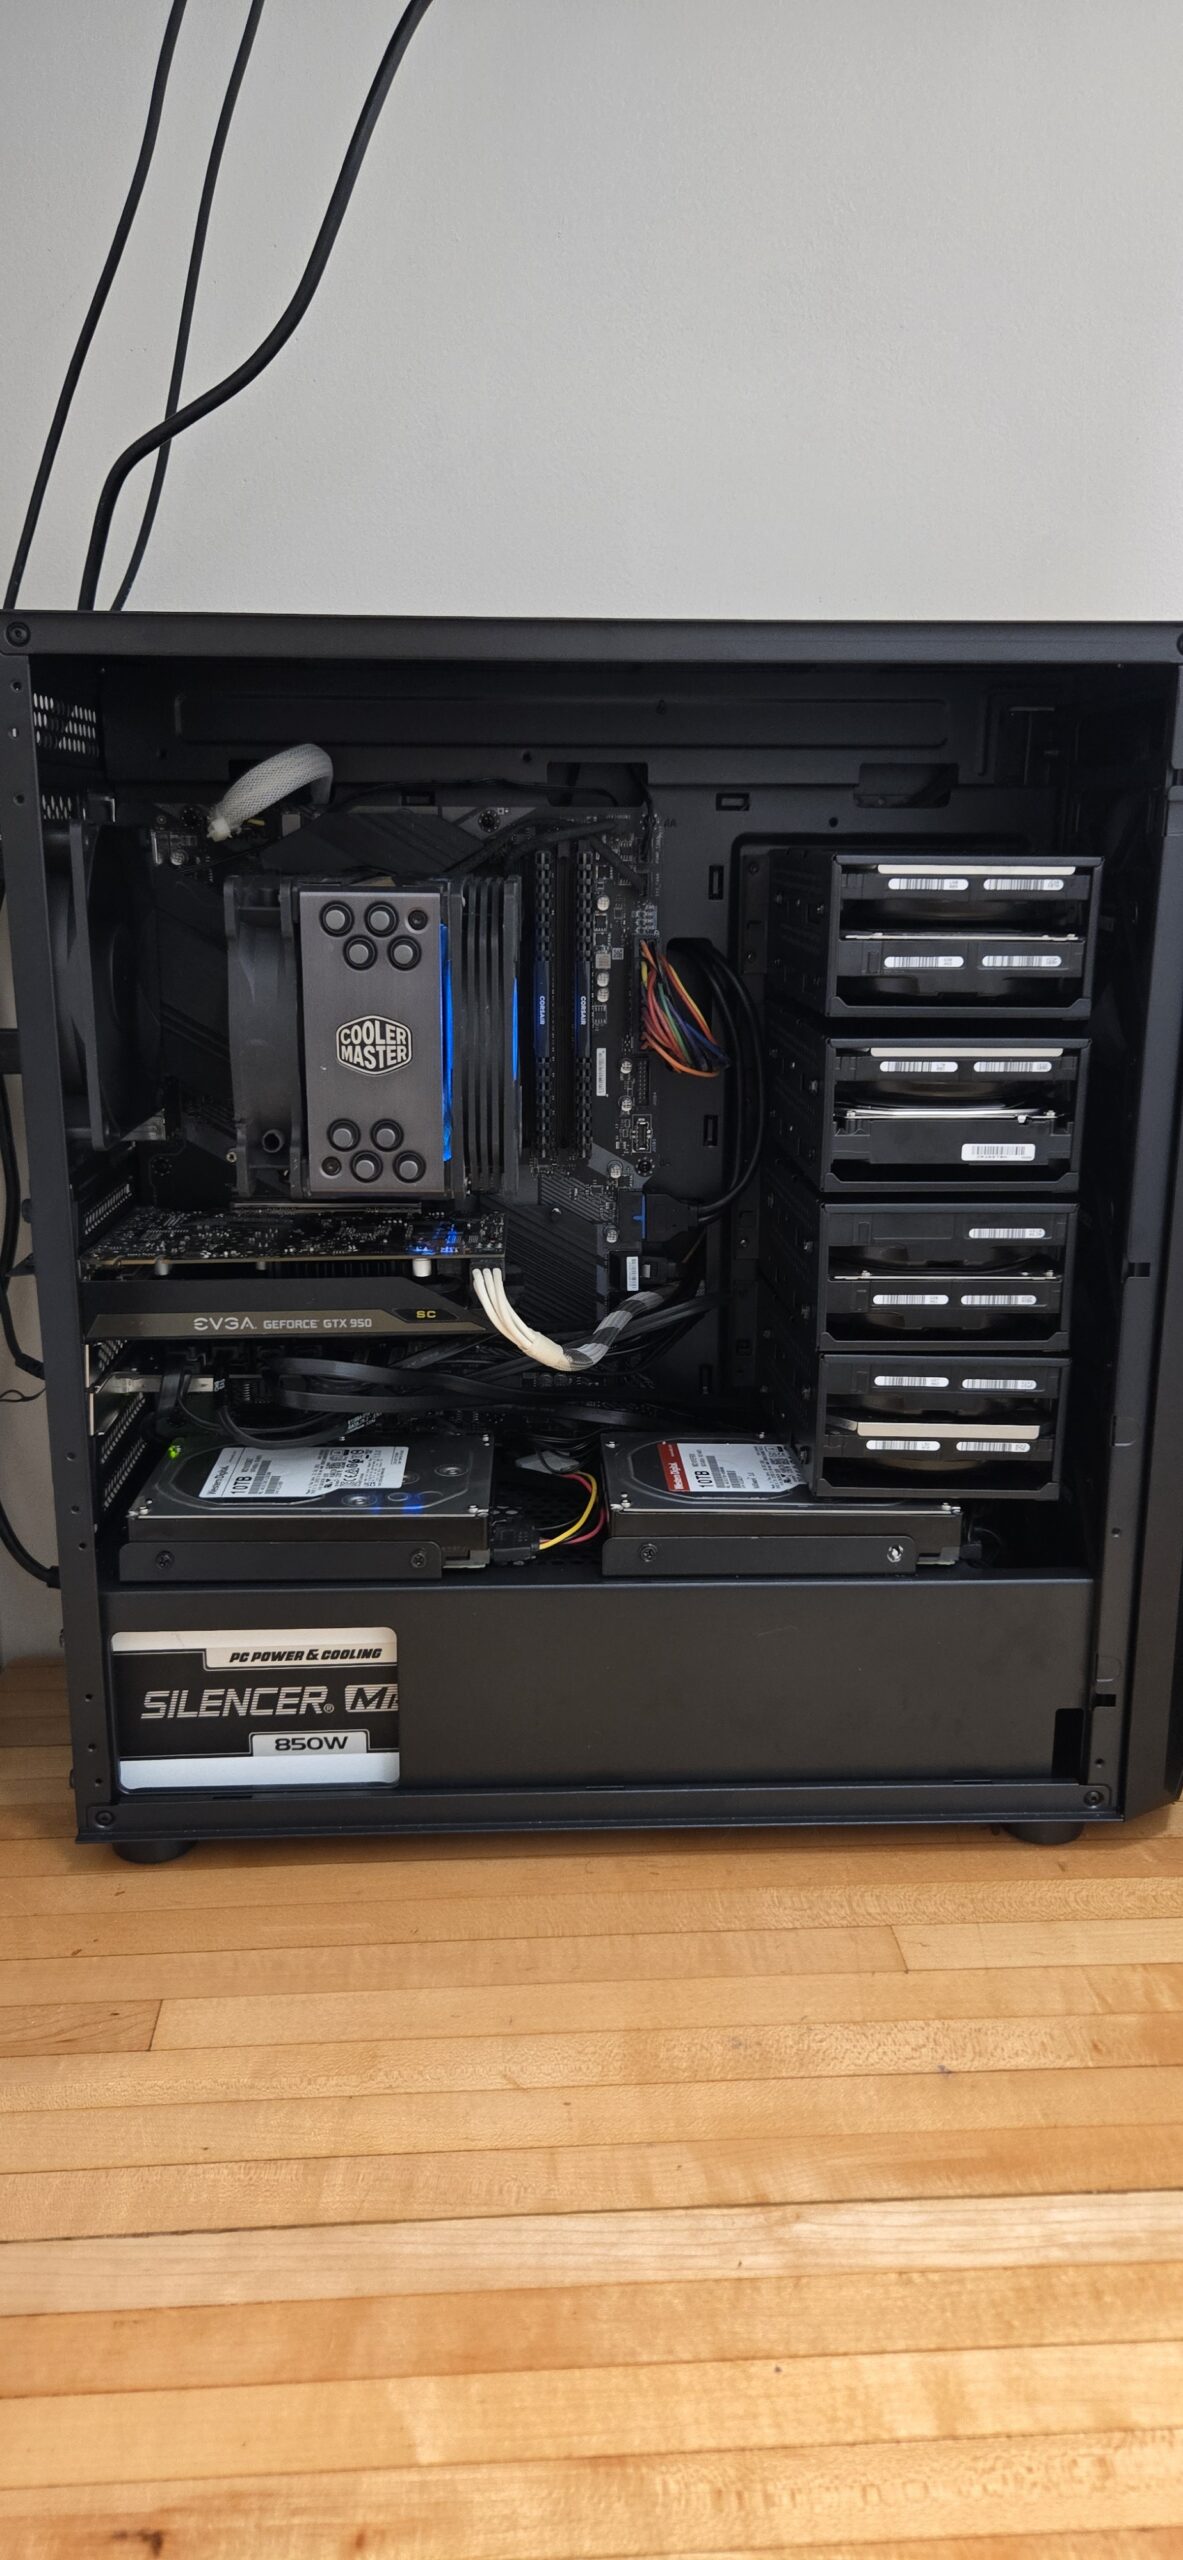
I was hitting 88% used space on my Unraid server but completely ran out of space in the U4 rack mounted case. Everything was so jammed, I was regularly receiving temp warning on hotter days. So it is time to swap the case and pull it out of the networking rack. I went with adding an 8TB drive while I was at it. This still puts me at 85.5 TB used of 106 TB. The nice thing is the new case will allow me to add six more 3.5″ drives and two 2.5″ before having to get creative.
I envision in the future, I will add a larger 12TB parity drive. Then I can upgrade the two 8TB drives to 12TB, gaining 8TB and more redundancy. I will use the two 8TB for offsite backup in a mirror raid.
I Sold the elephant myCoBot 280 and UR to step up my game. The 280 was great to learn on, or have a desktop 6DOF arm, but it’s payload capacity was very limited. In this video I have the UR moving two pens between three locations indefinitely. Moar cool stuff to come.
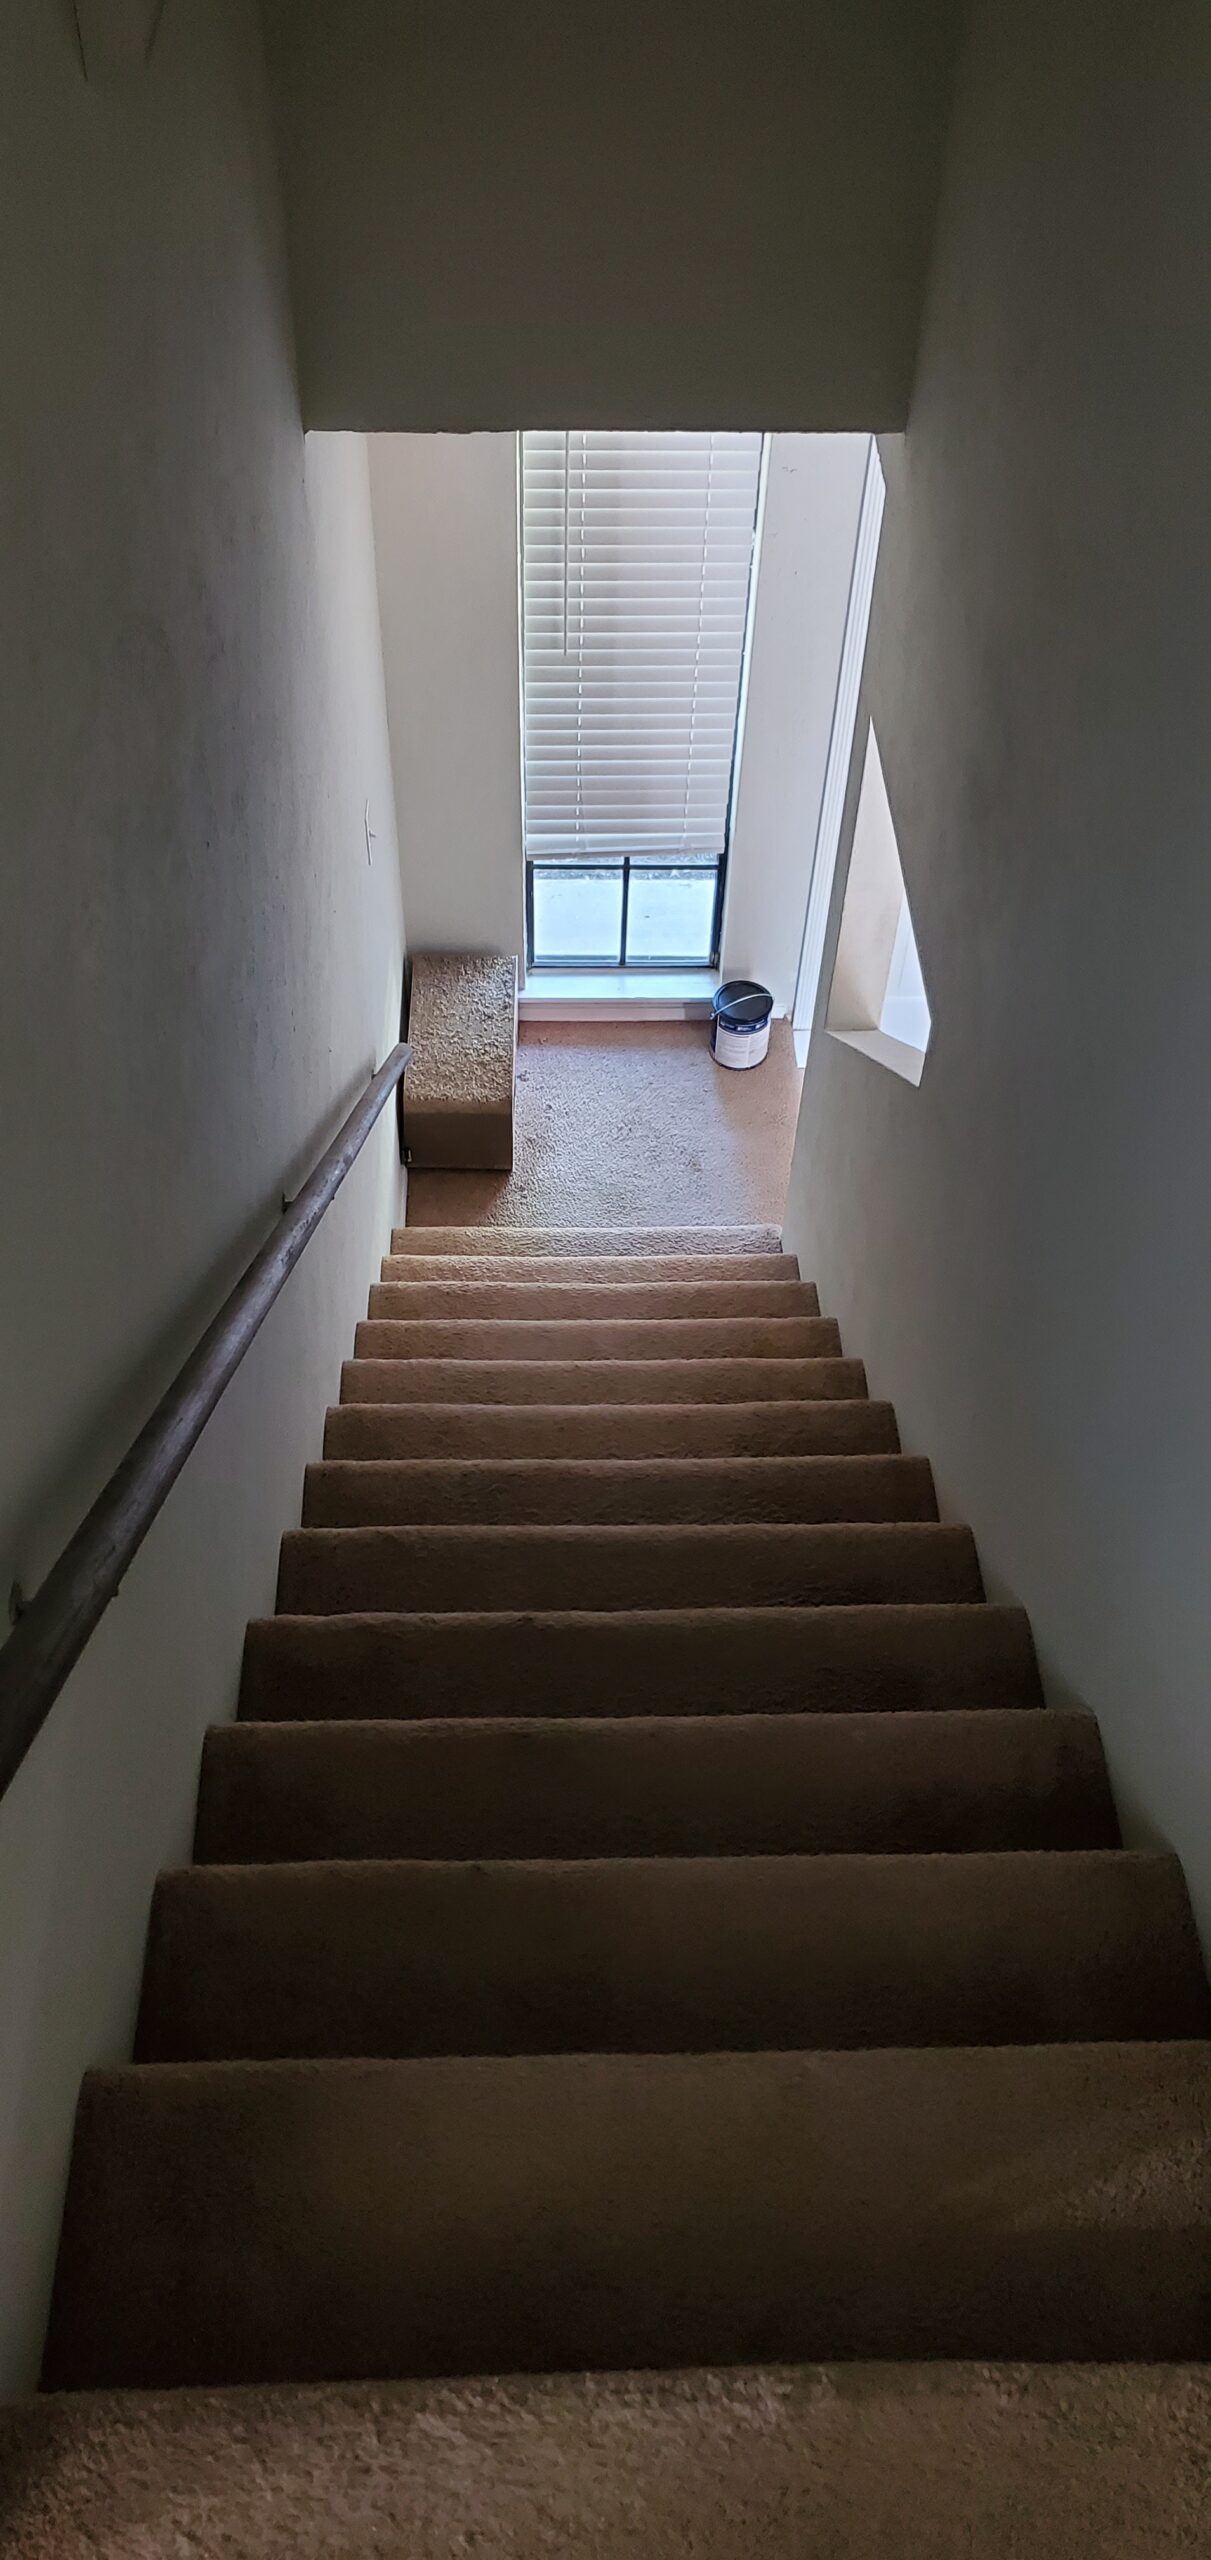
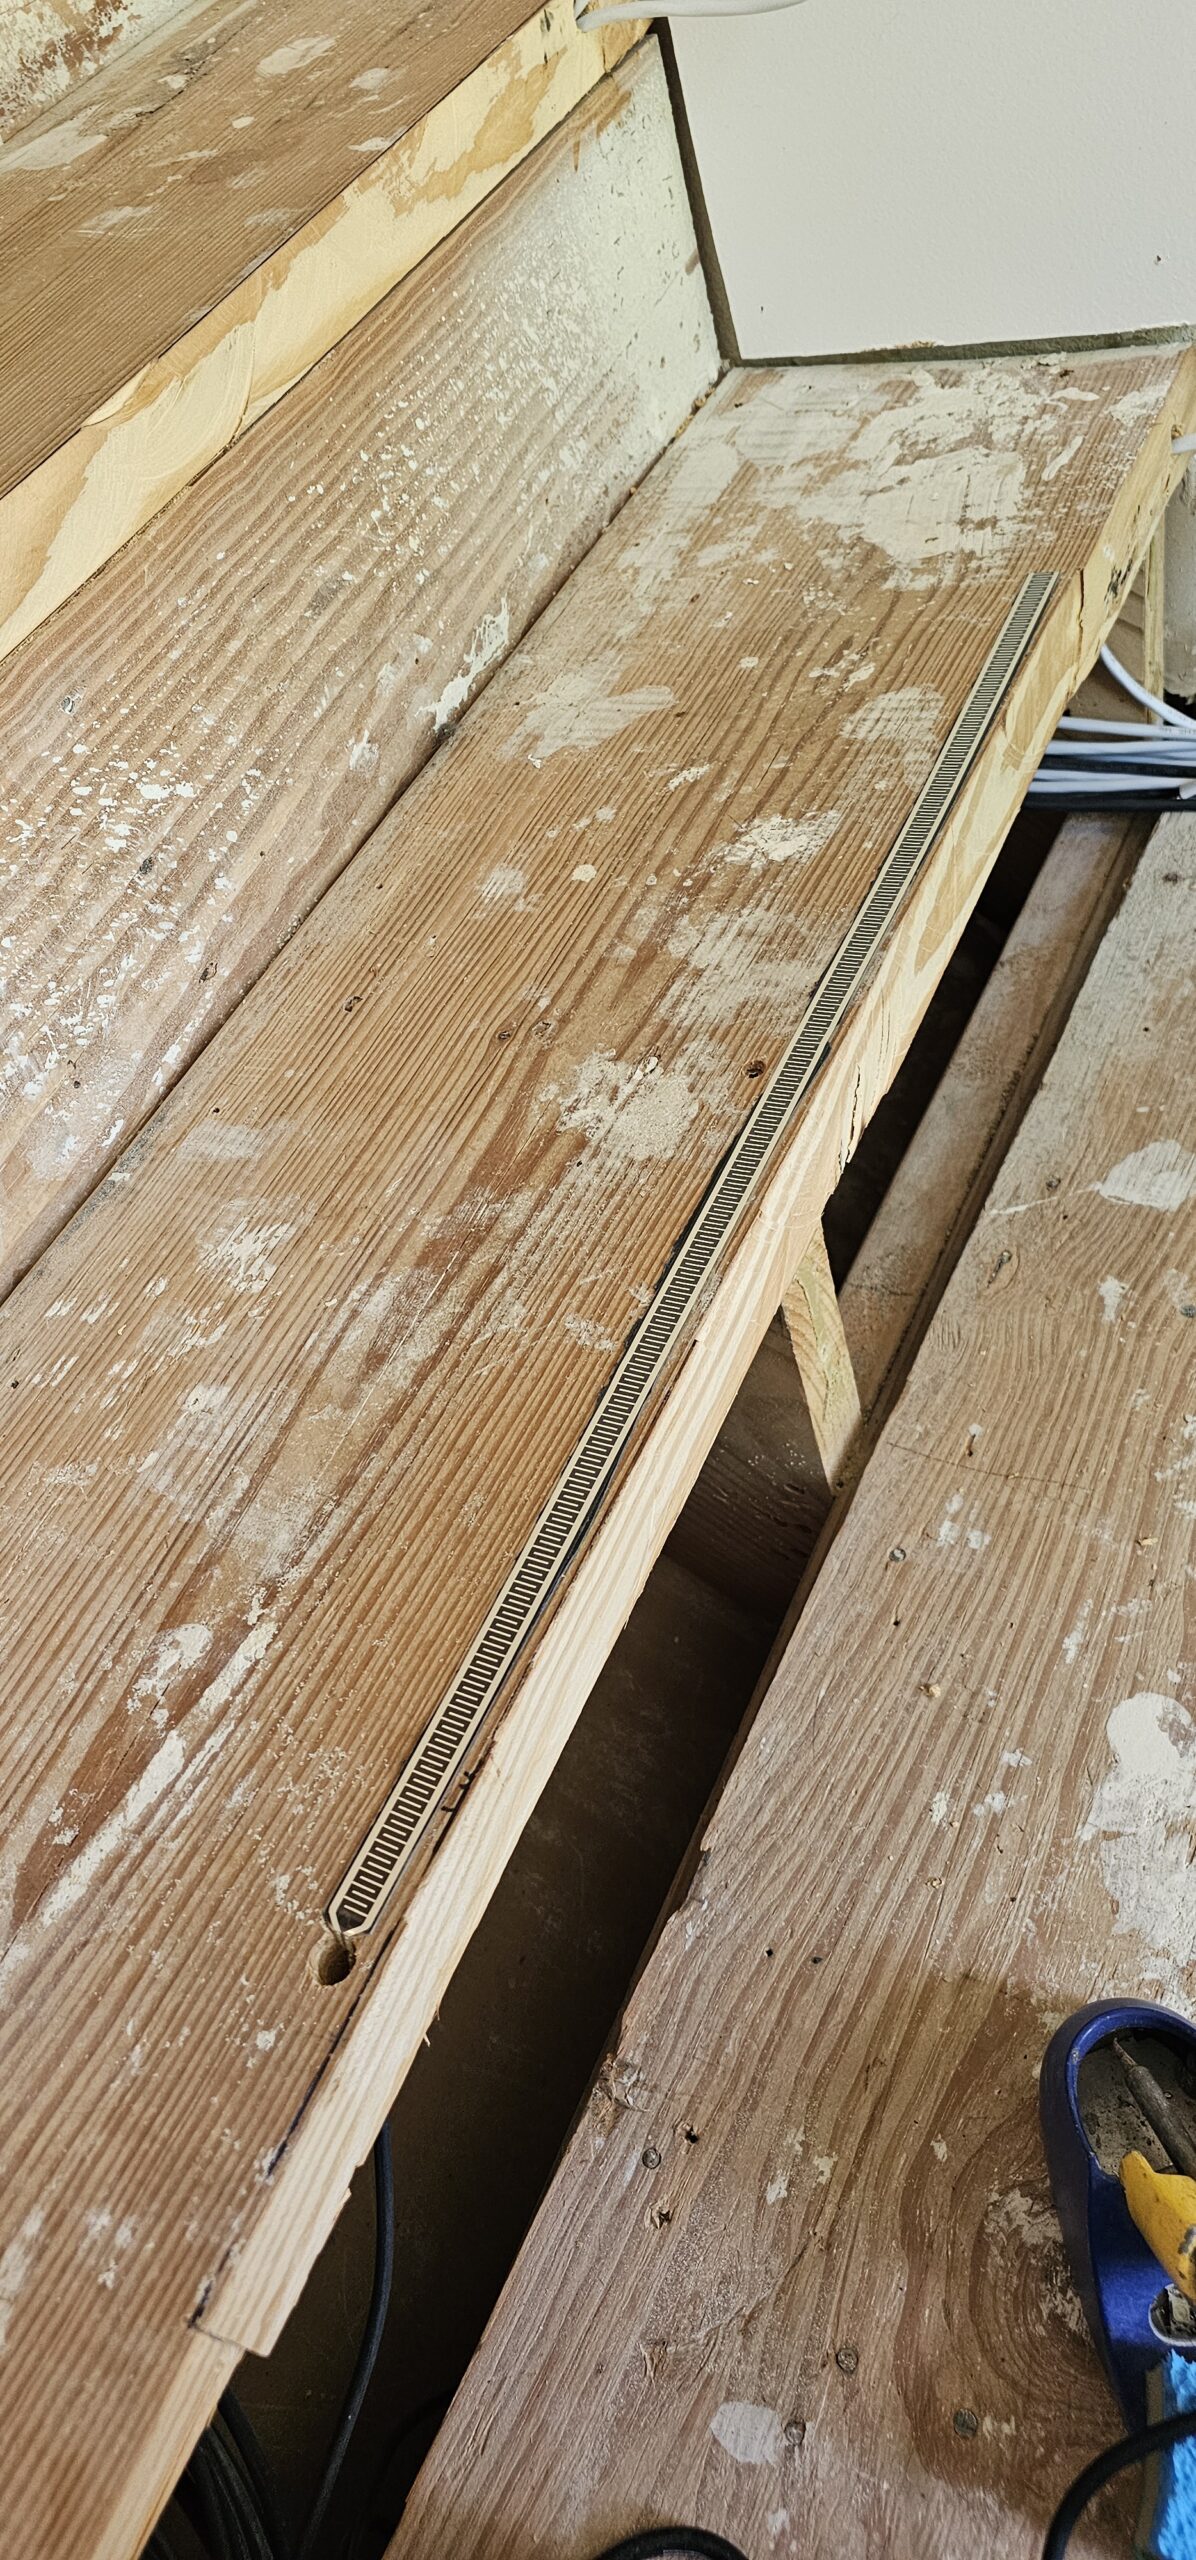
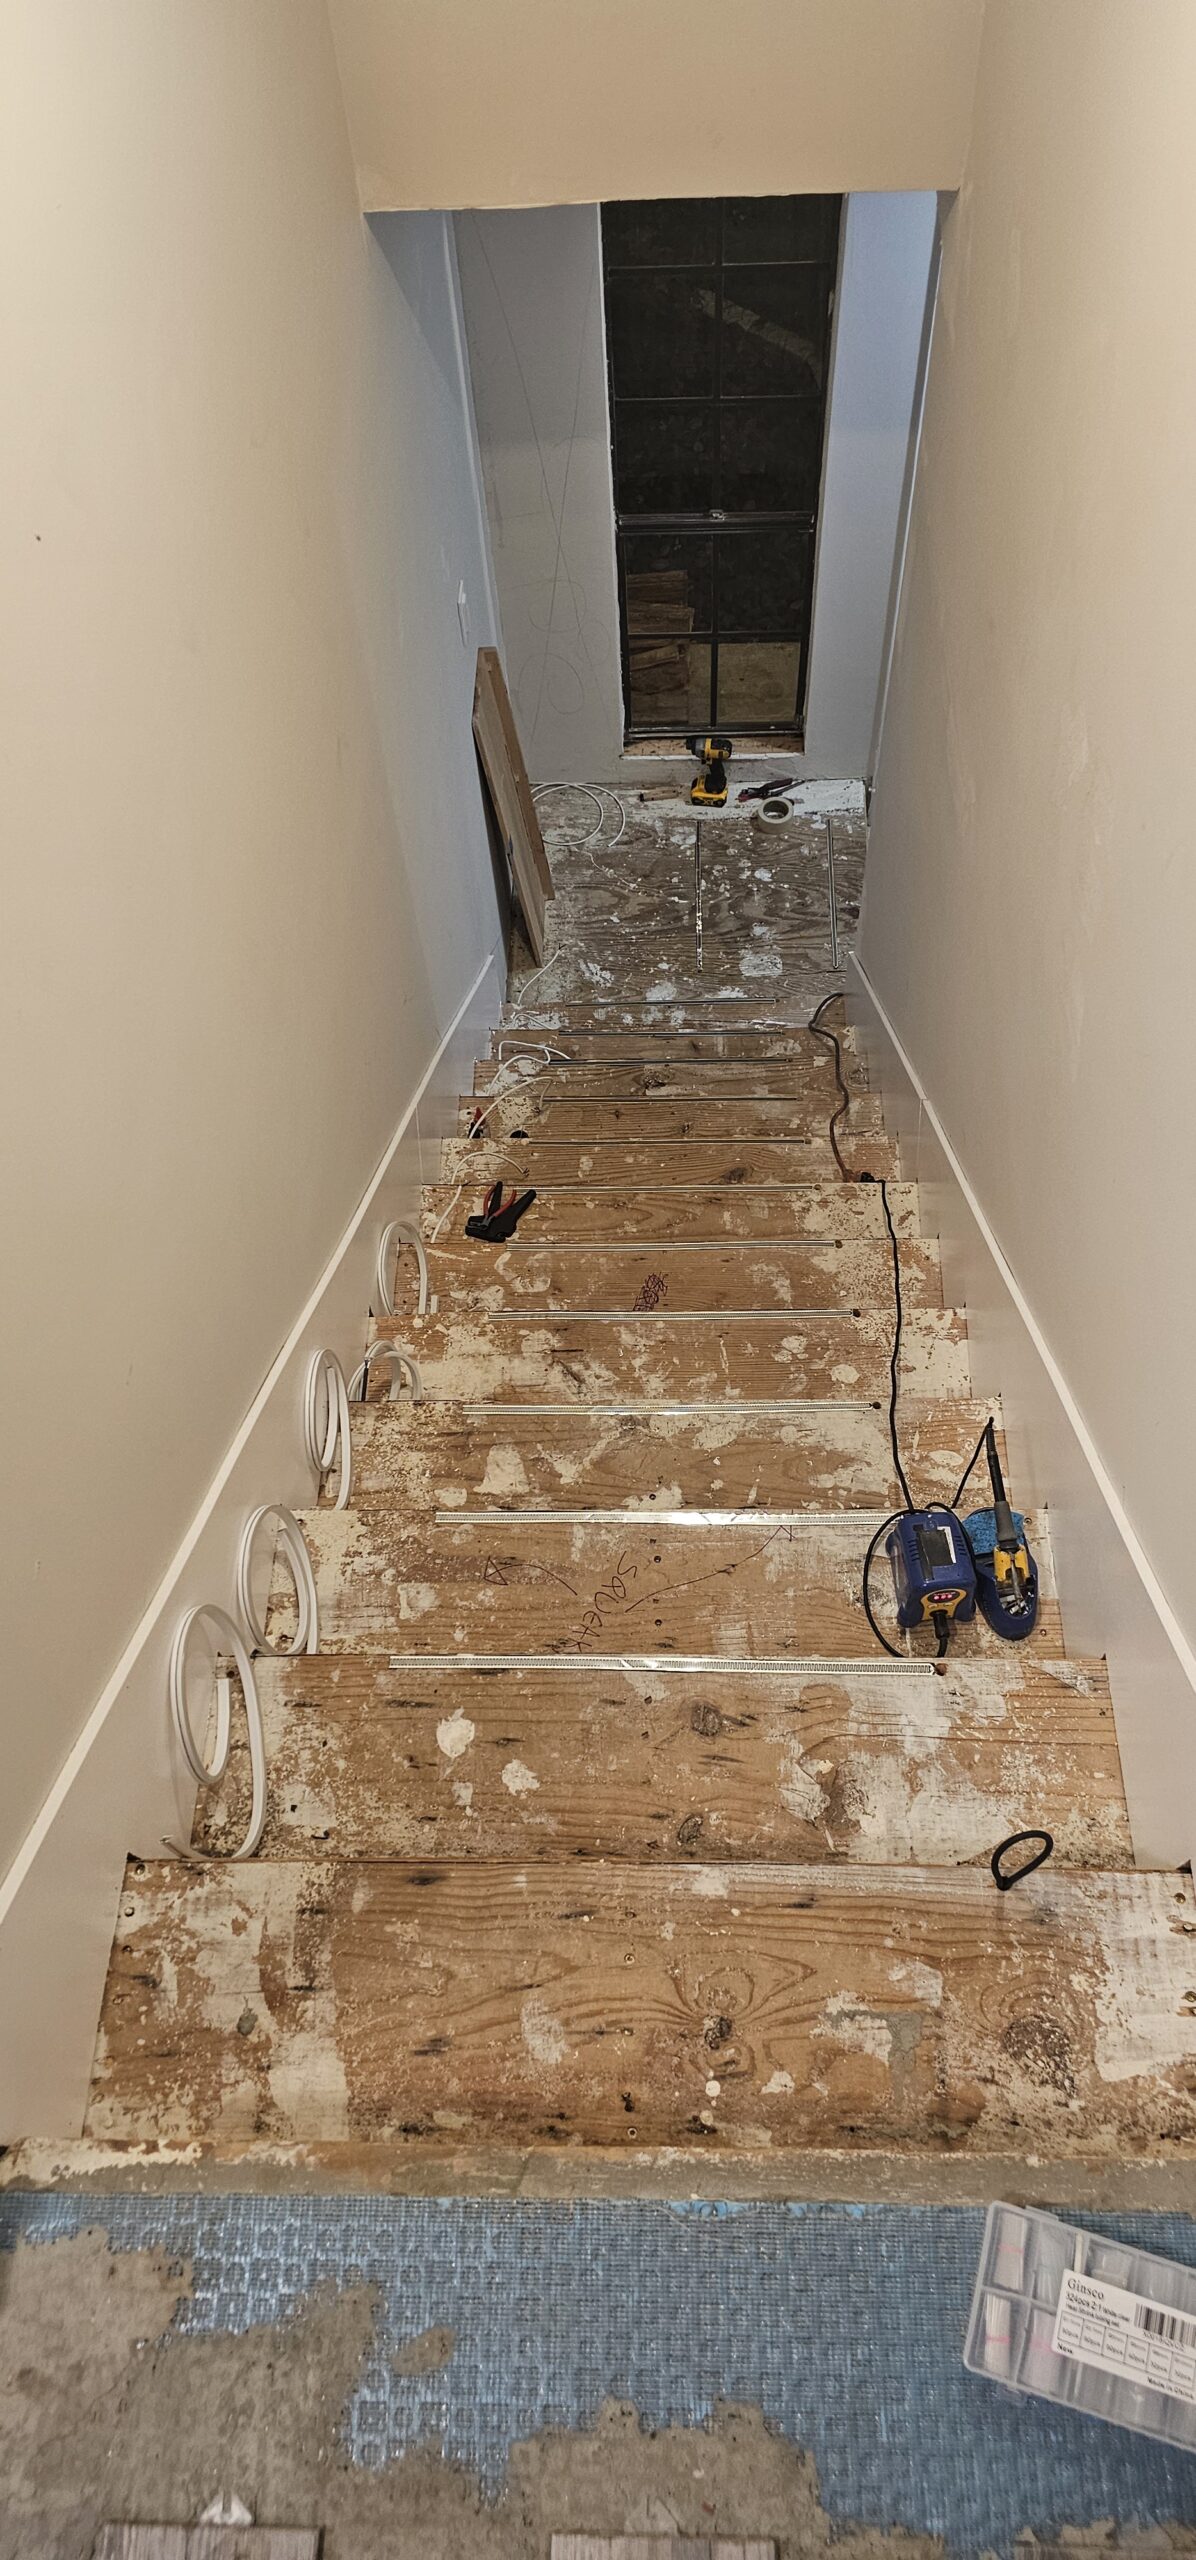
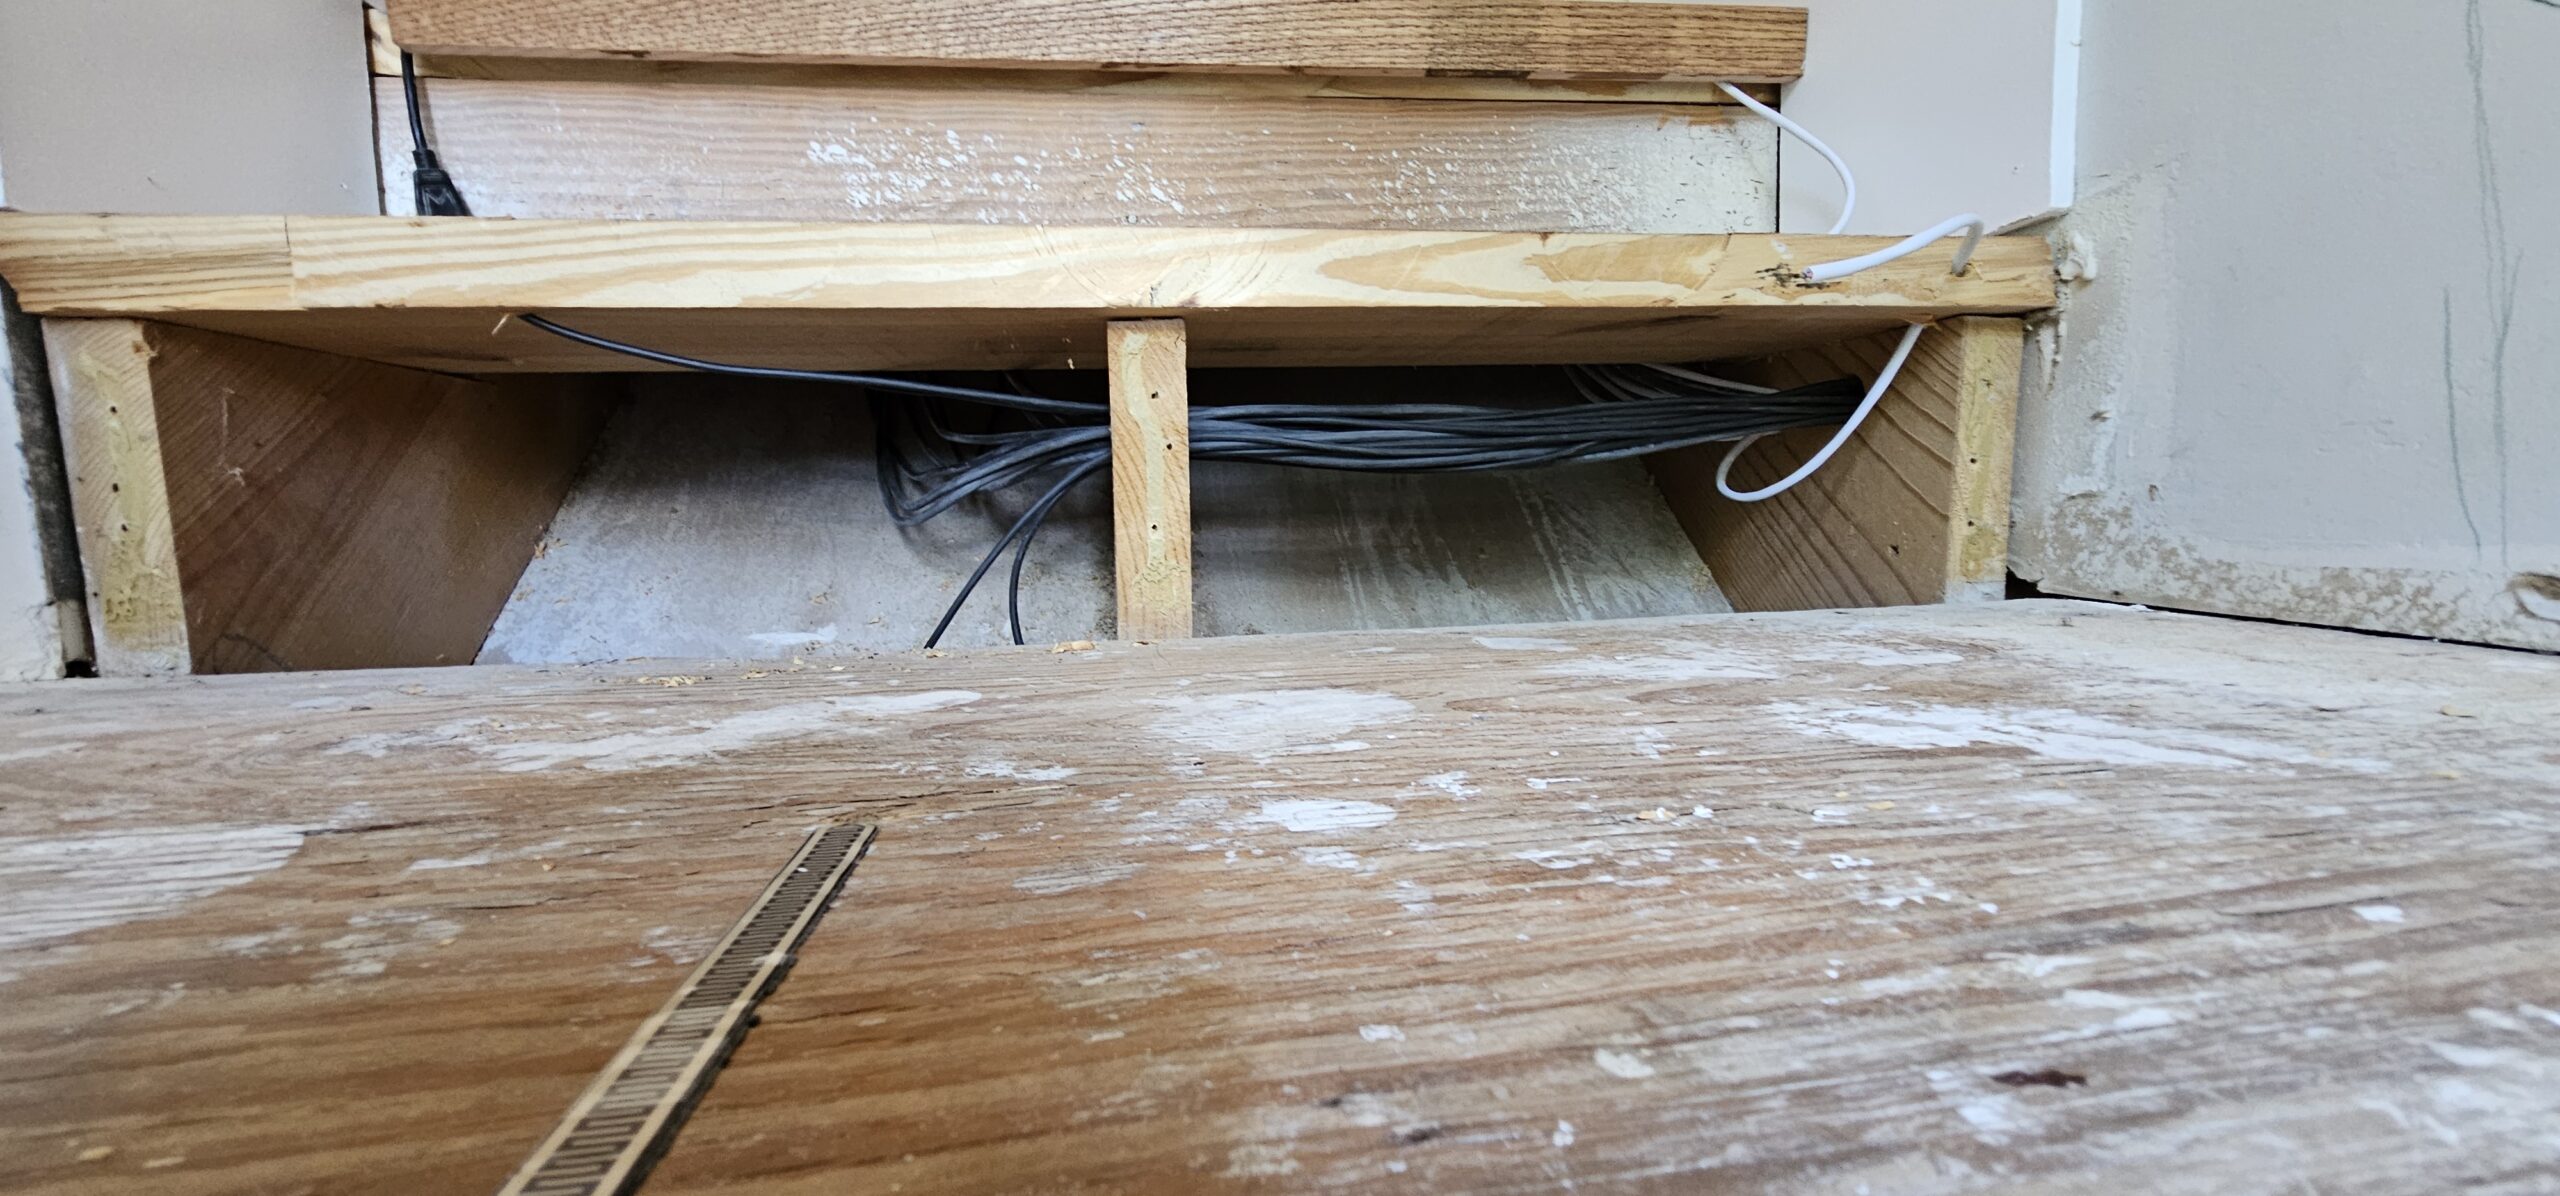
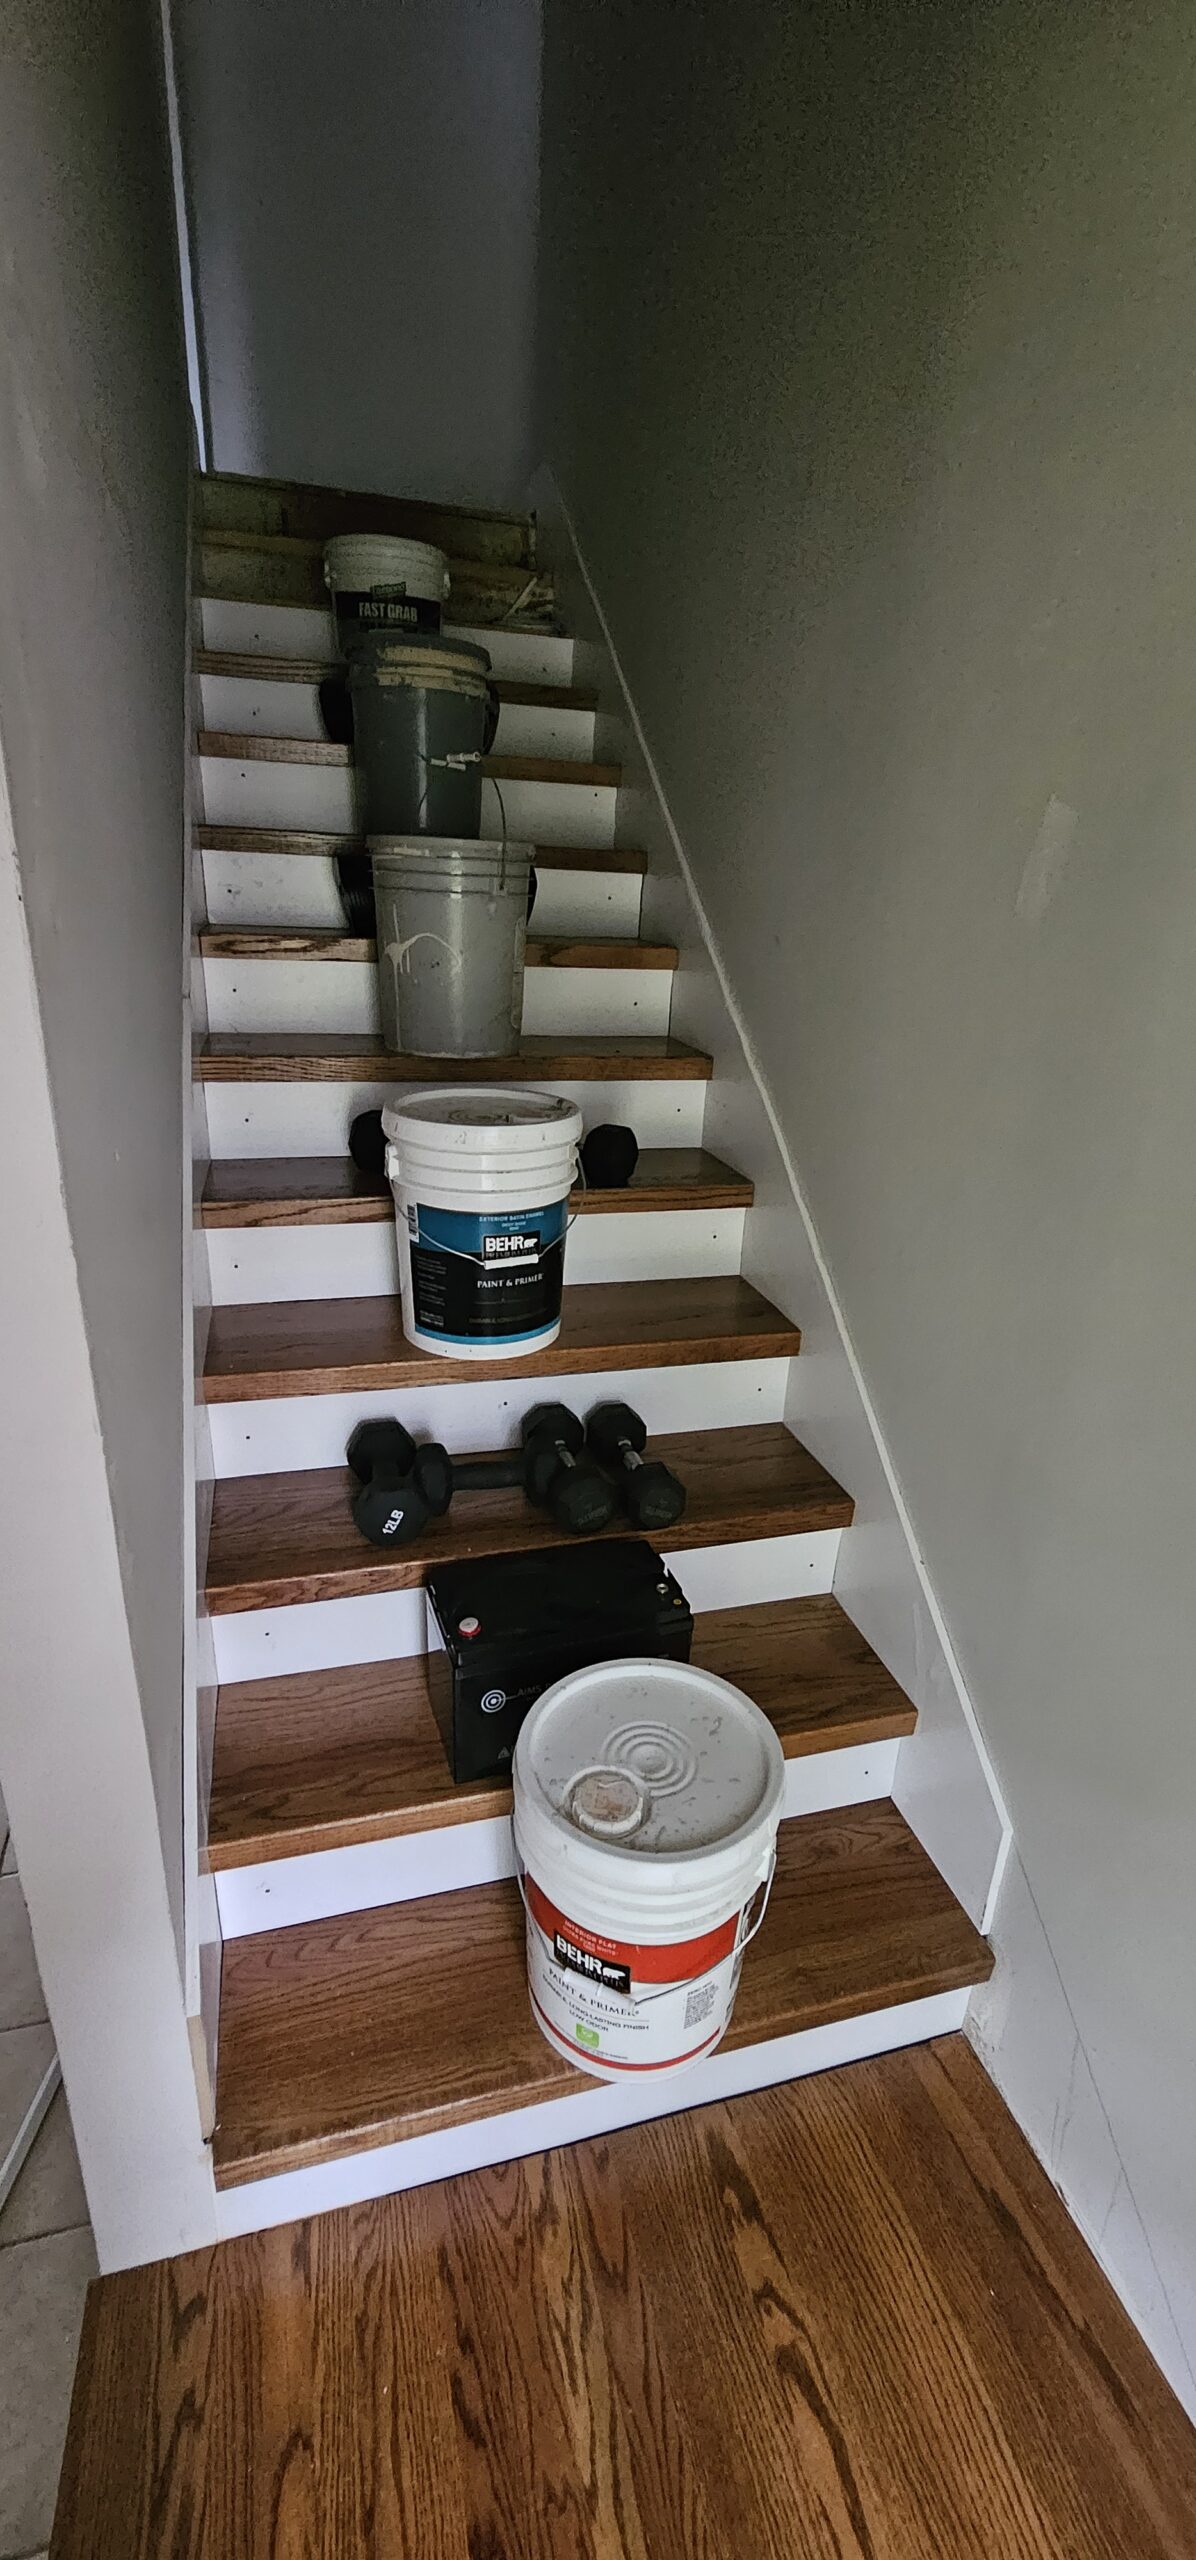
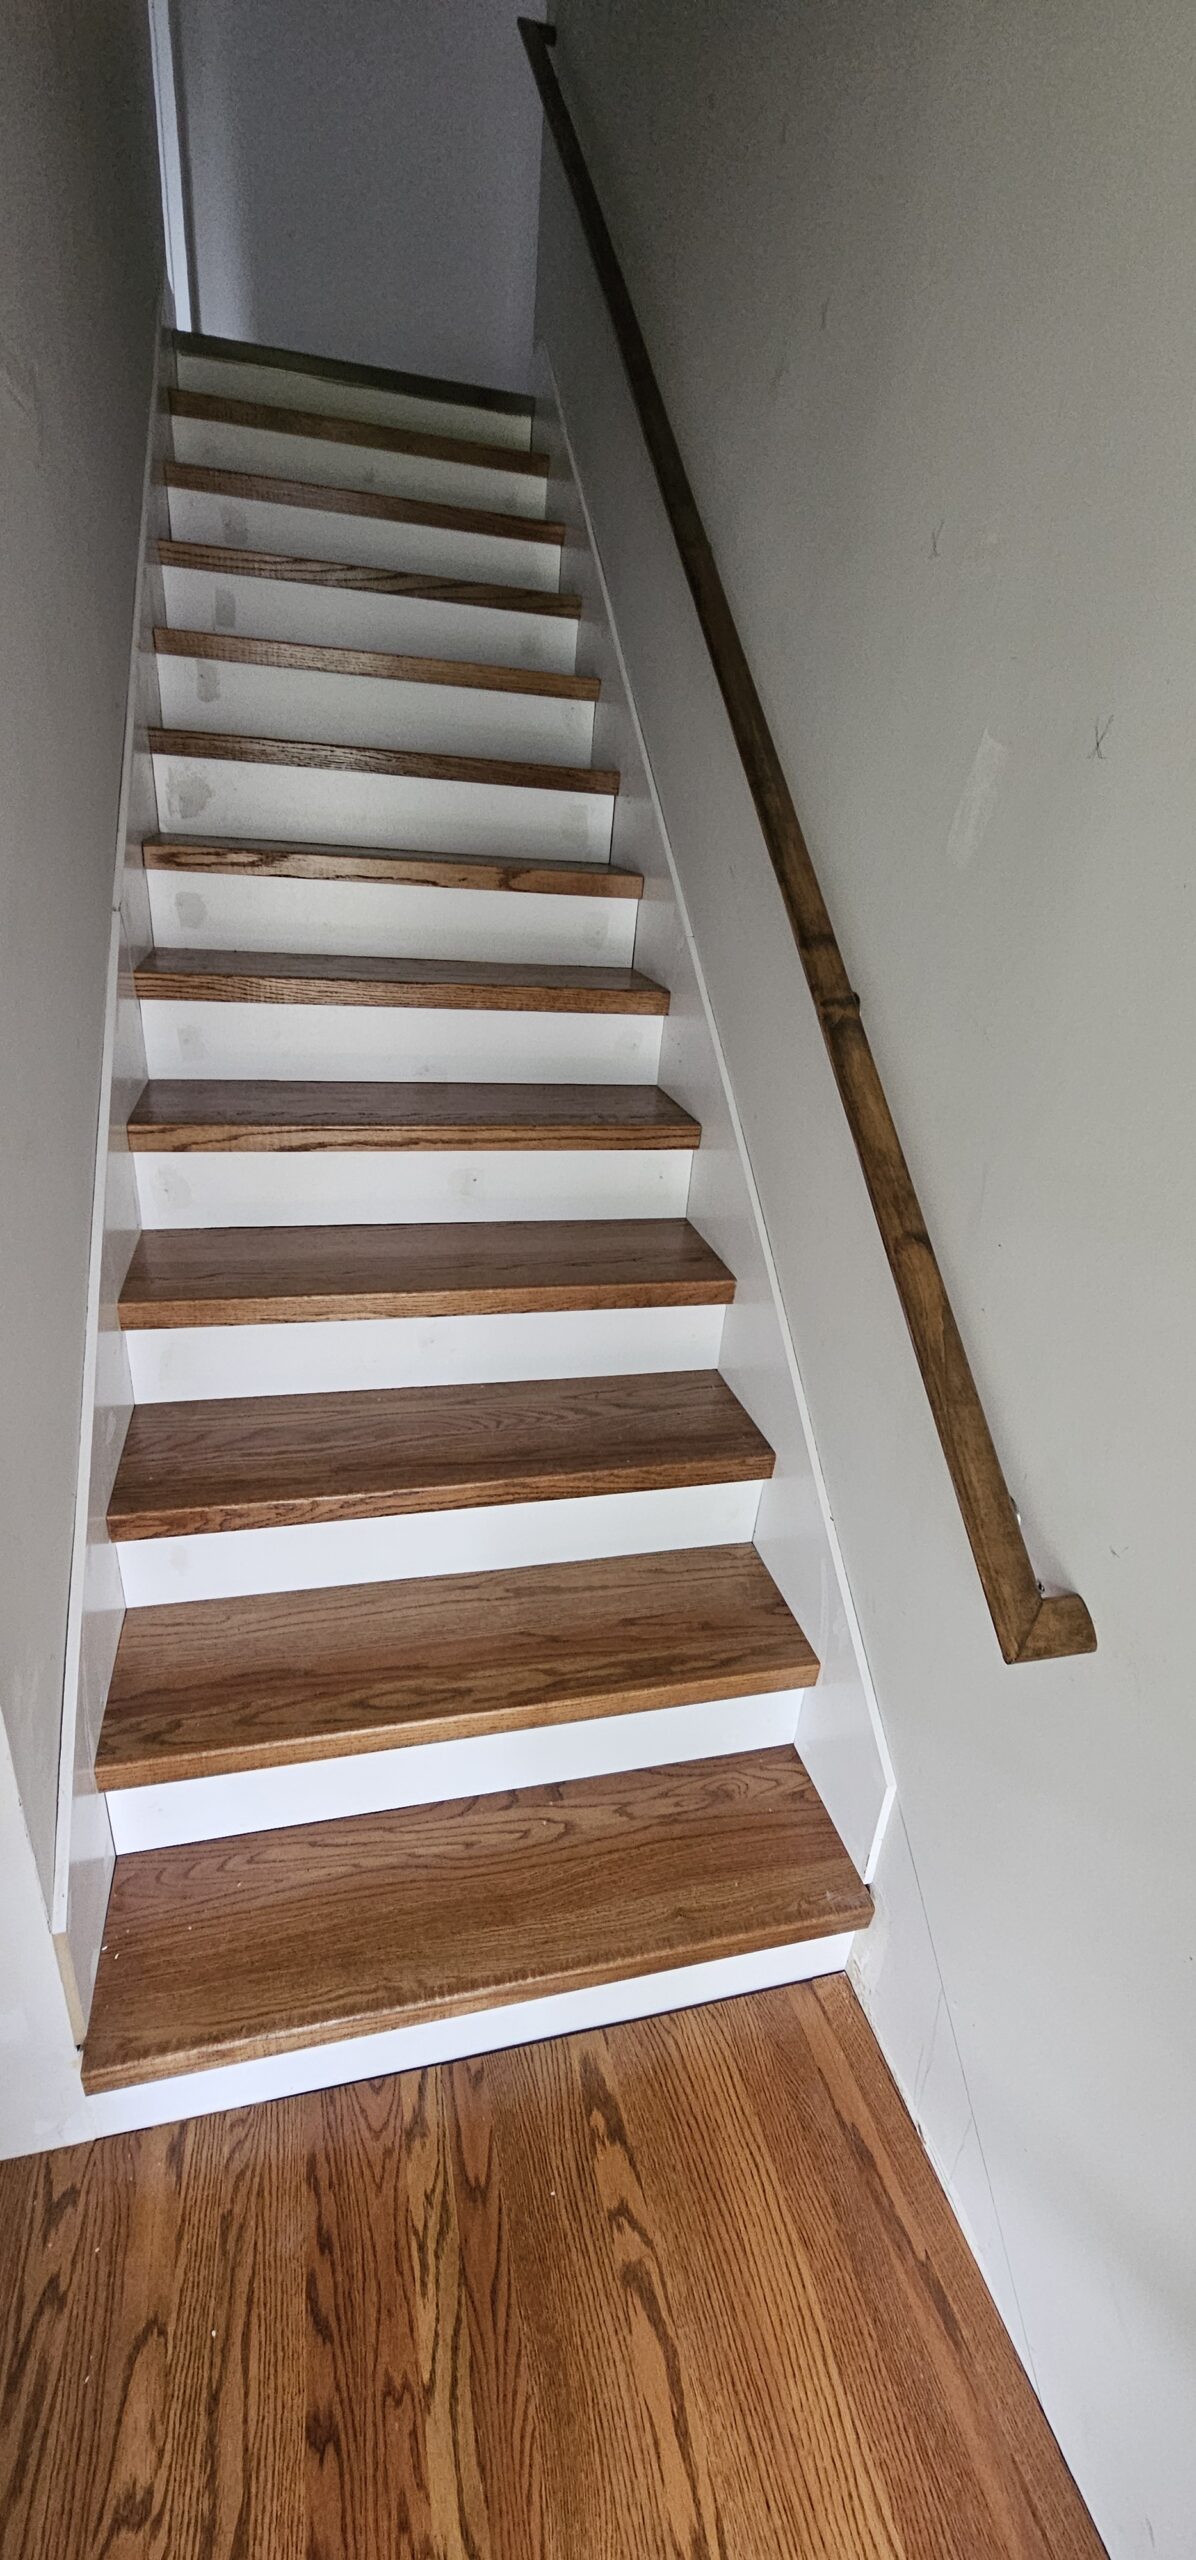
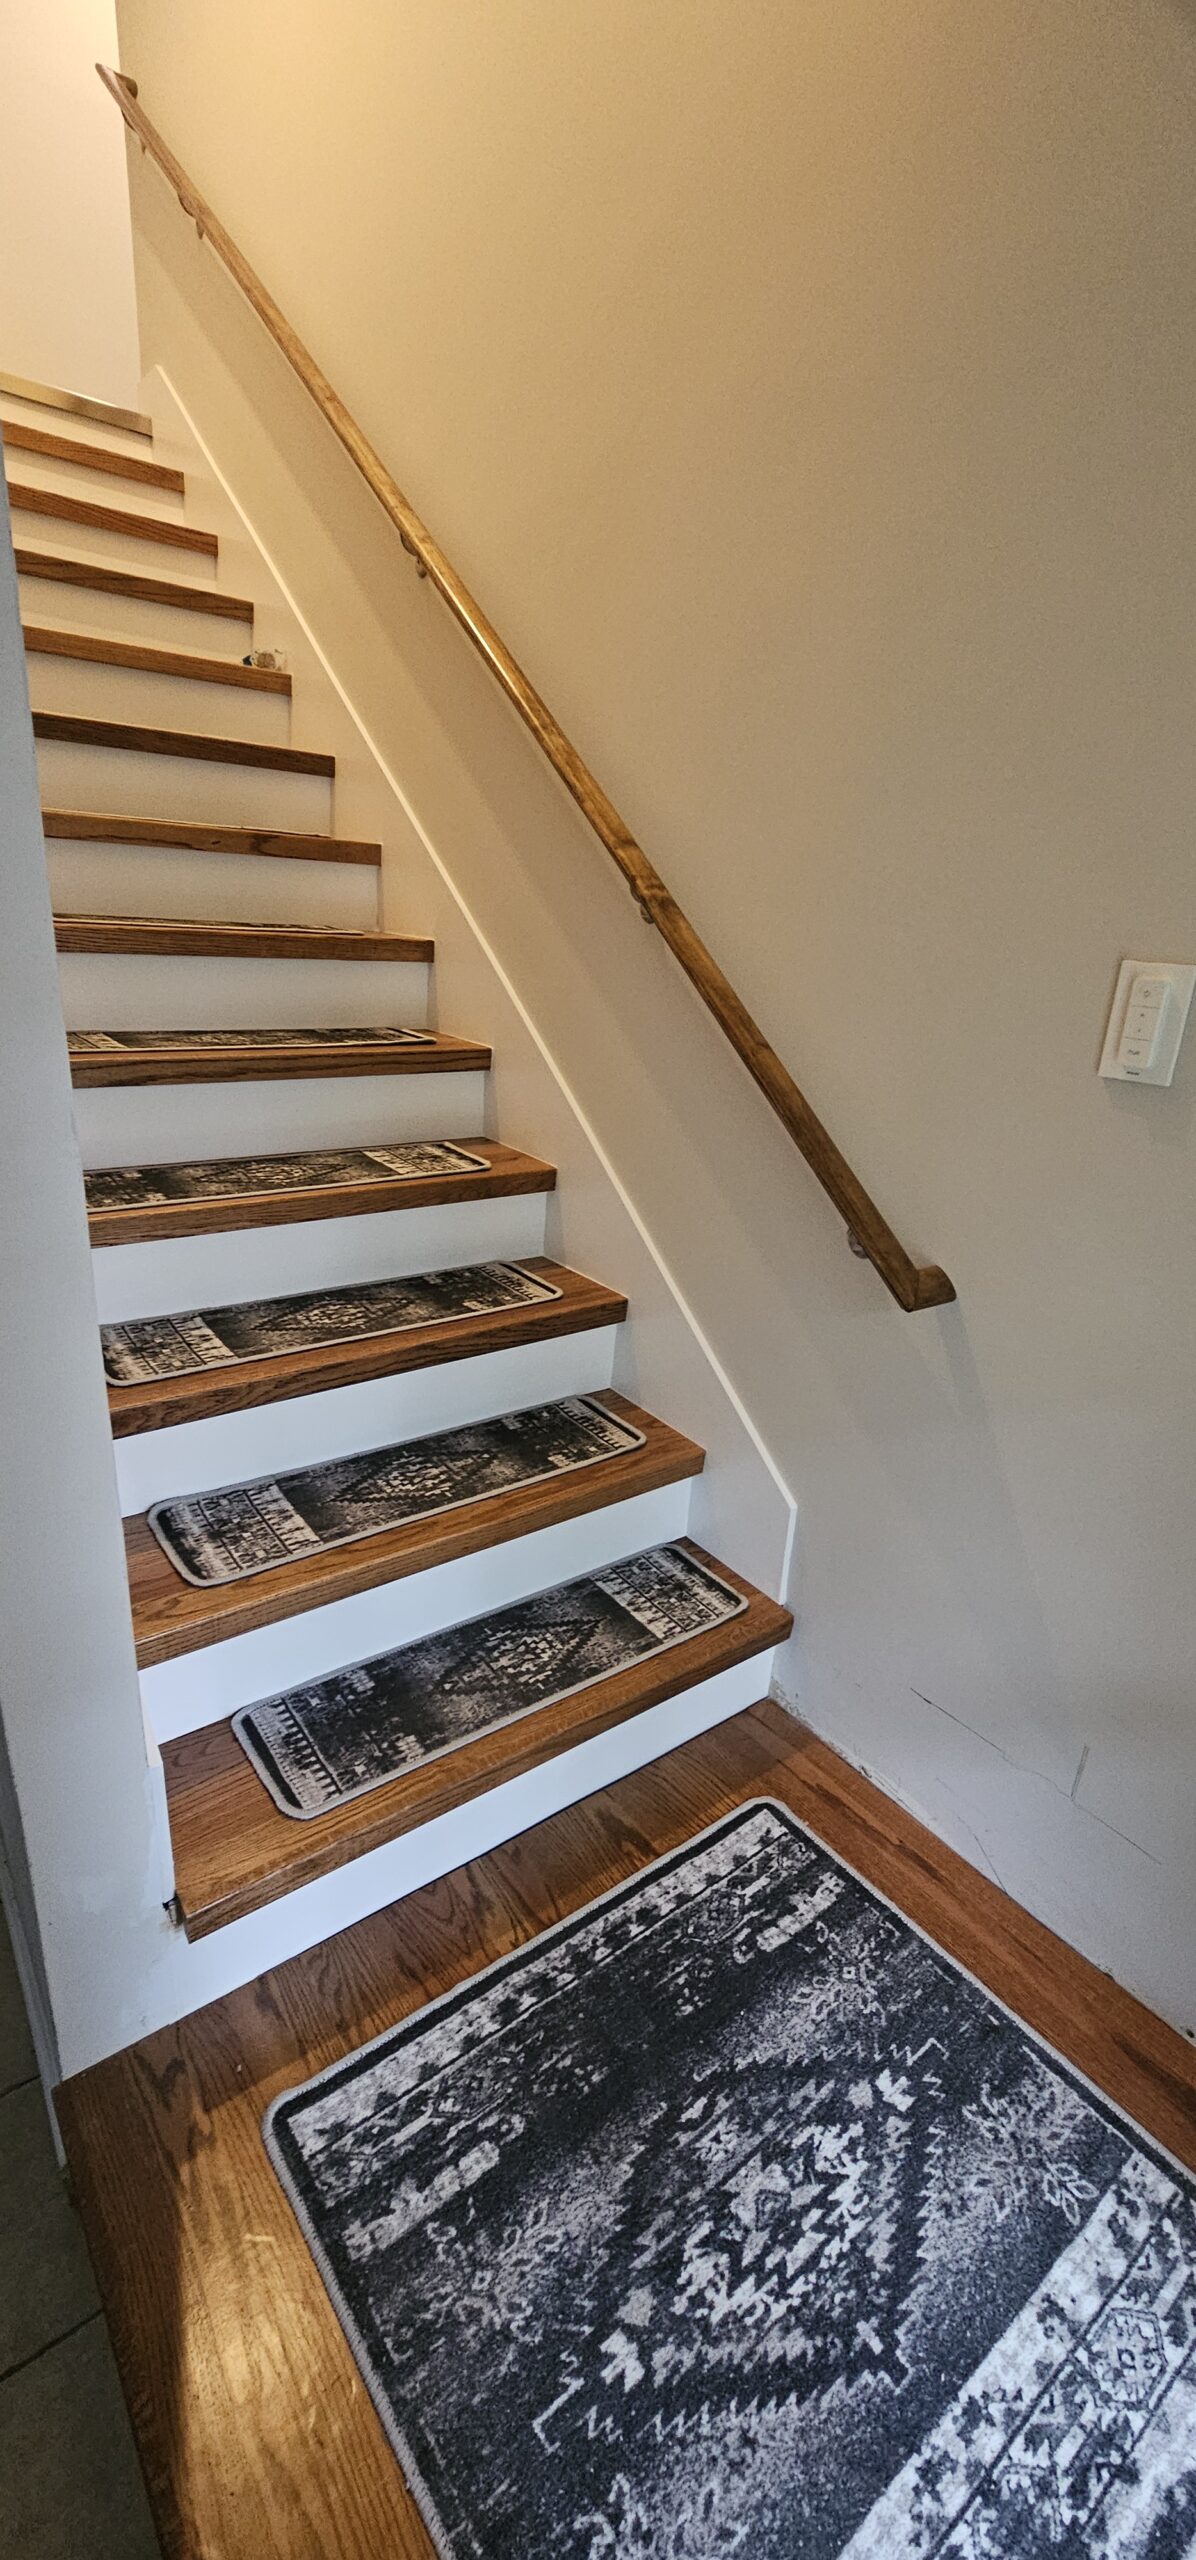
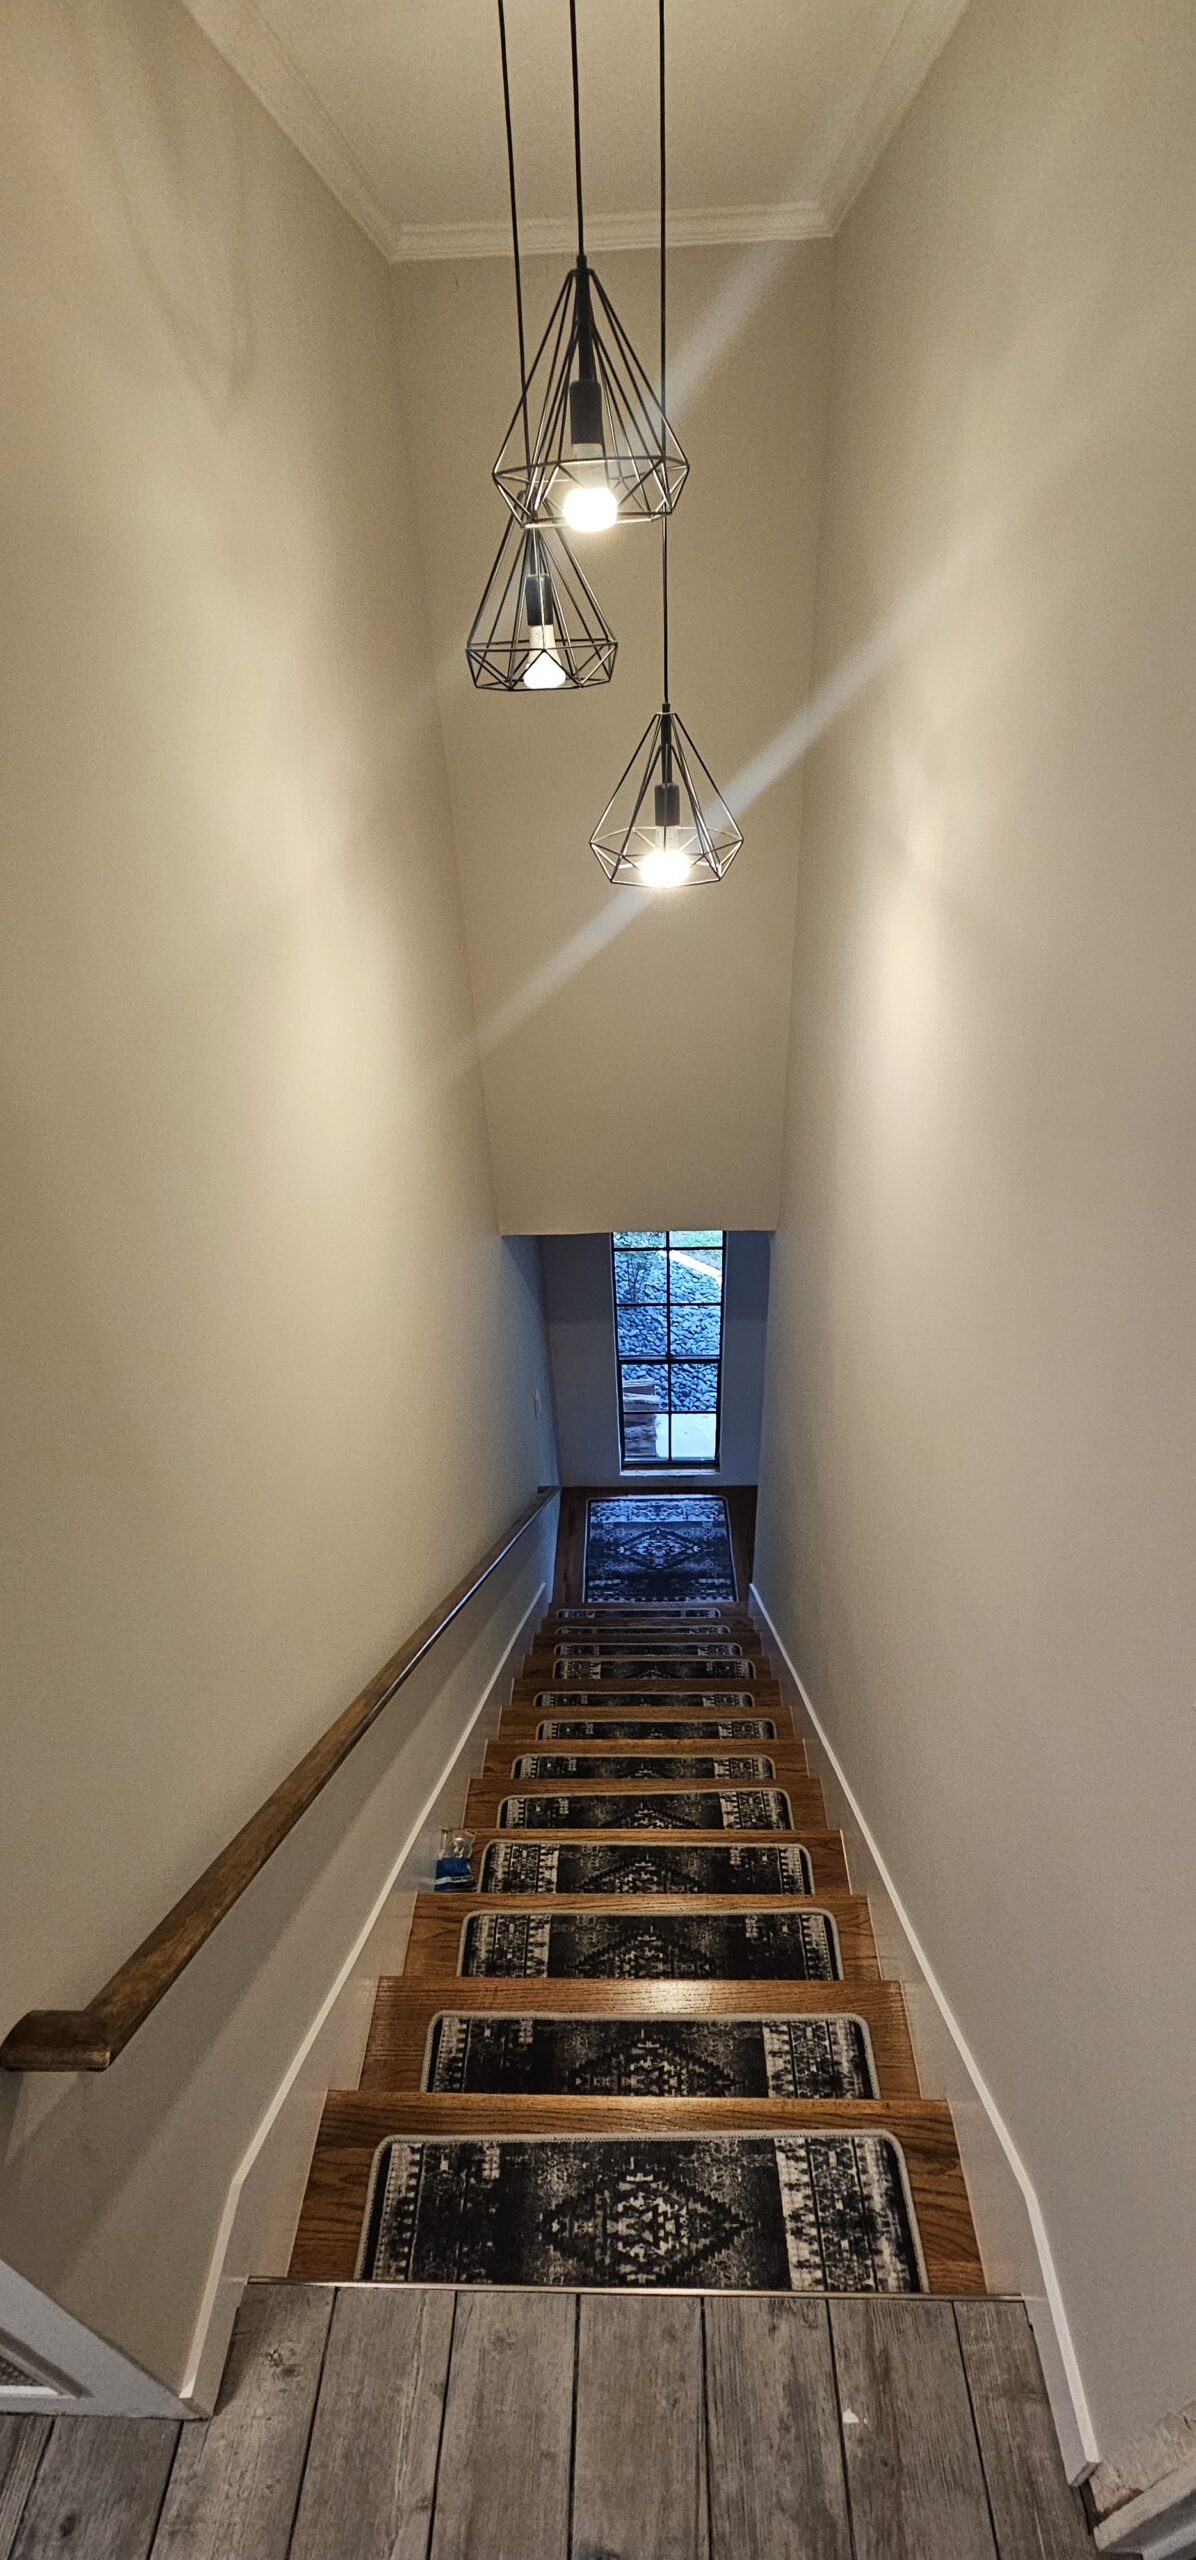
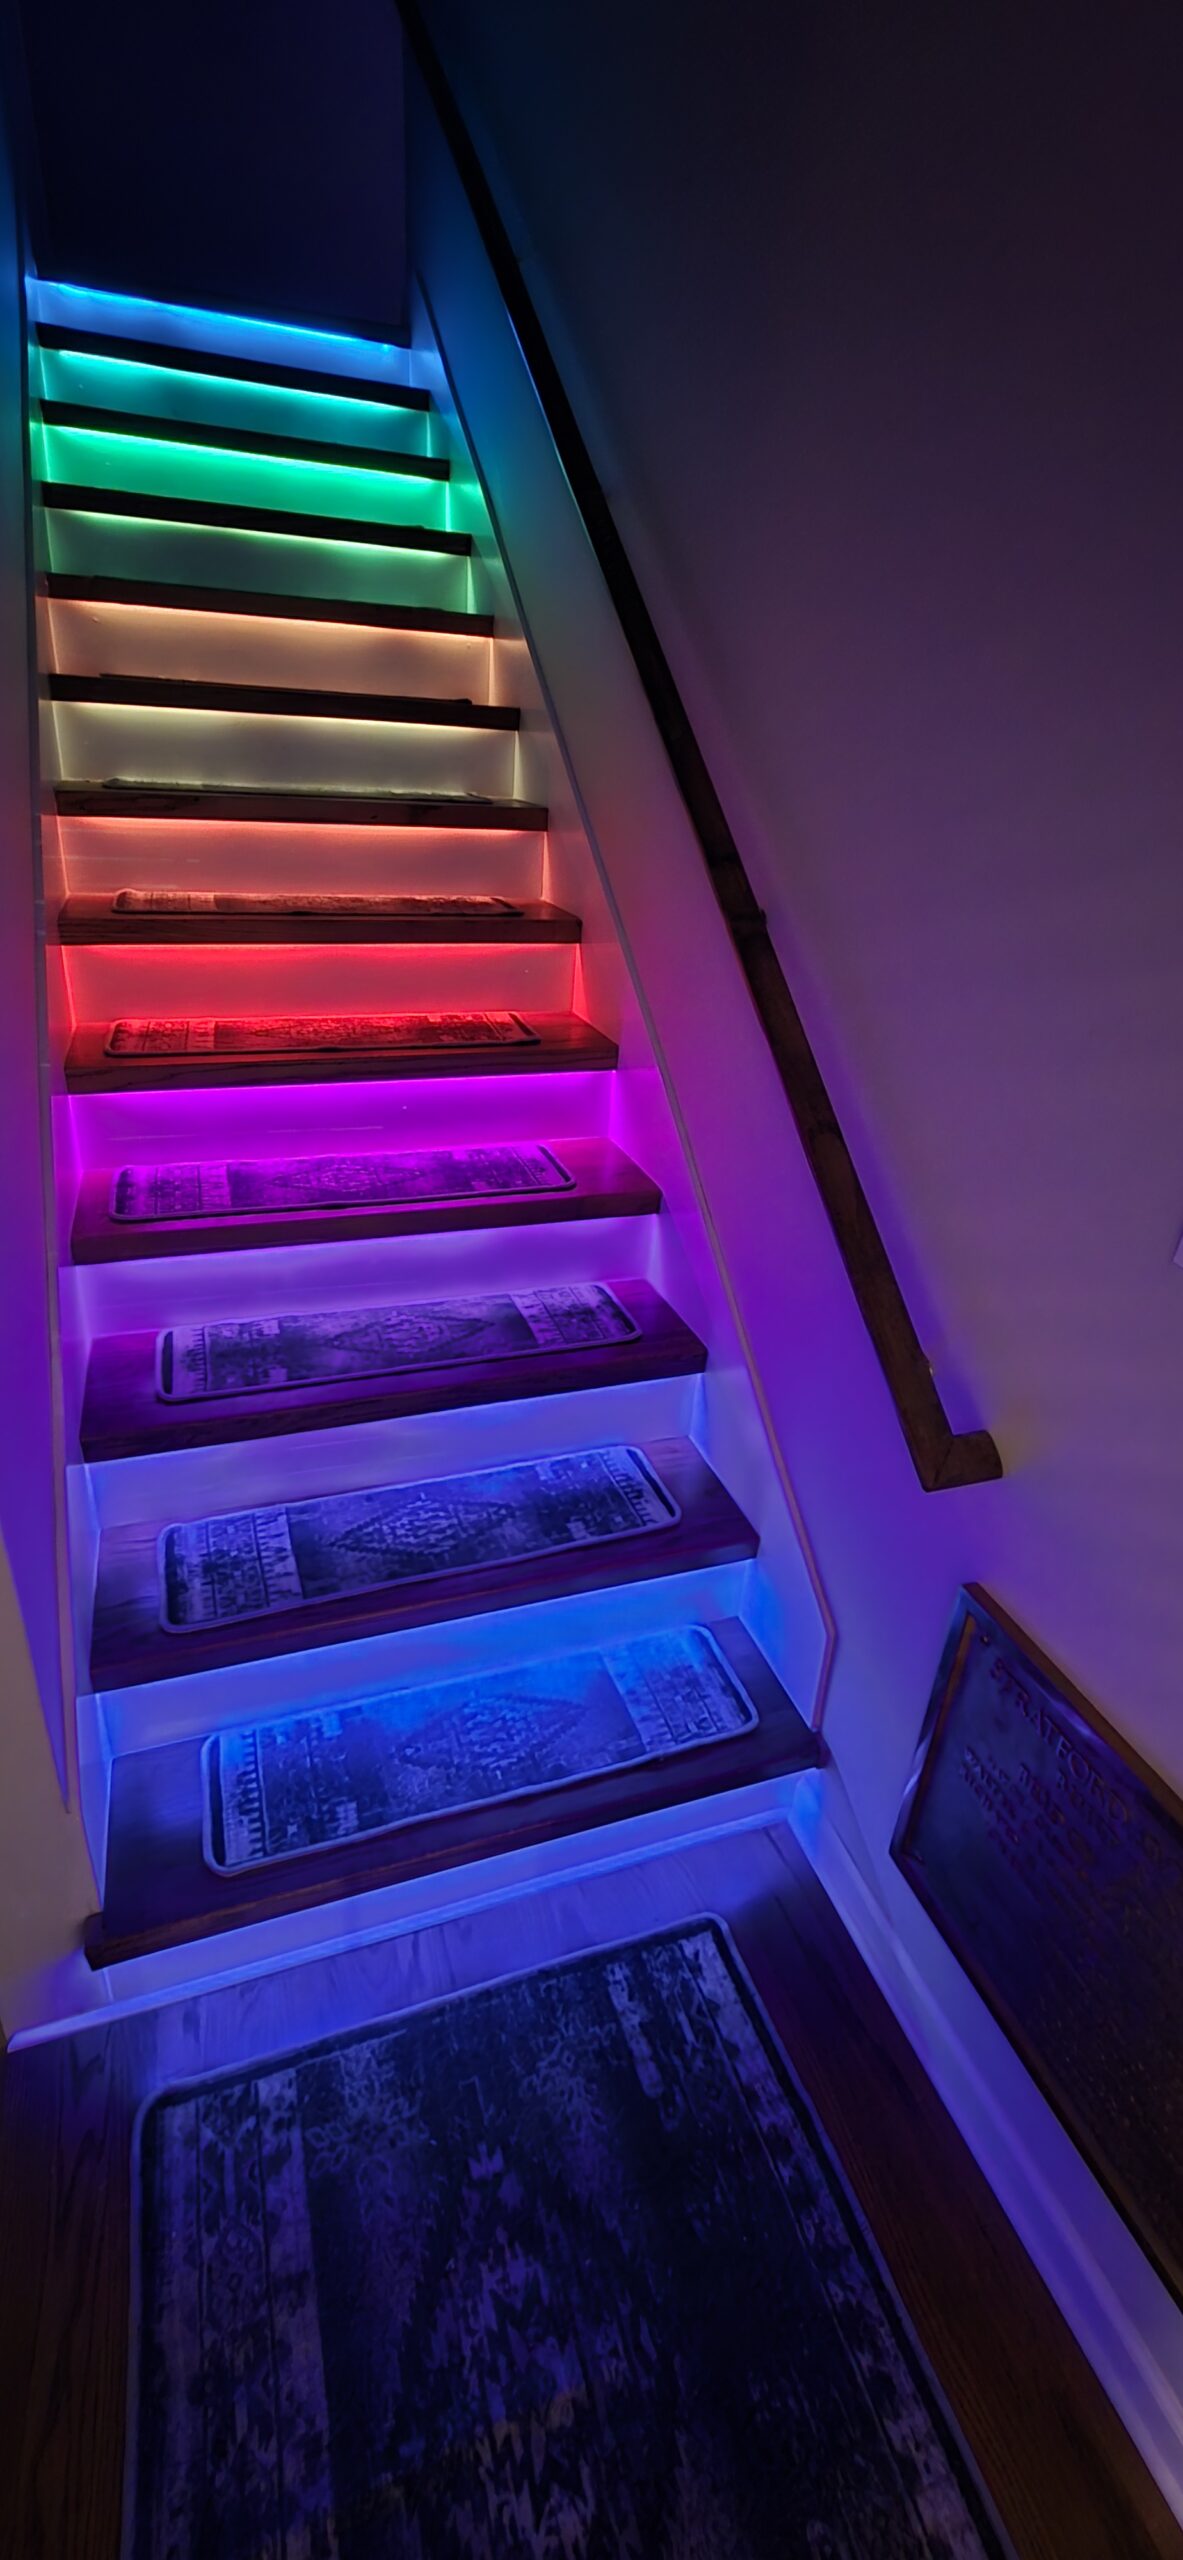
This was a big project but it turned out to be much easier than expected. The pressure switches were a bust but the LEDs strips work great. The stairs do not have enough play in them to trigger the pressure switches. I plan to use a distance sensor in leu of the switches.
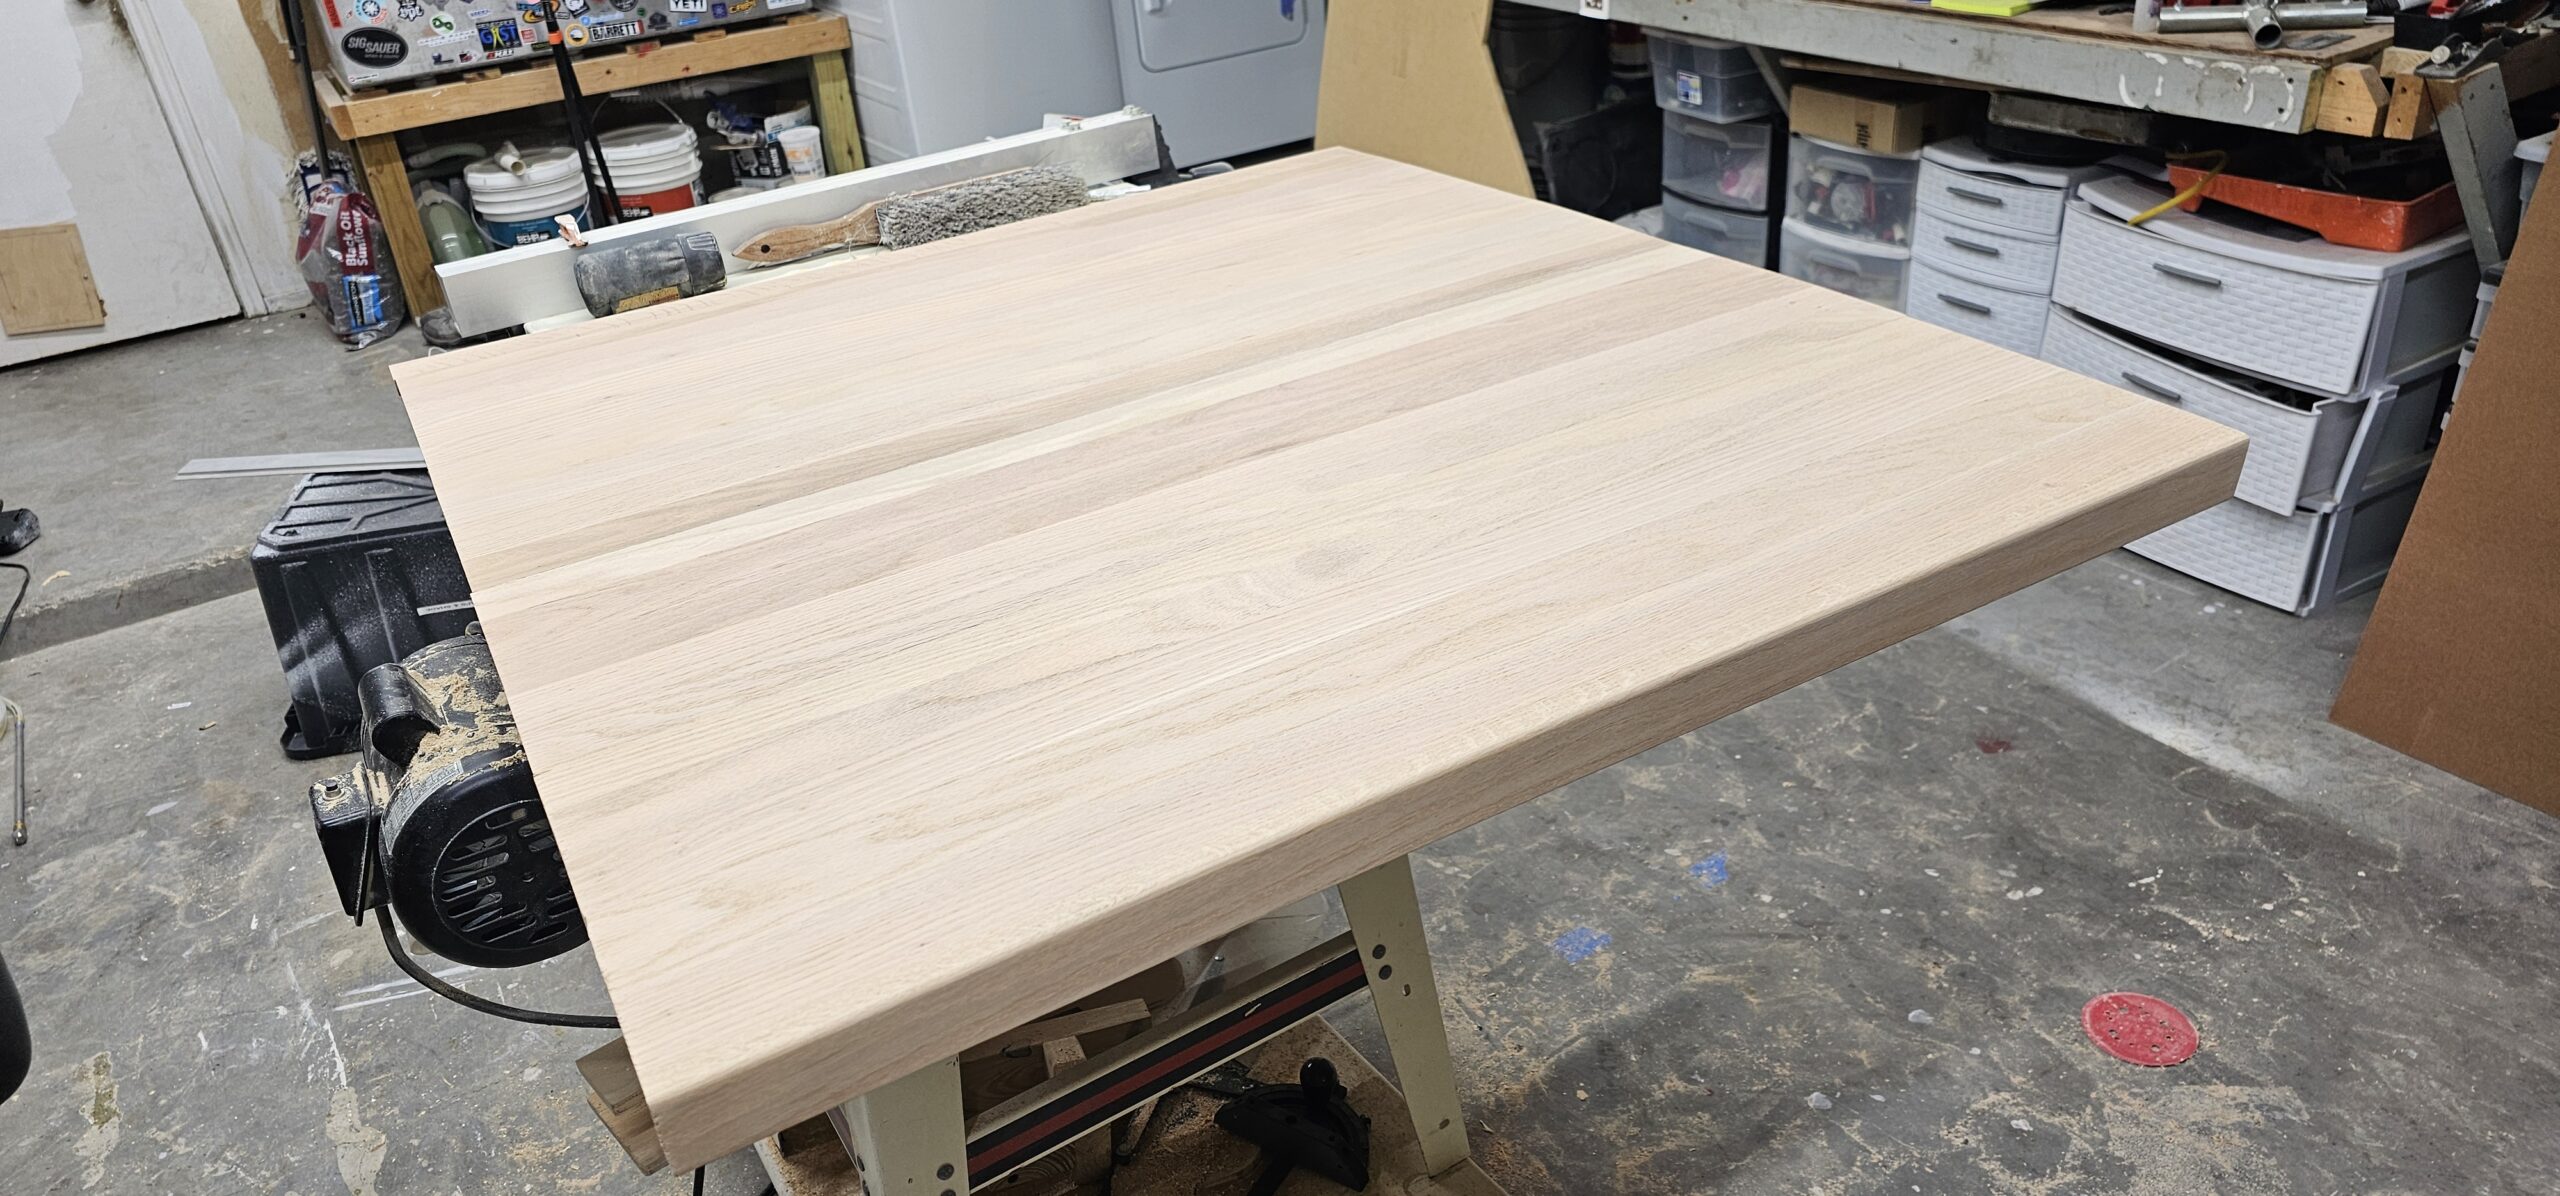
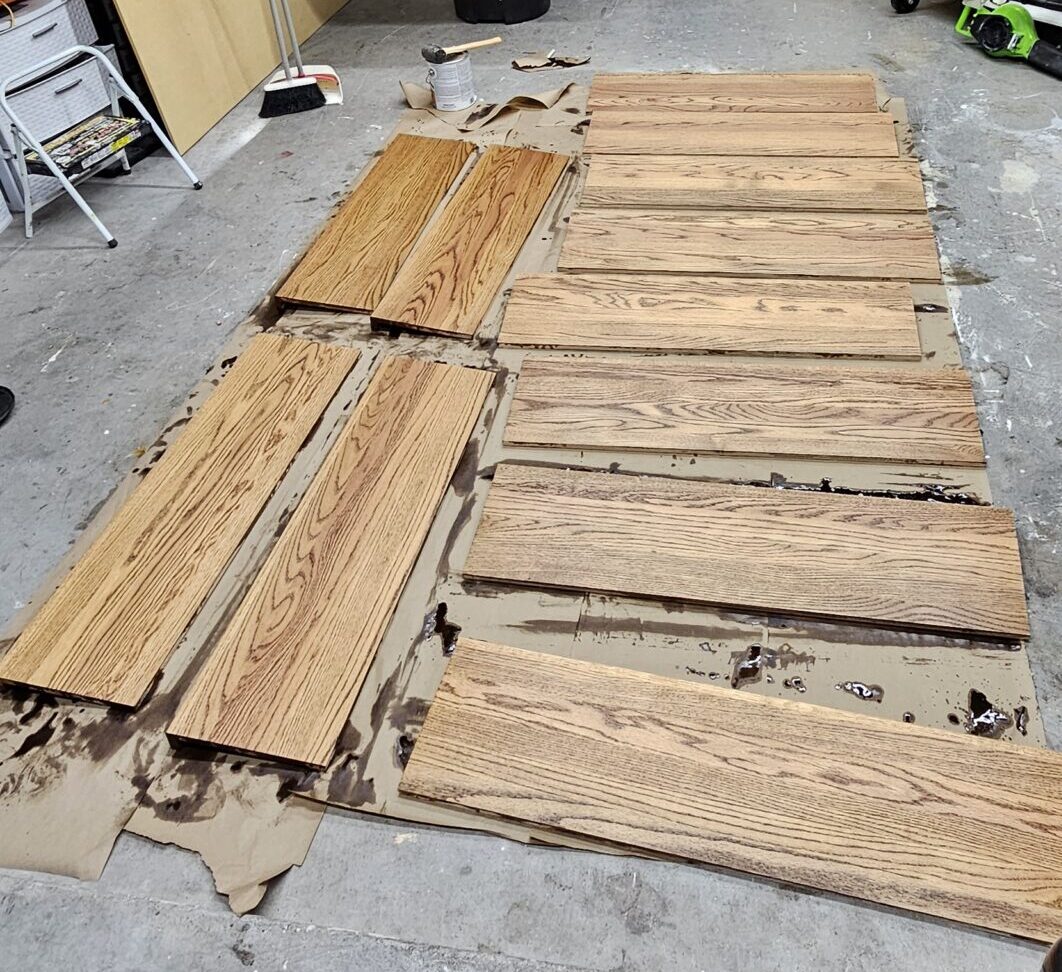
BeforePressure SensorLEDs, Sensors & Skirt BoardLots of wiresLanding glued upStain LandingStain TreadsSkirt BoardRugs So We Don’t SlipReplaced The LightAfter
I ordered an Elephant mycobot 280 to more easily test ROS code and learn MoveIt with a scaled down version of on my desk. It is a pretty slick little device but the repeatability and the payload capacity is really lacking.
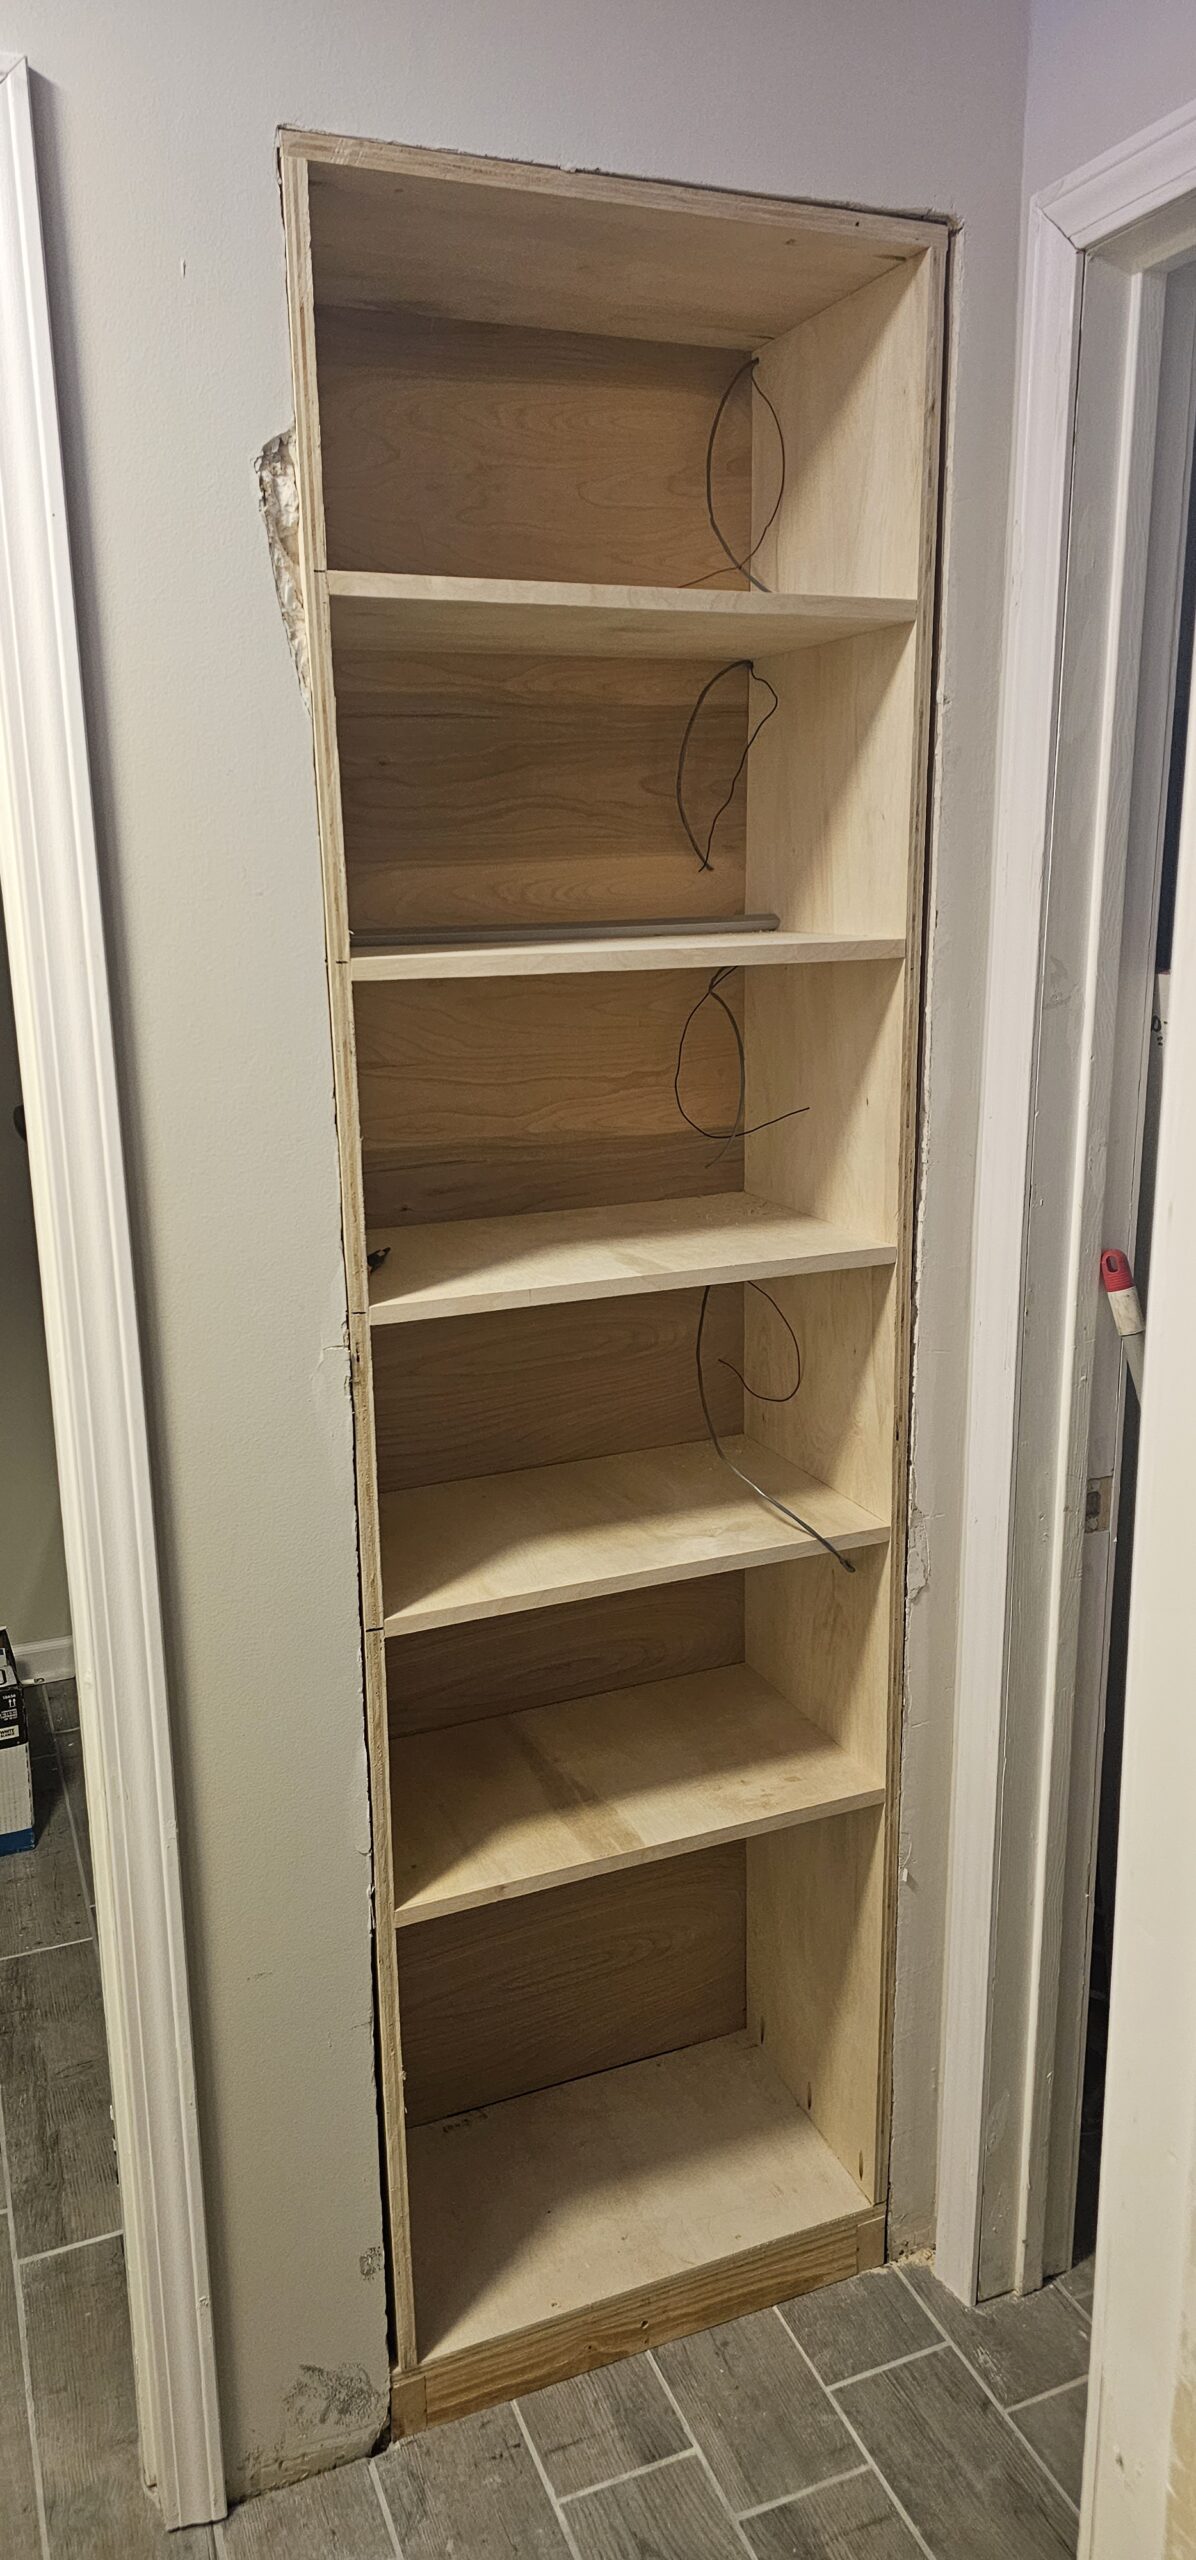
I cant seem to find a picture of the before but I was able to snap this frame from a video I found. The outside did not look too bad but the inside was the main reason we replaced the whole thing. I will update this post if I find any footage from the inside.
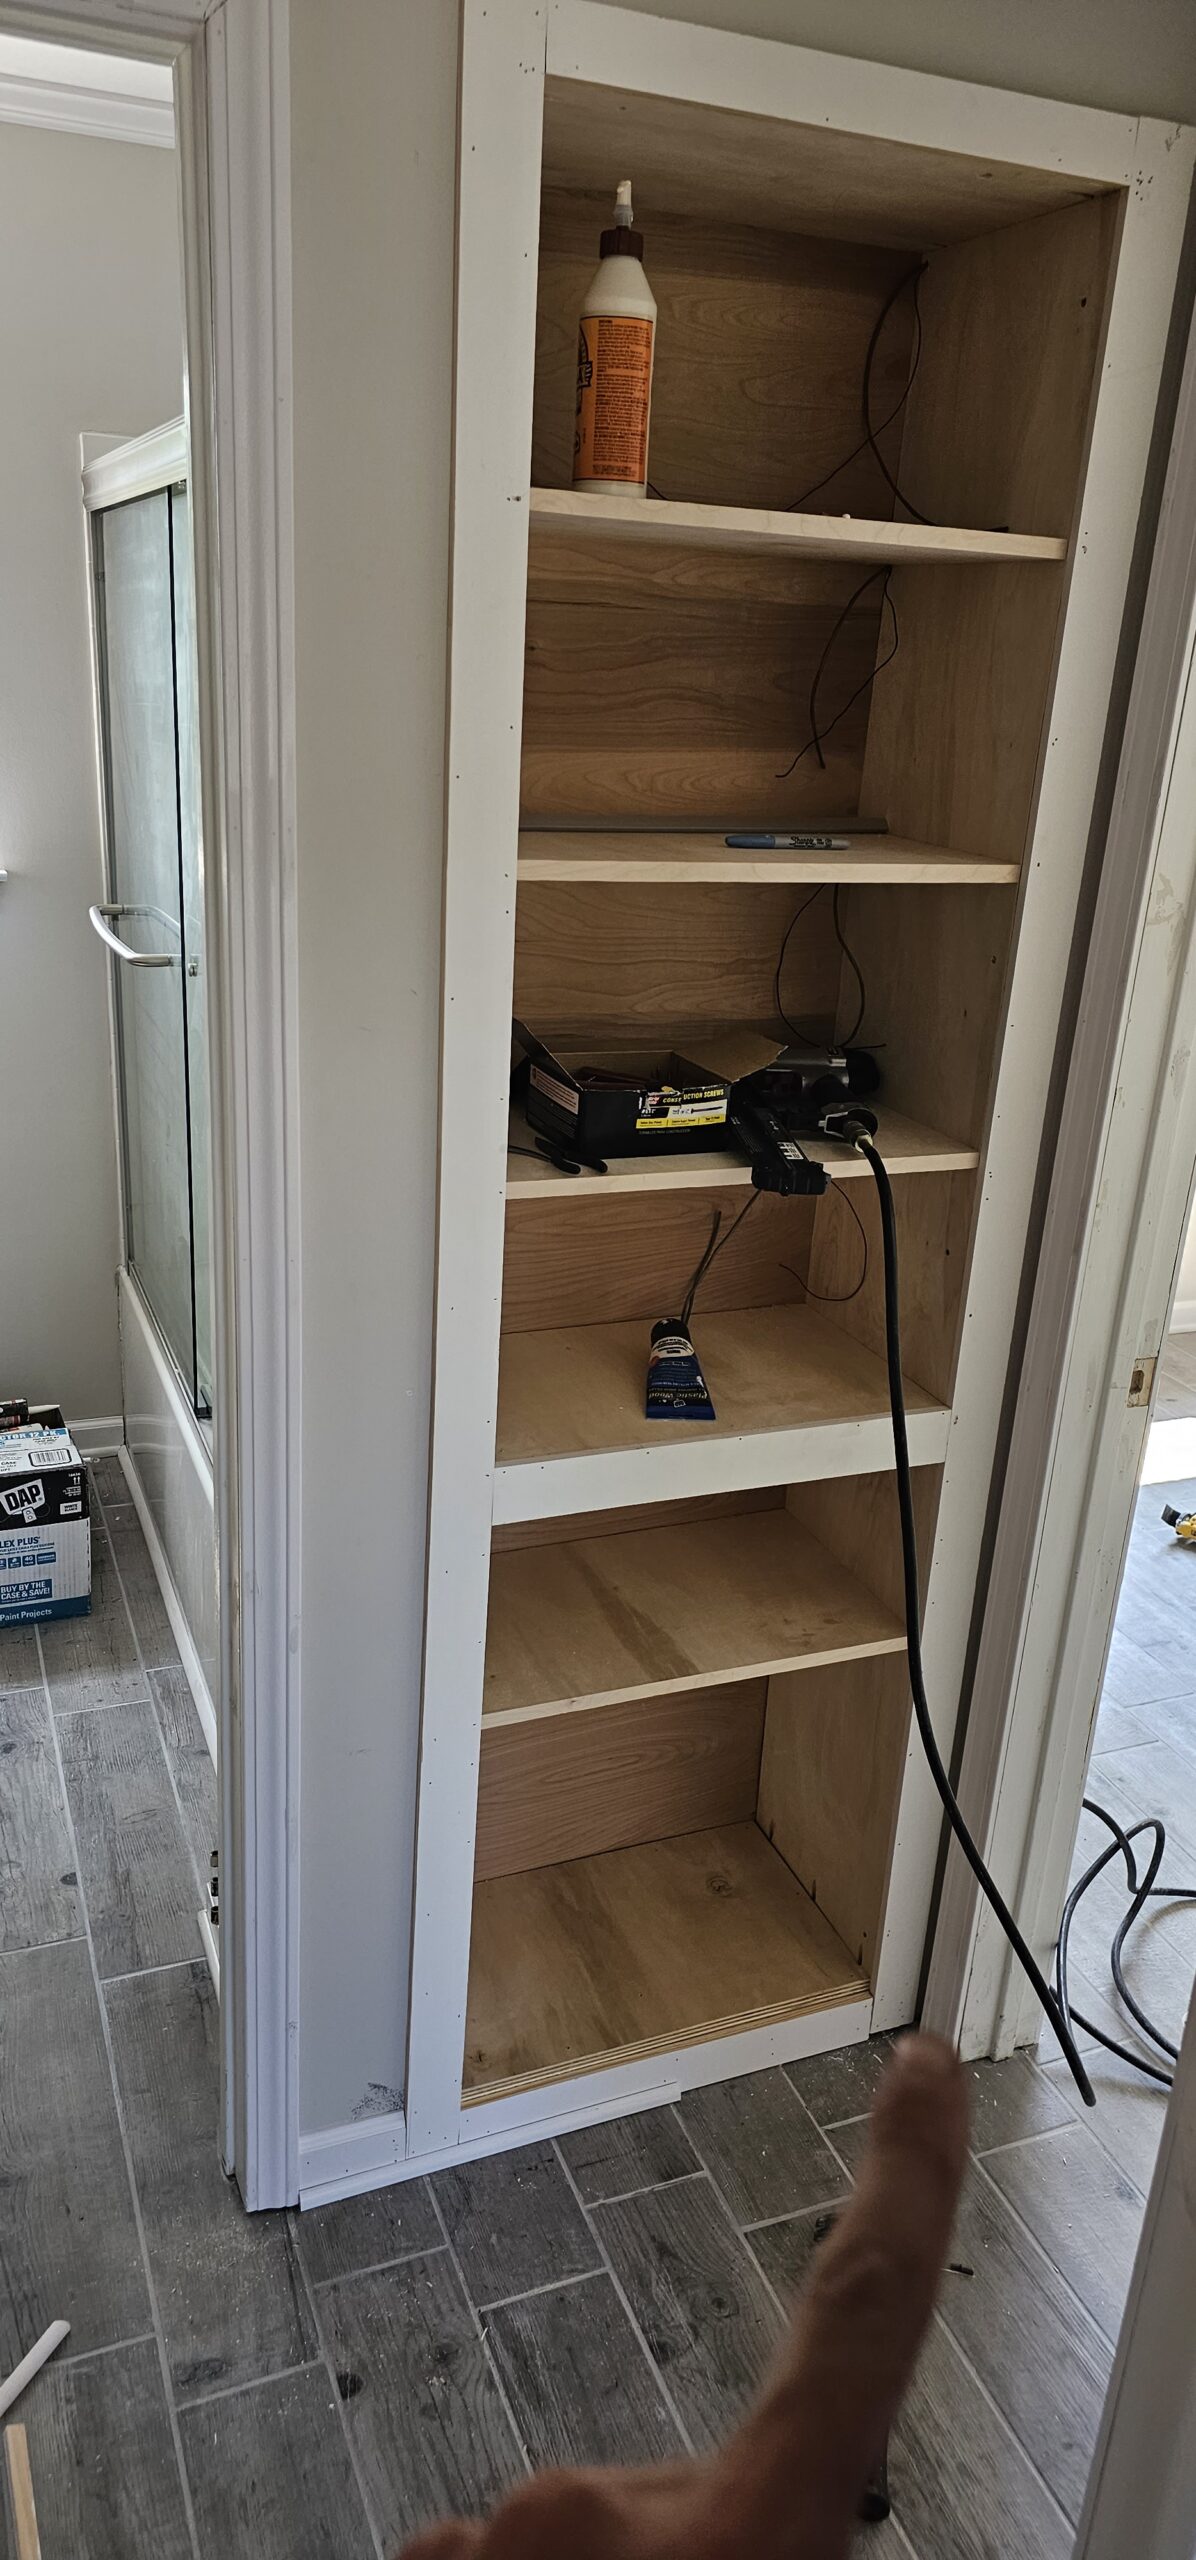
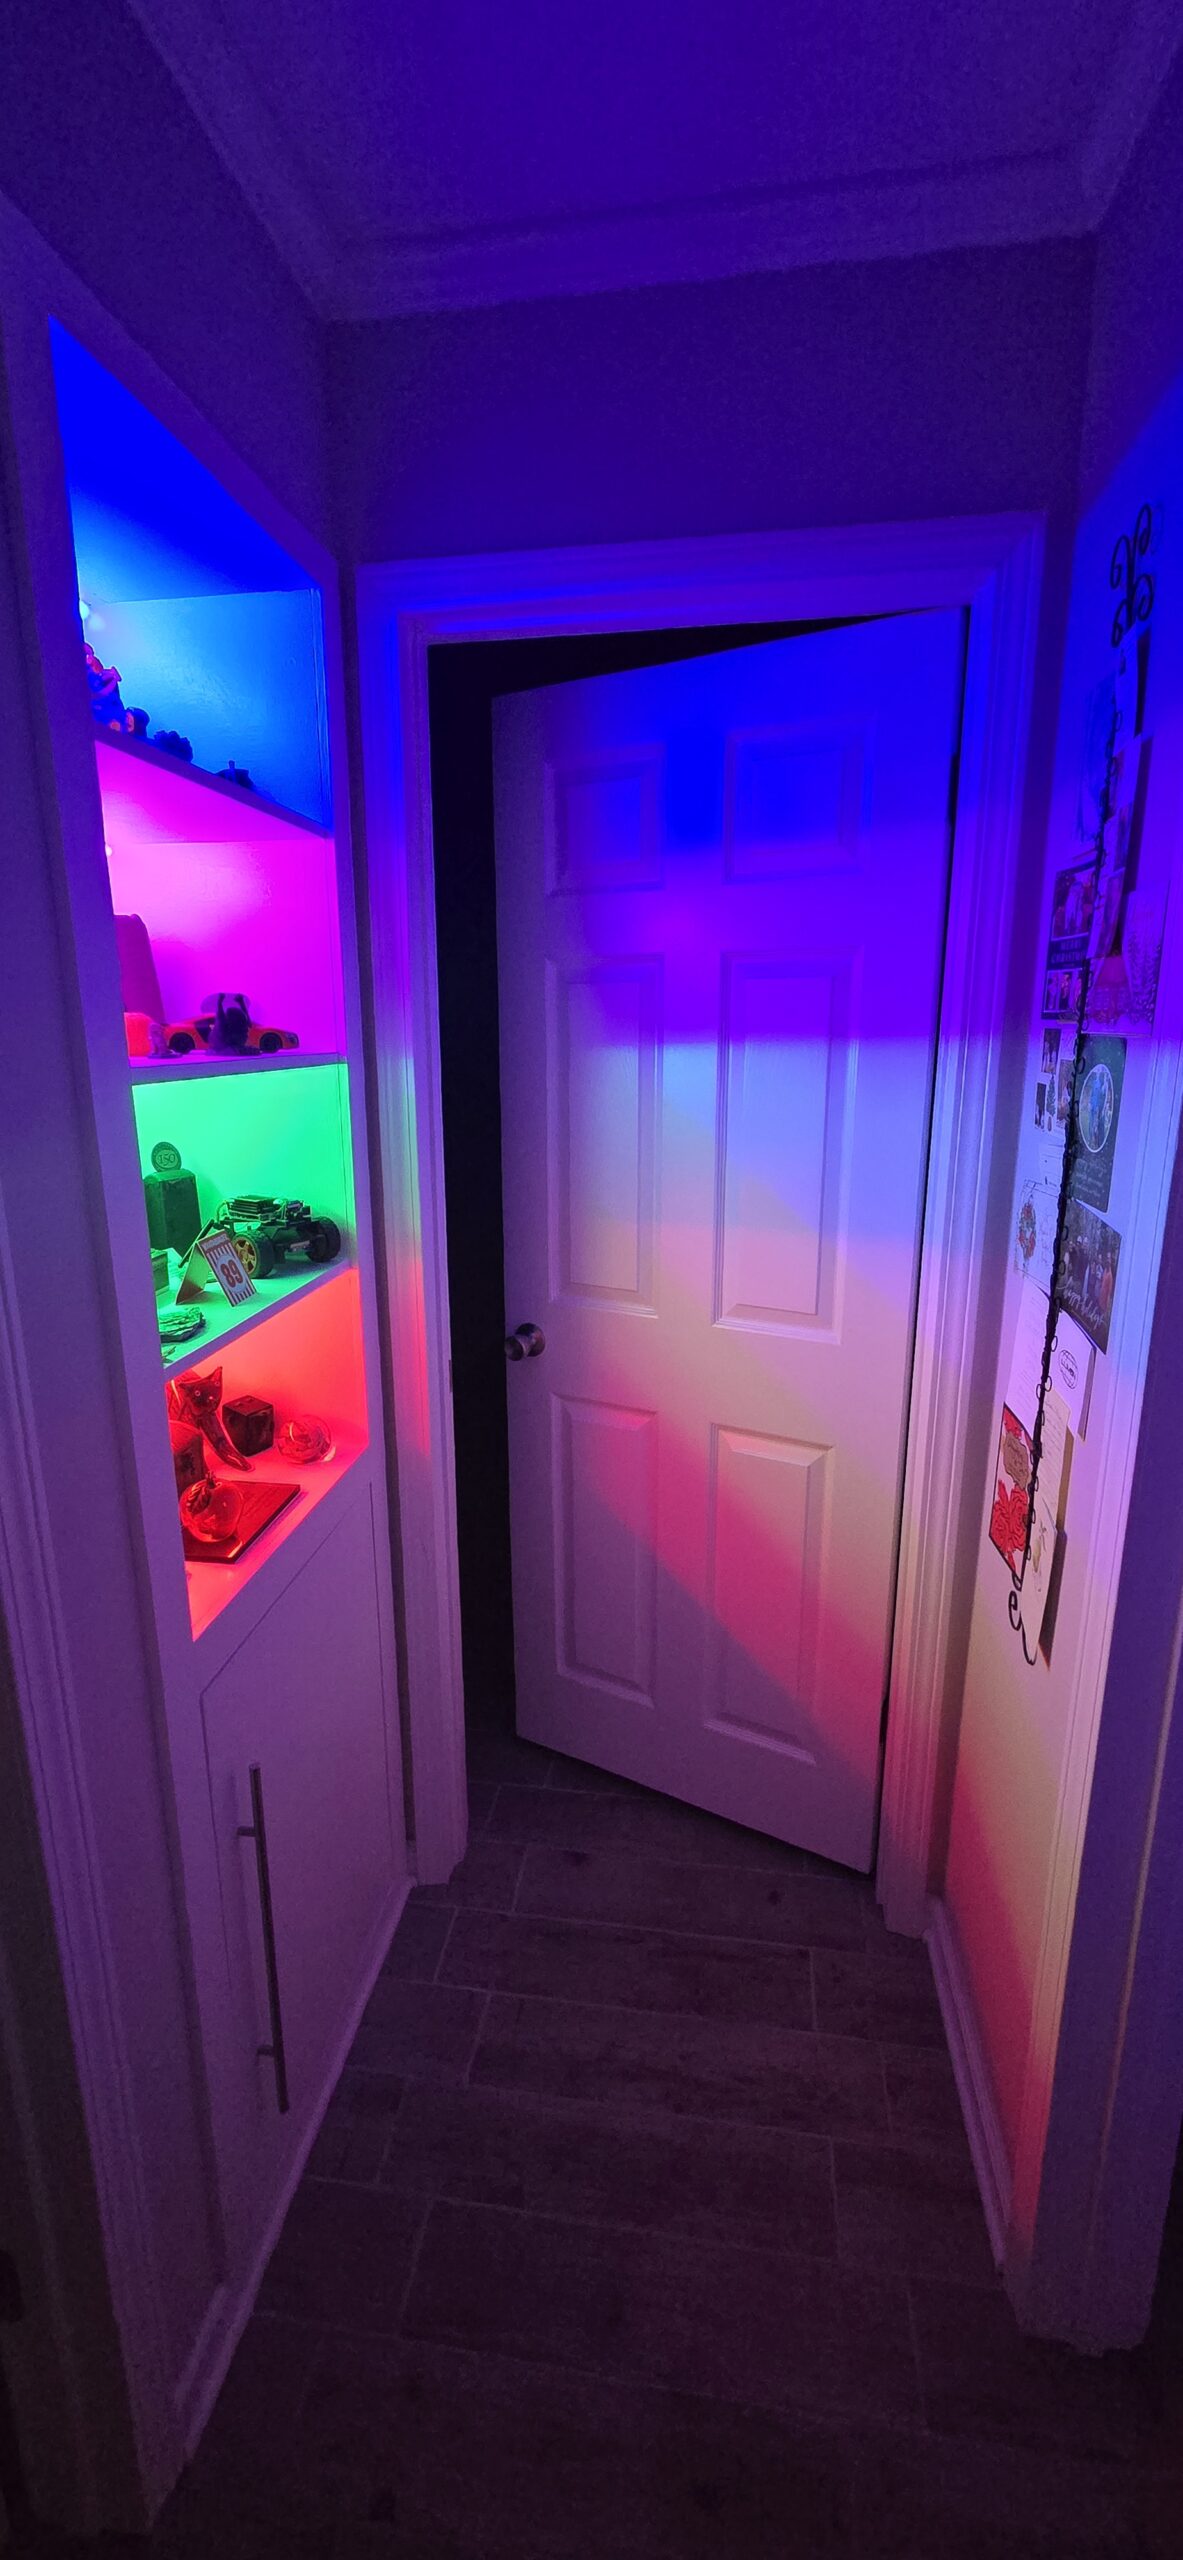
This was a simple build from a wood working stand-point. The whole unit was build downstairs in the workshop and dropped right place. Installed the molding, door, and paint.
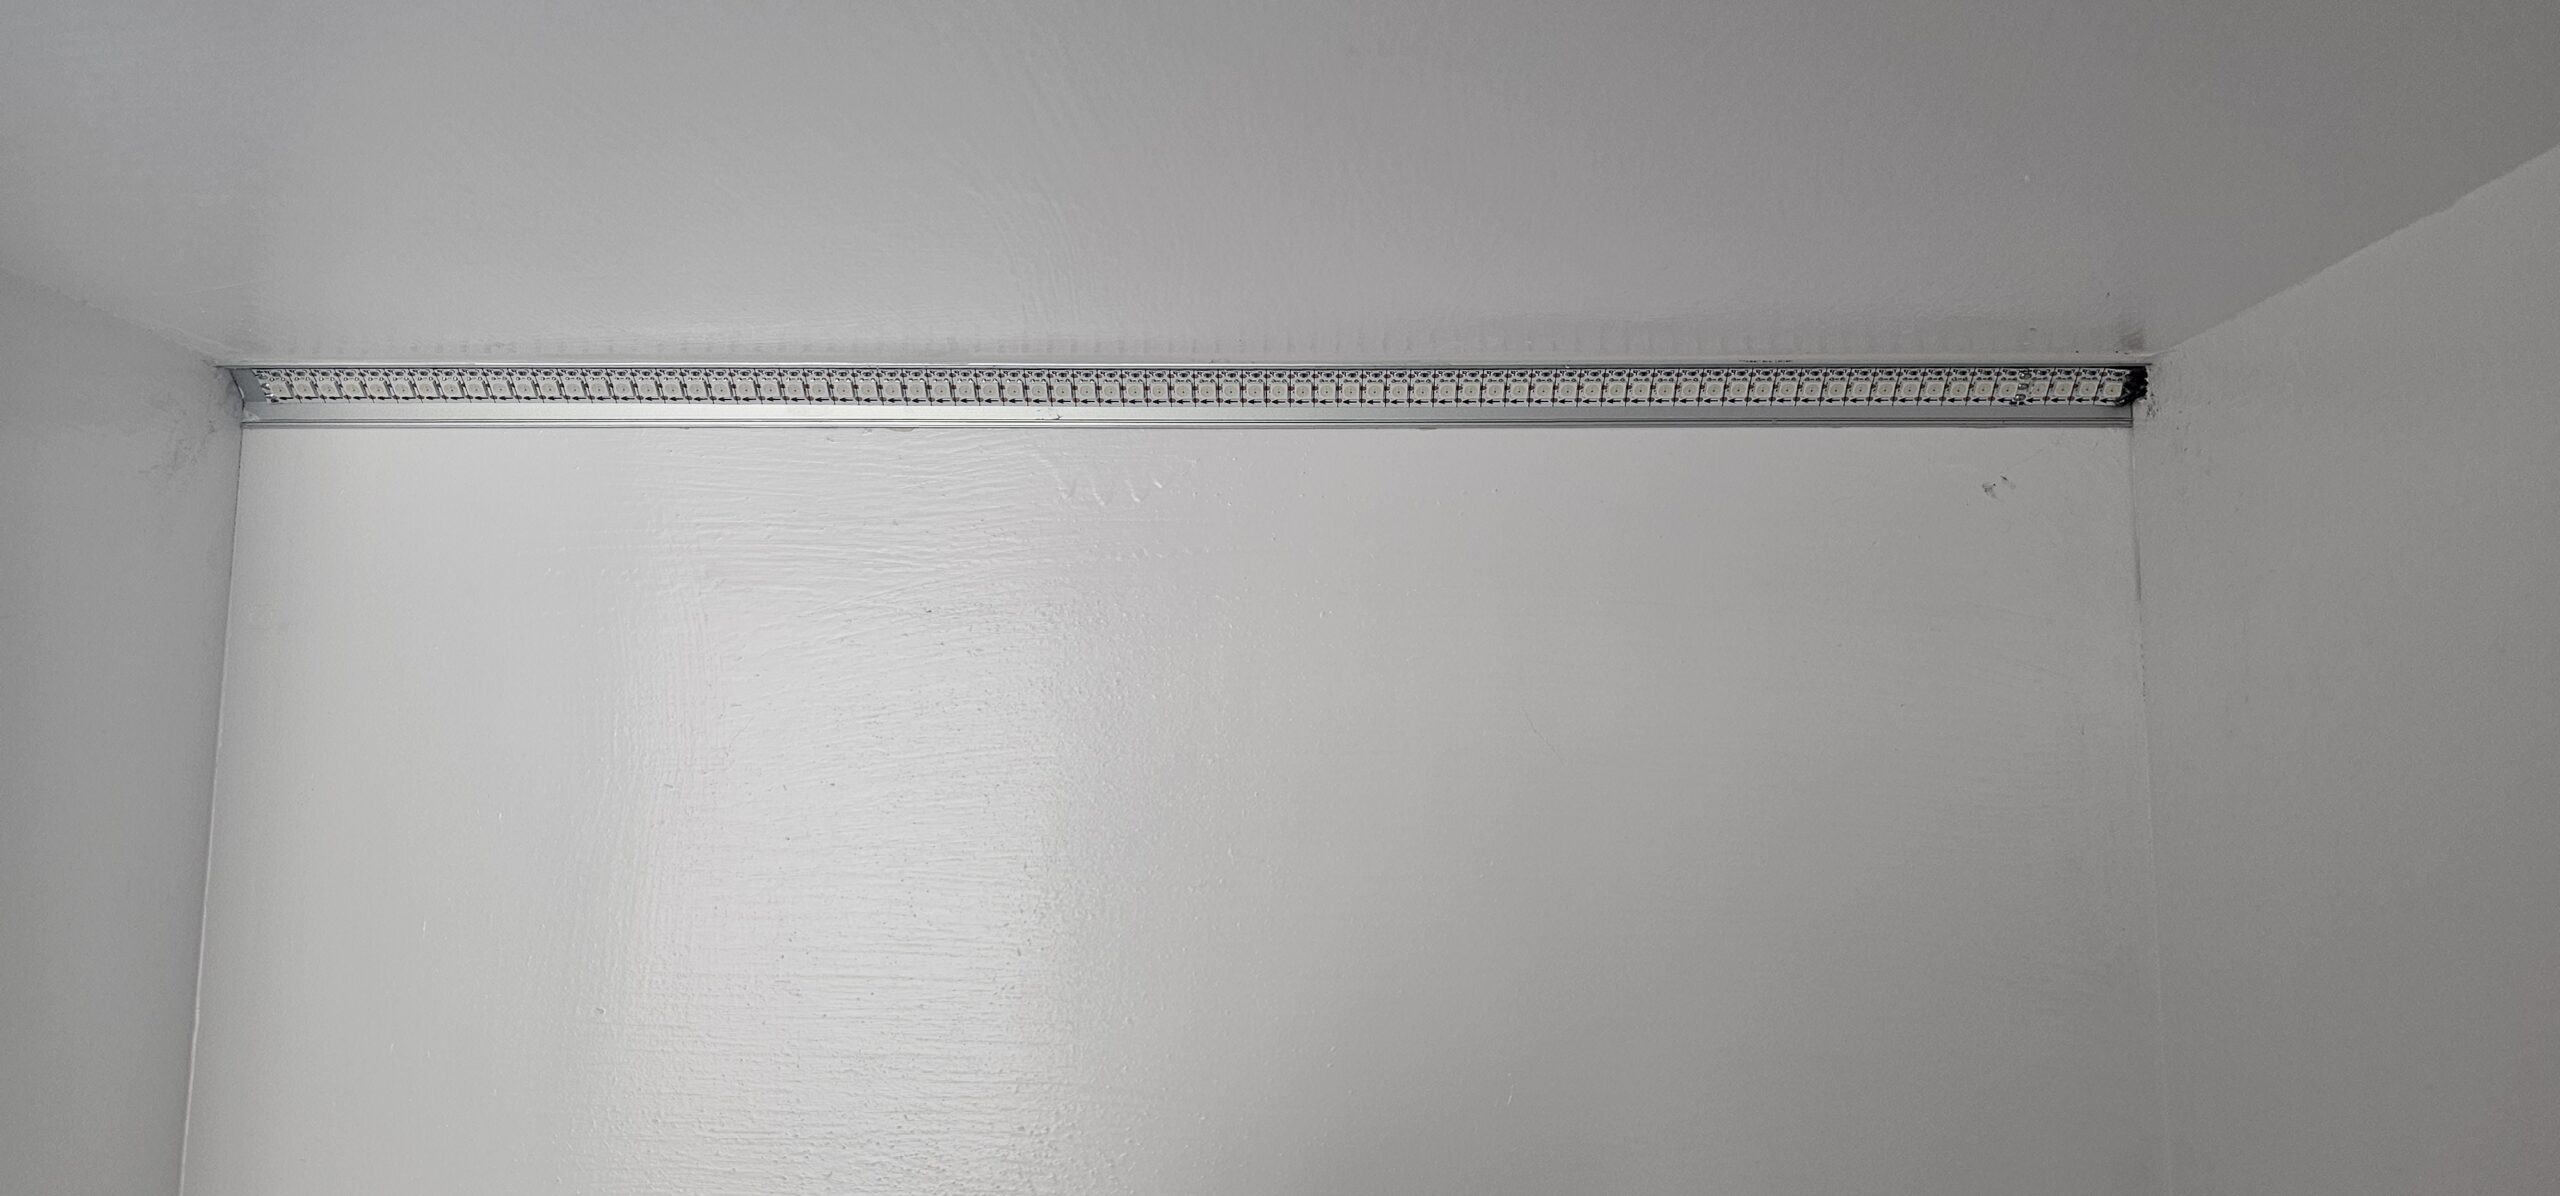
I pre-ran all the LED wires prior to installing the frame. This project used 144/m 5V Individual Addressable RGB WS2812B LED Strip. After this project, I moved to all 12V variants and stopped obsessing over controlling every single pixel. The 5V + 144/M + long wire runs initially gave me some issue, but I eventually over came them.
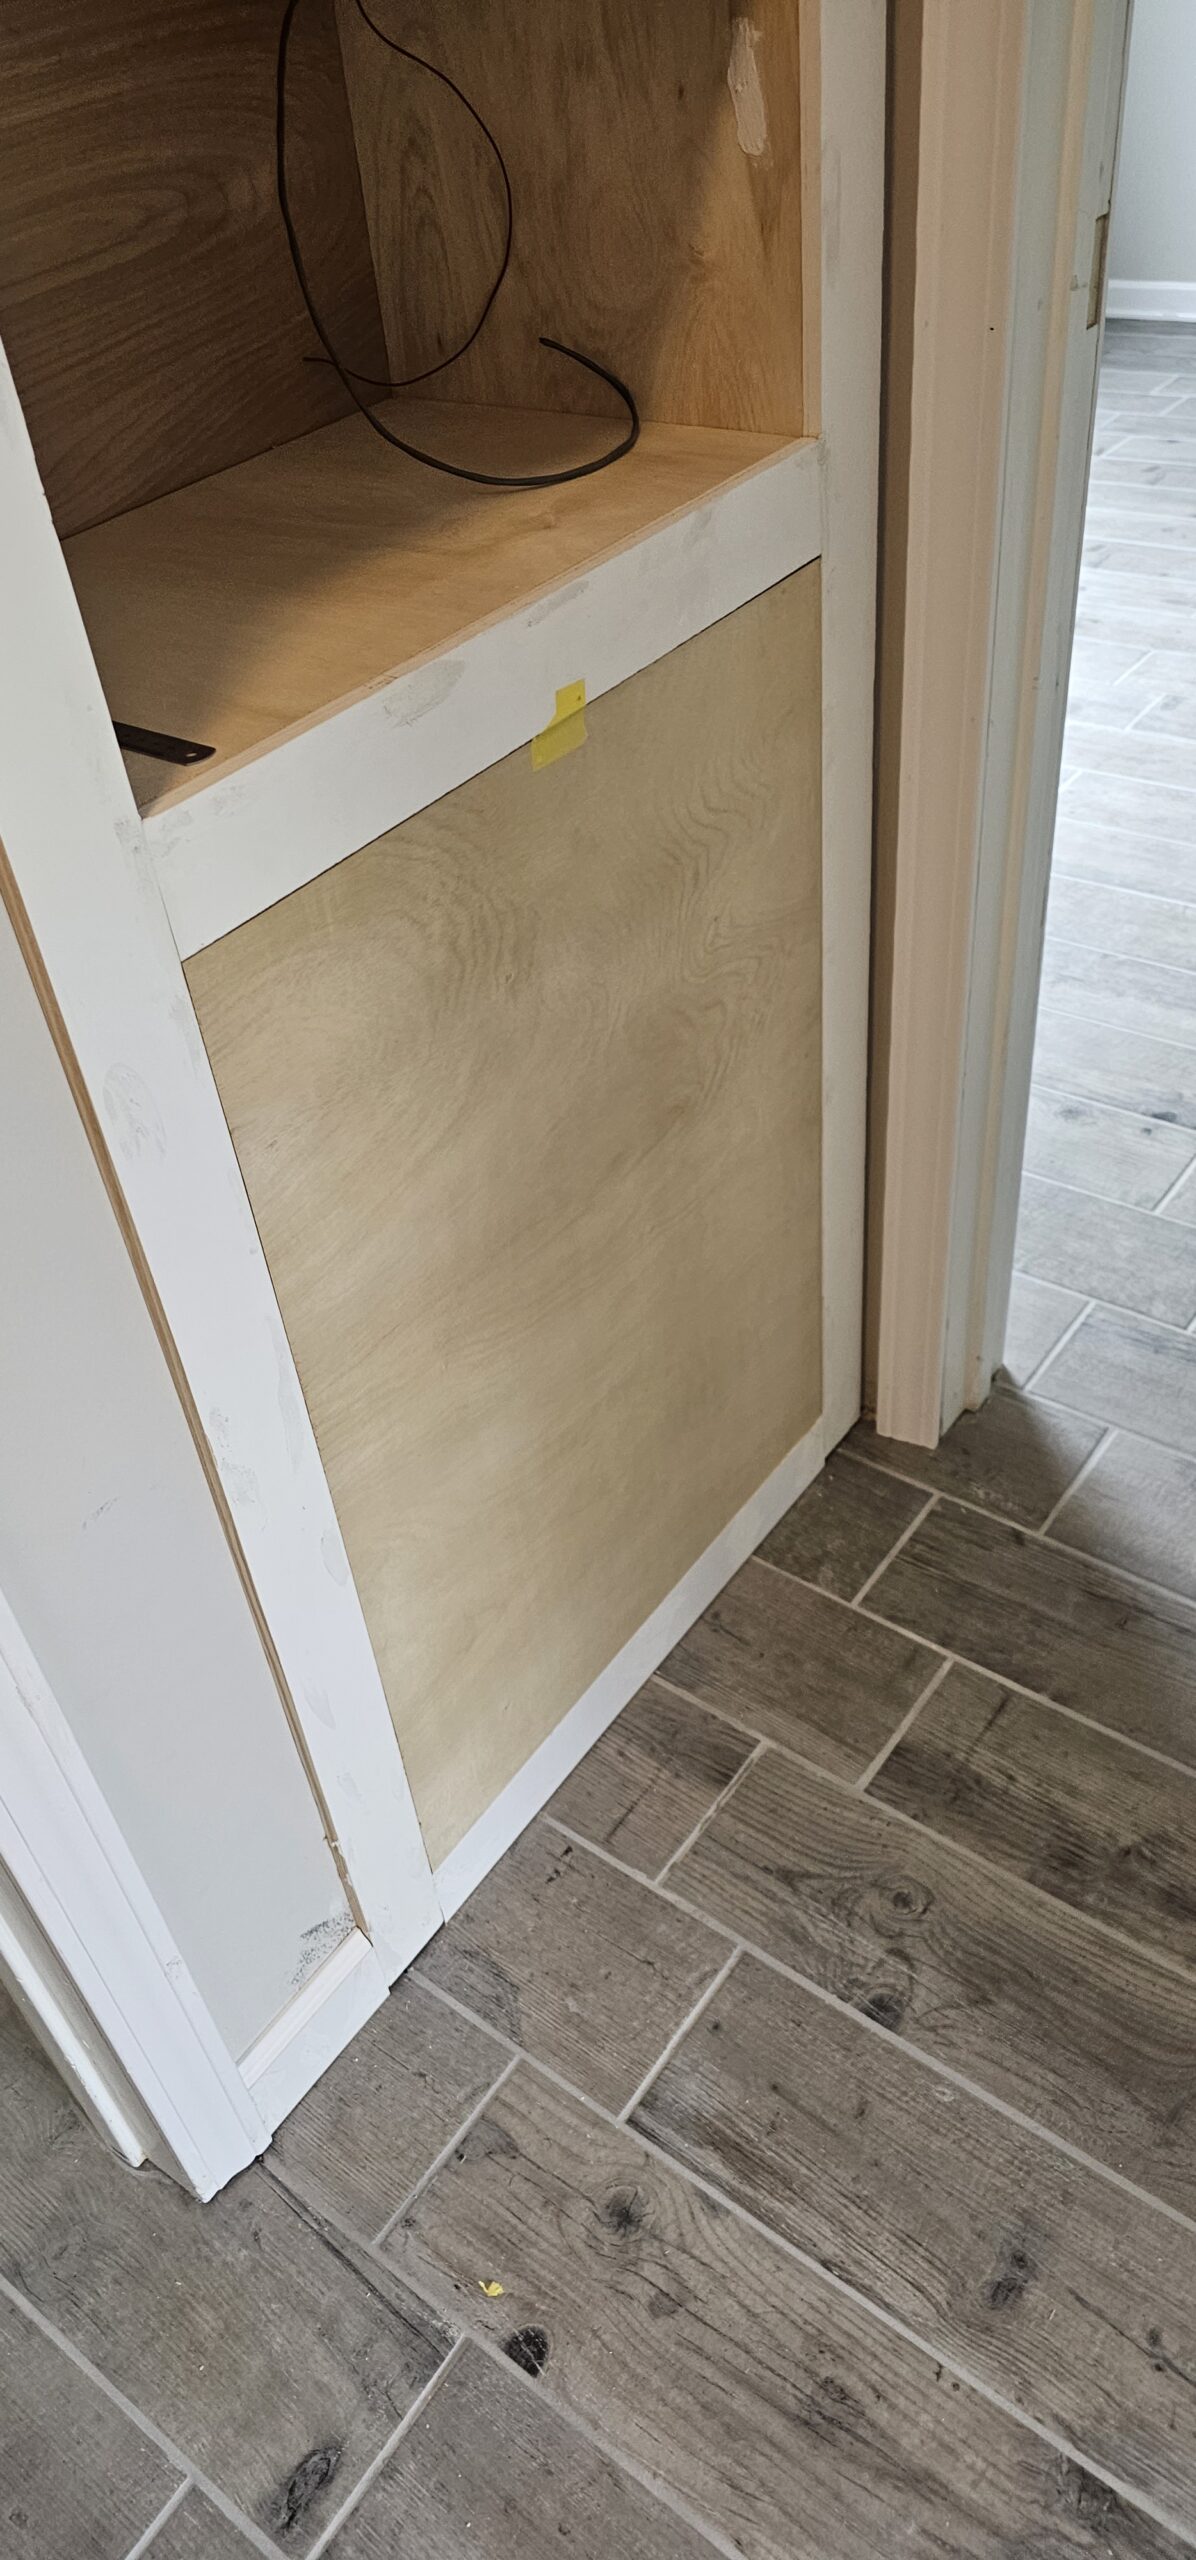
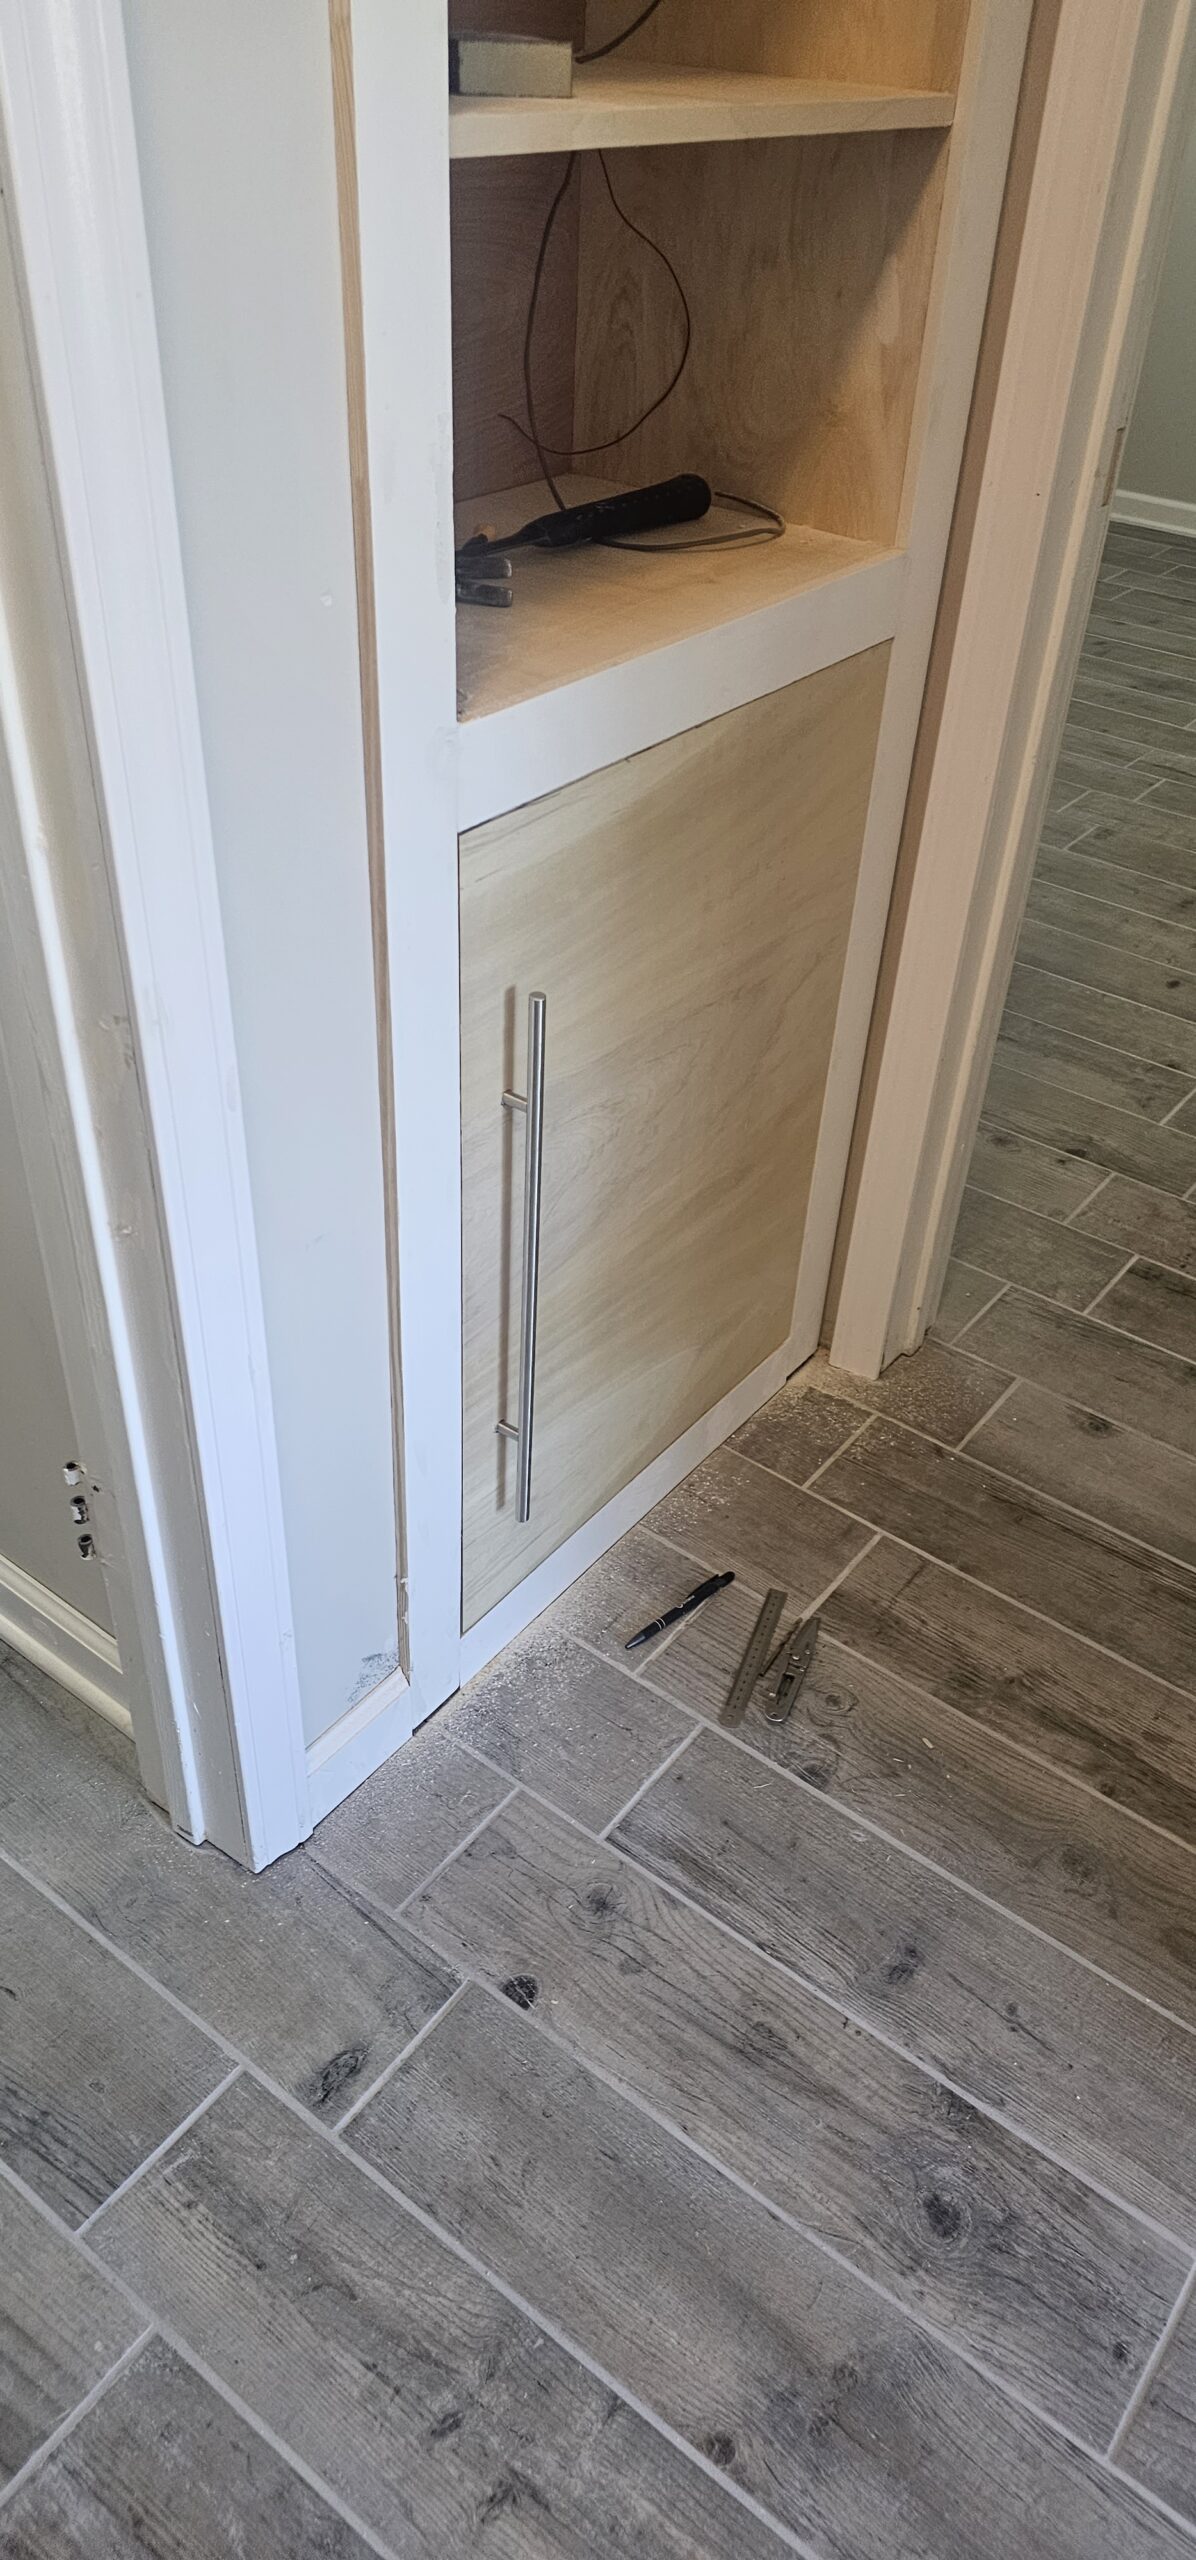
The LEDs sit in a quarter round defuser that I originally bought for the stairs. This was my test run for the stair project and I am happy with how they came out.
BeforeNew InsidesTrim ItTest Fit The DoorSame Style PullsDat DenseCover Up!After SideAfter Side
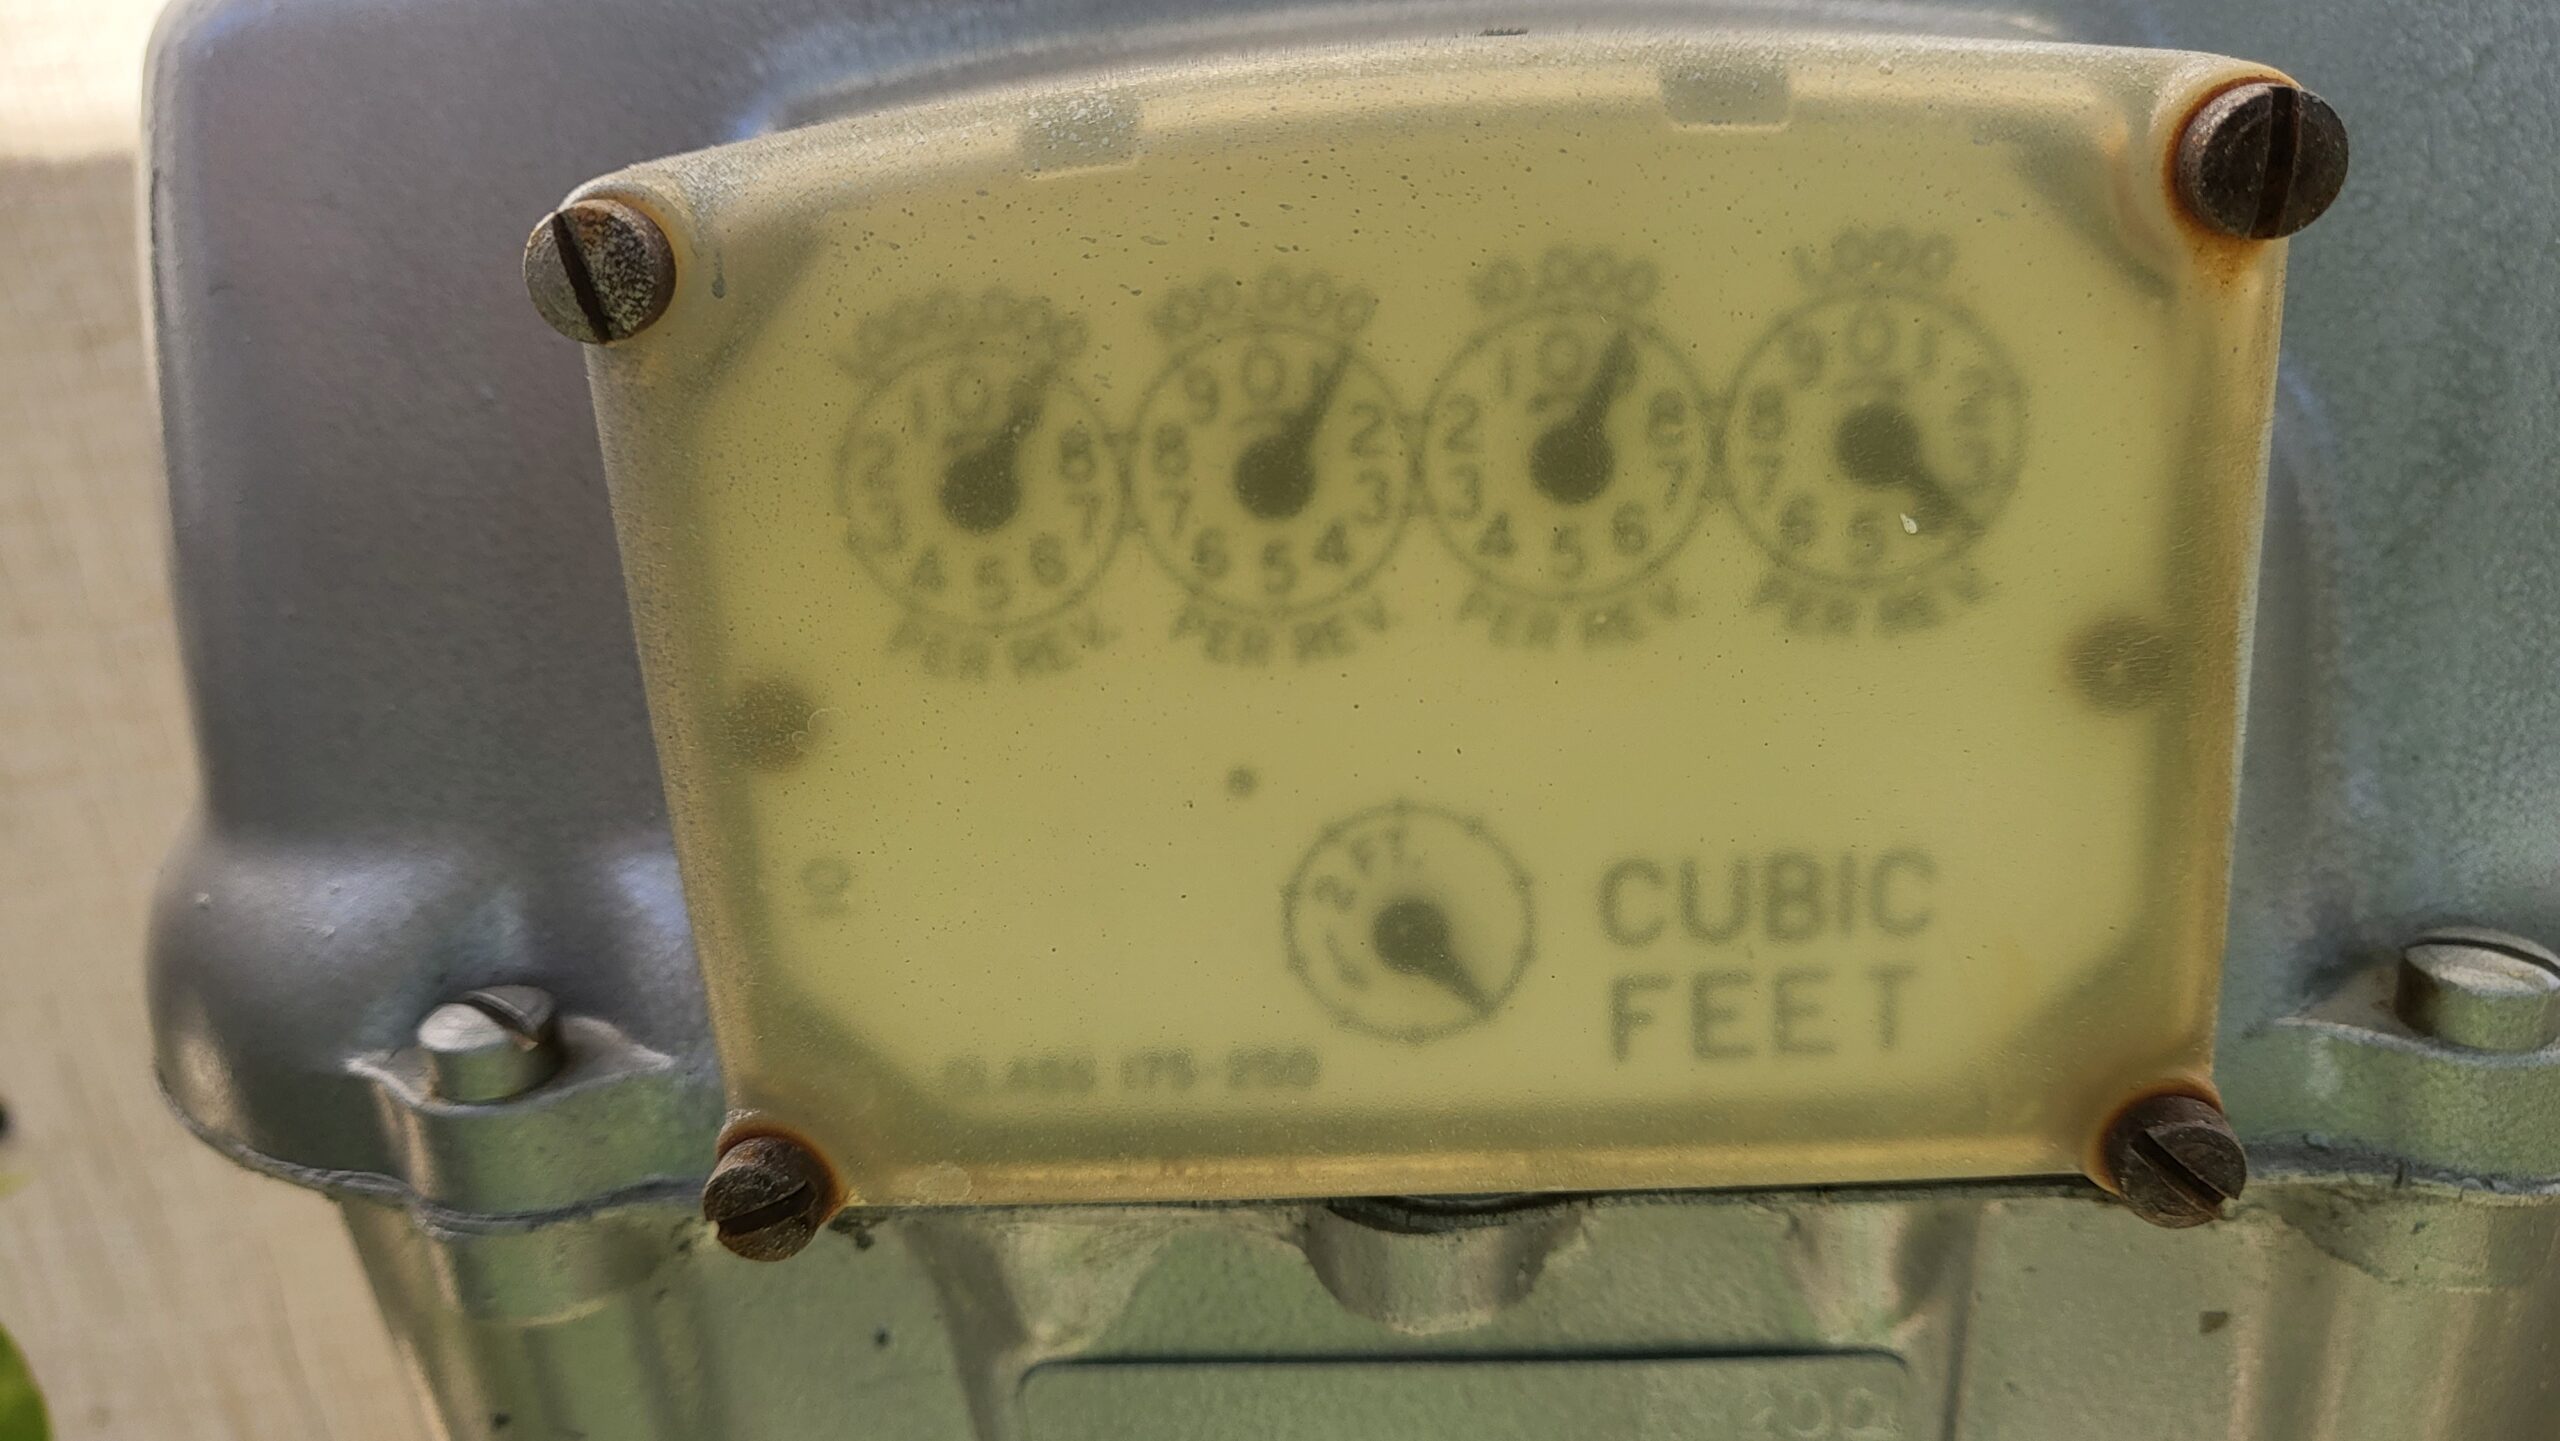
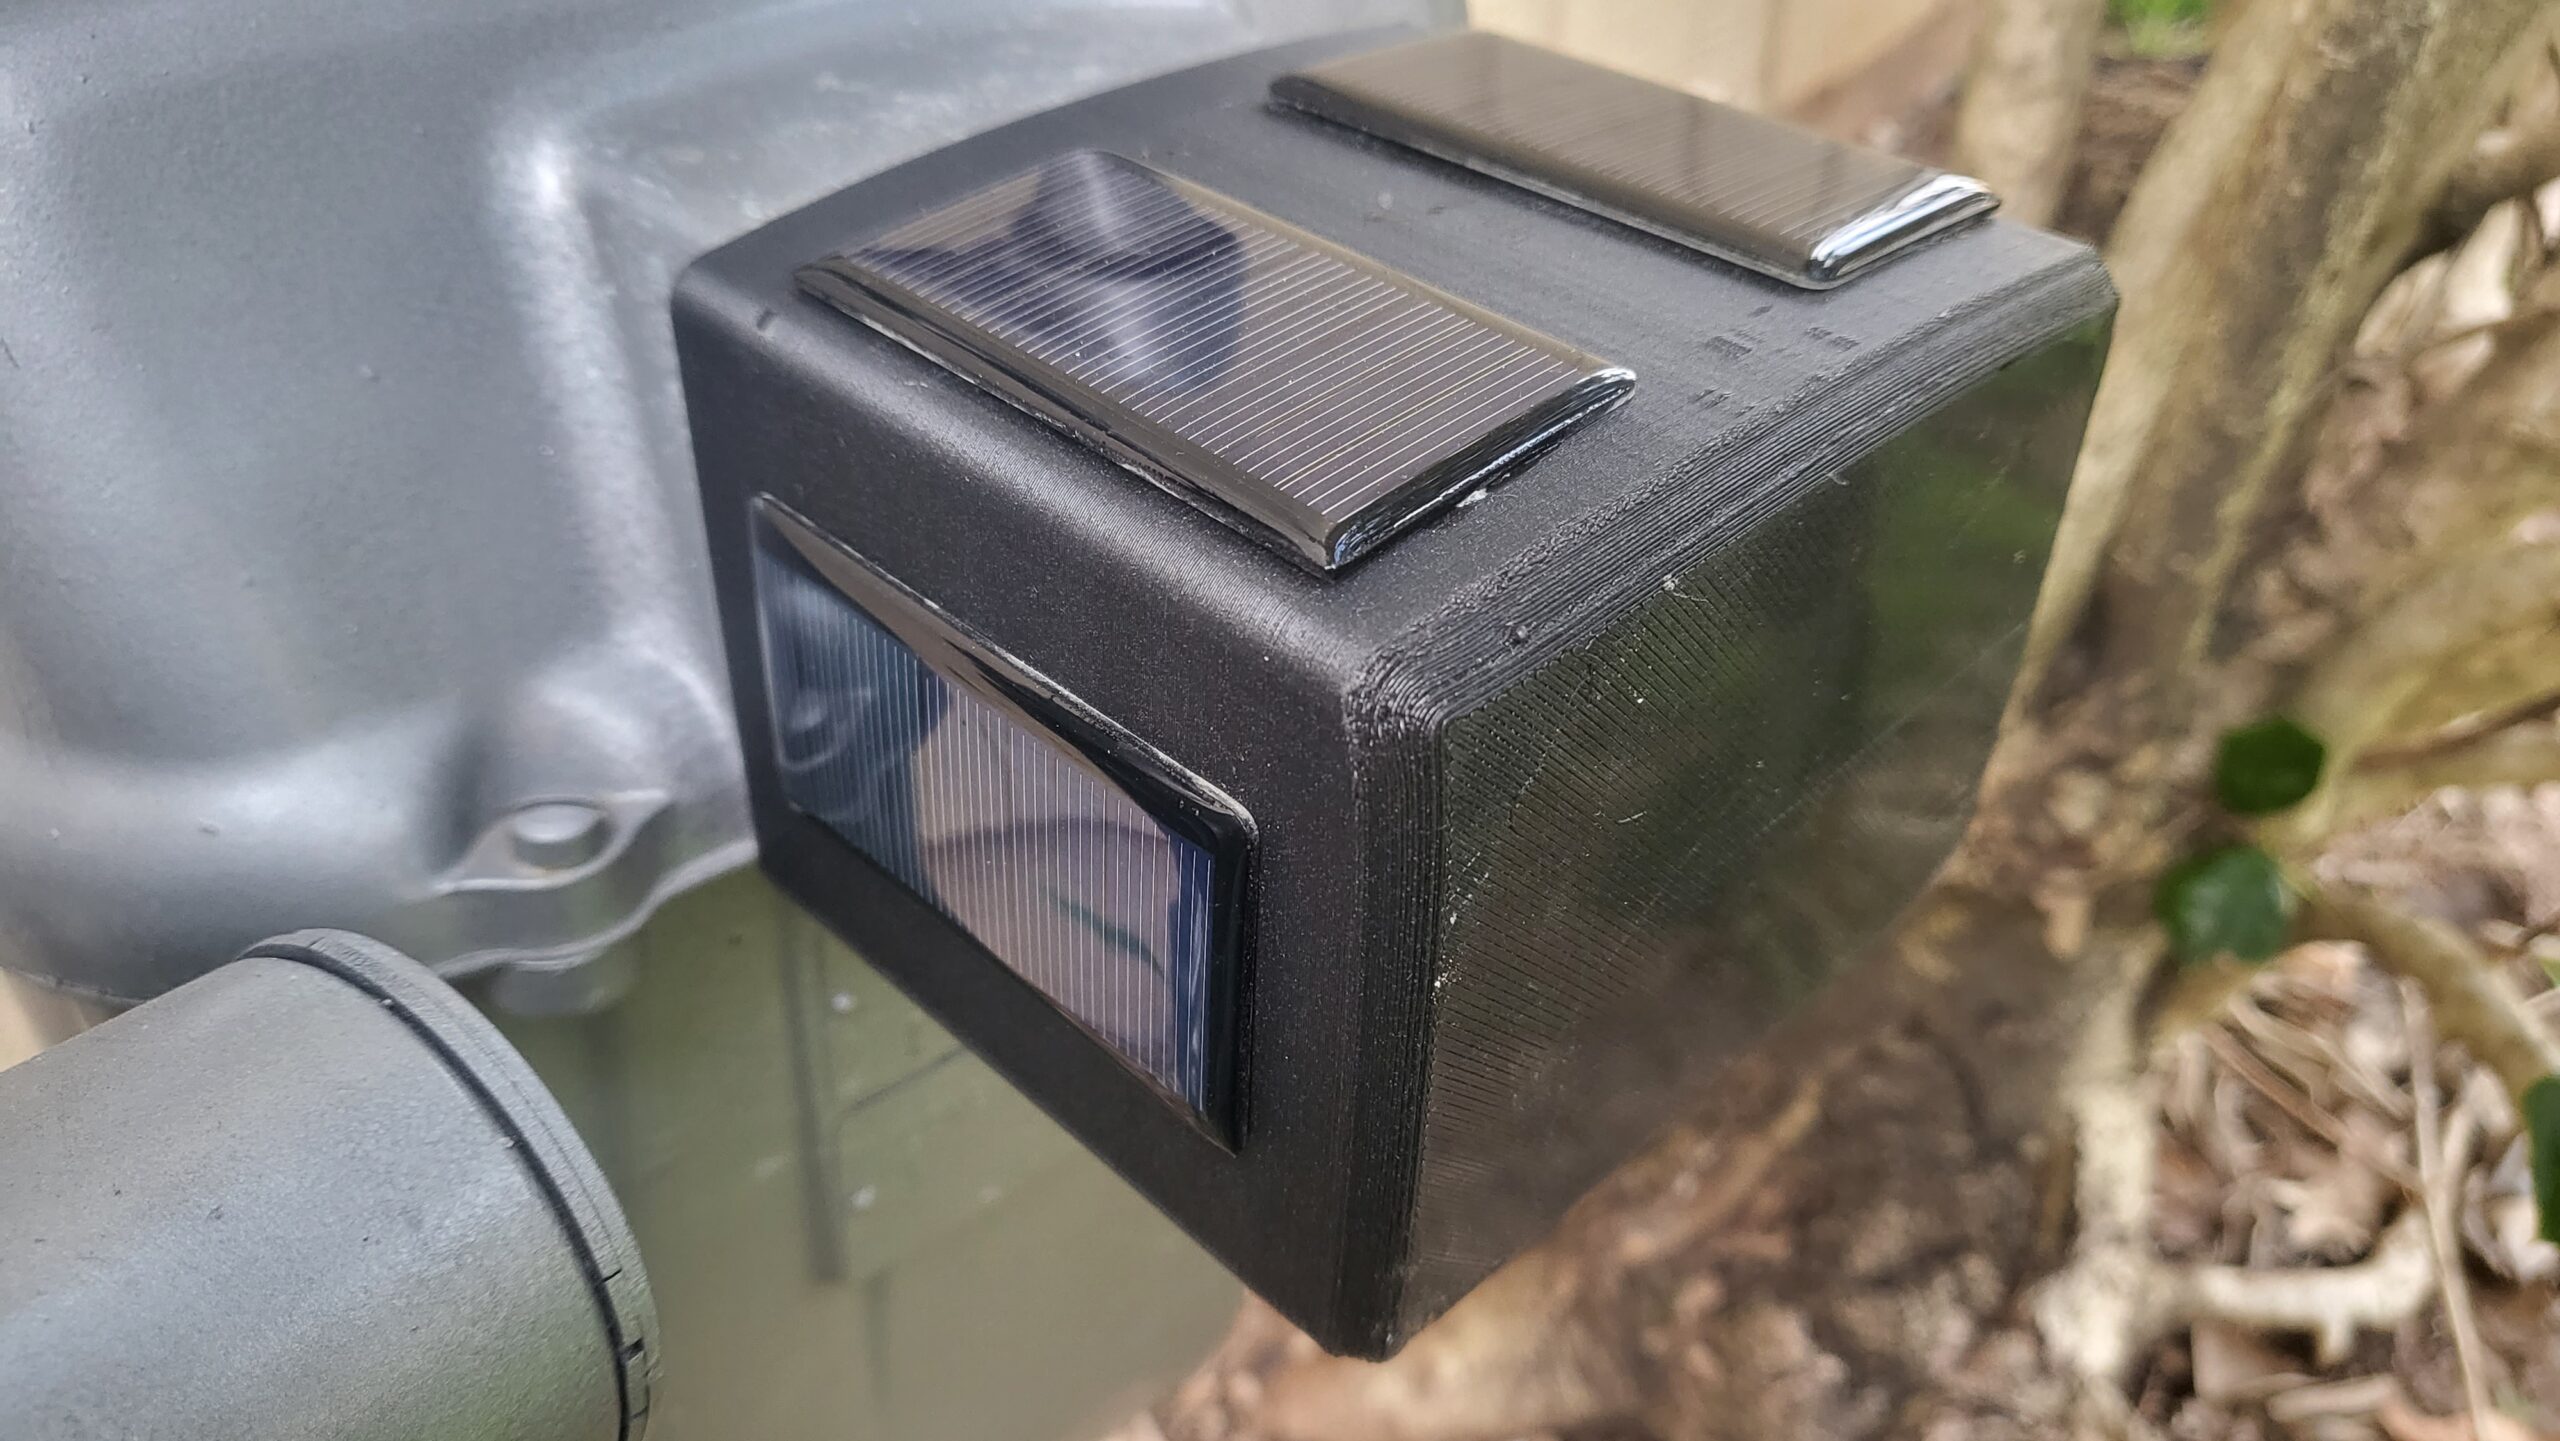
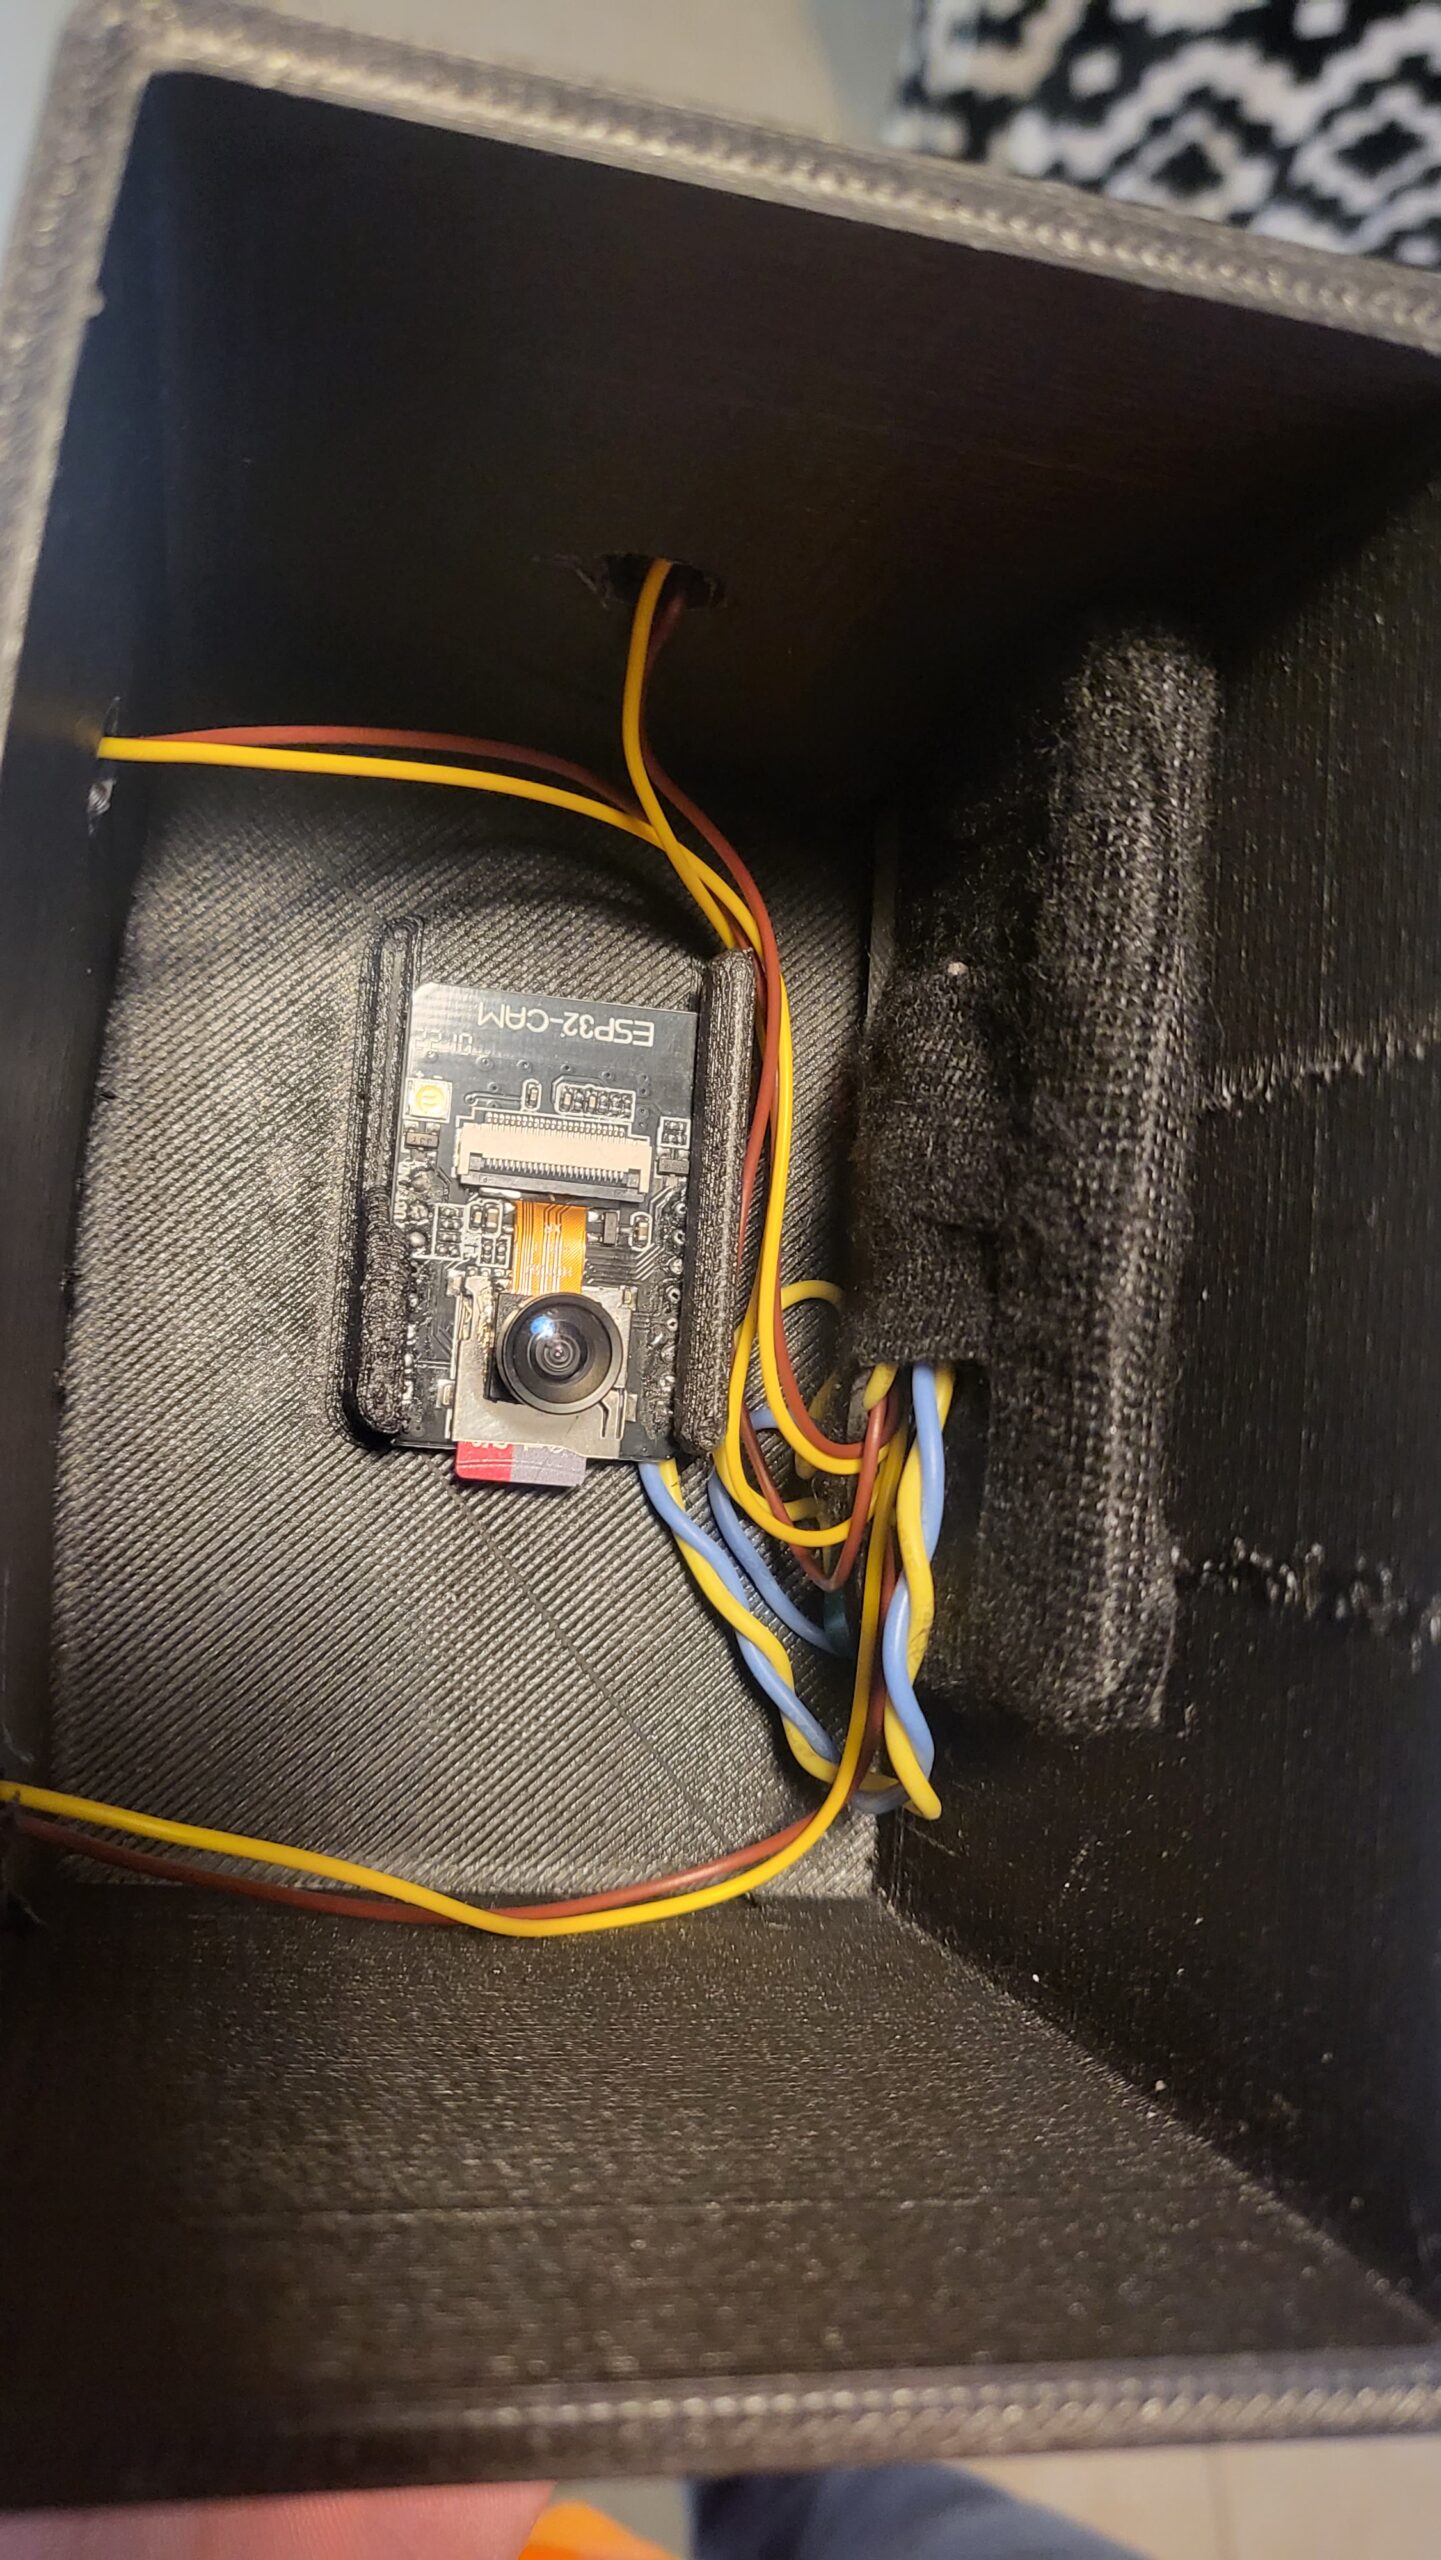
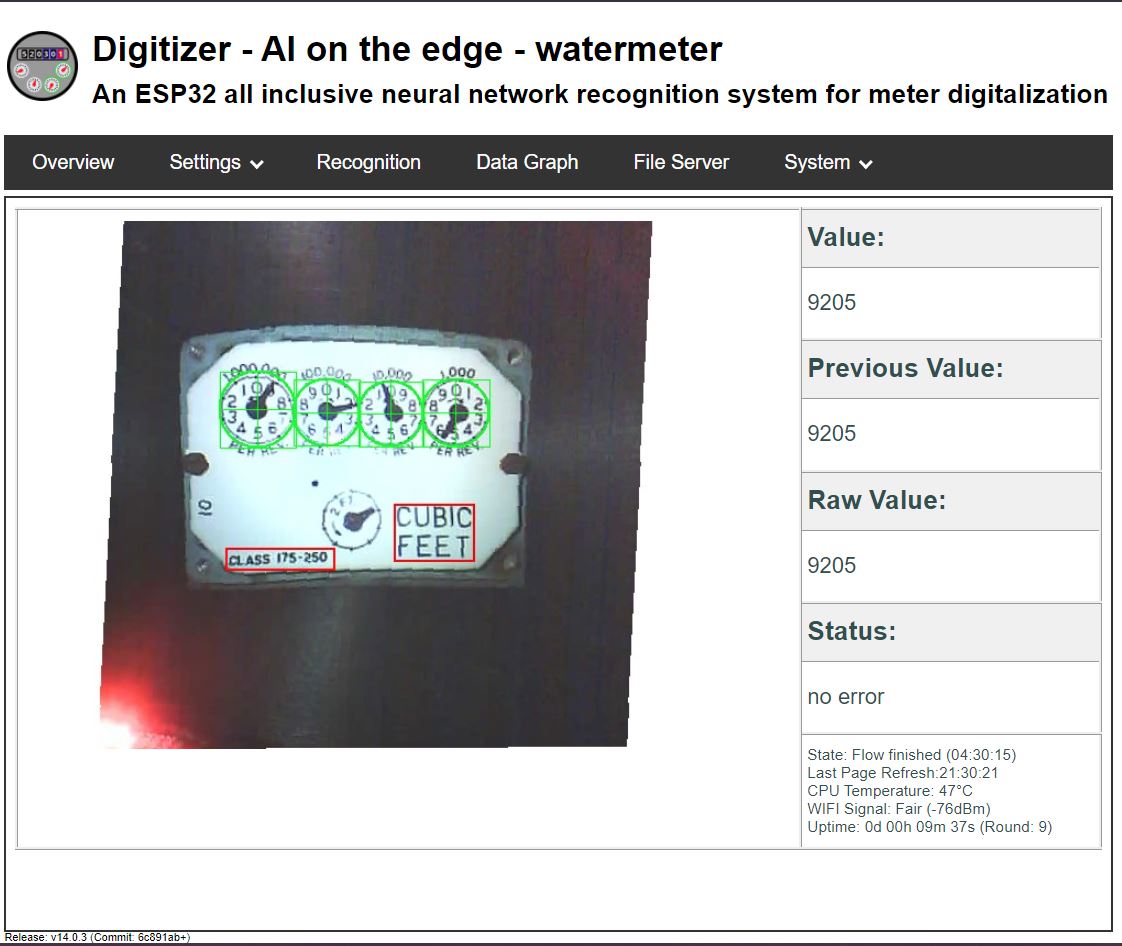
I wanted a way to add our natural gas consumption into Home Assistant, so I built a thing. It uses a ESP32 camera board, 2000mAh LiPO cell, BMS, and 4 solar cells. I found an AI On The Edge package that did all the heavy lifting. All I need to do was flash the ESP, configure the gauge layout, and setup the MQTT messages. The hardest part was polishing the gas meter window so that it could actually be read.
I stopped using this because I did not feel comfortable having a LiPo in direct sun, charging using a cheap BMS, on top of my gas meter. I plan to run 3/5V out to it and delete the solar/BMS/Lipos.
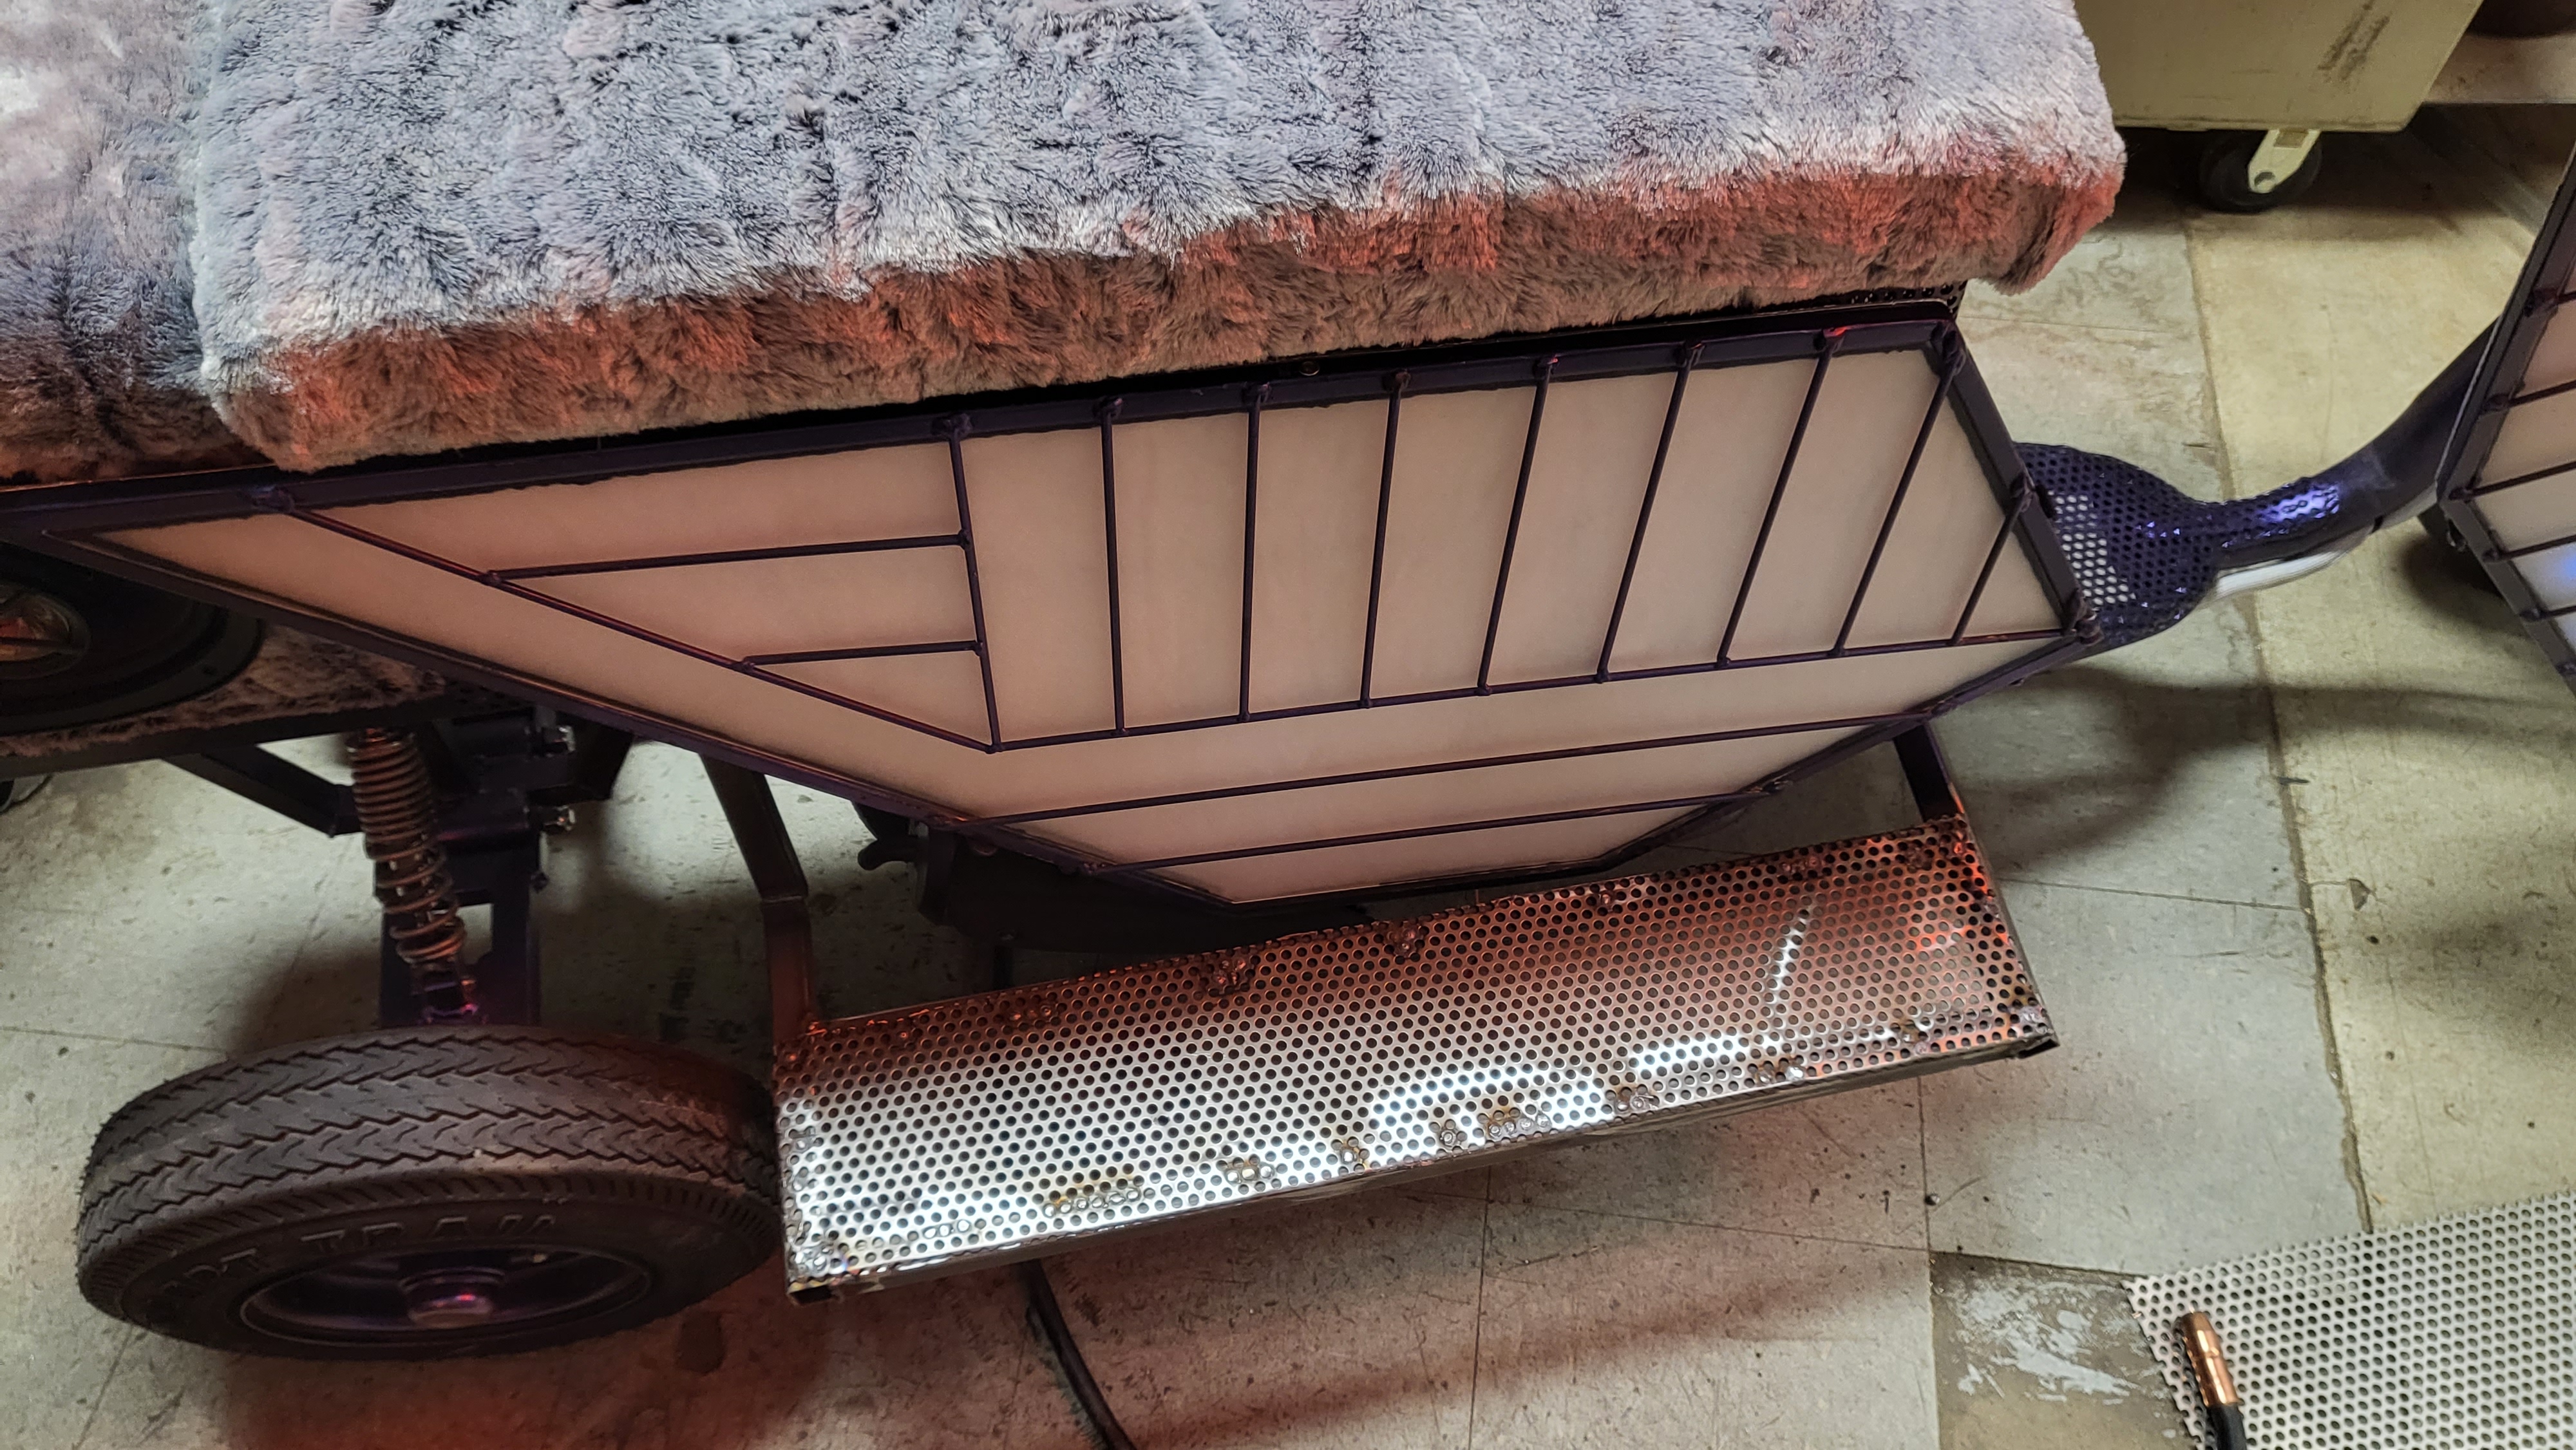
As the deadline to leave for the Black Rock Desert grew shorter, I kept making little refinements to the vehicle. One of those was to replace the footpegs with a long deck. This not only more comfortable but also allowed more riders could fit on.
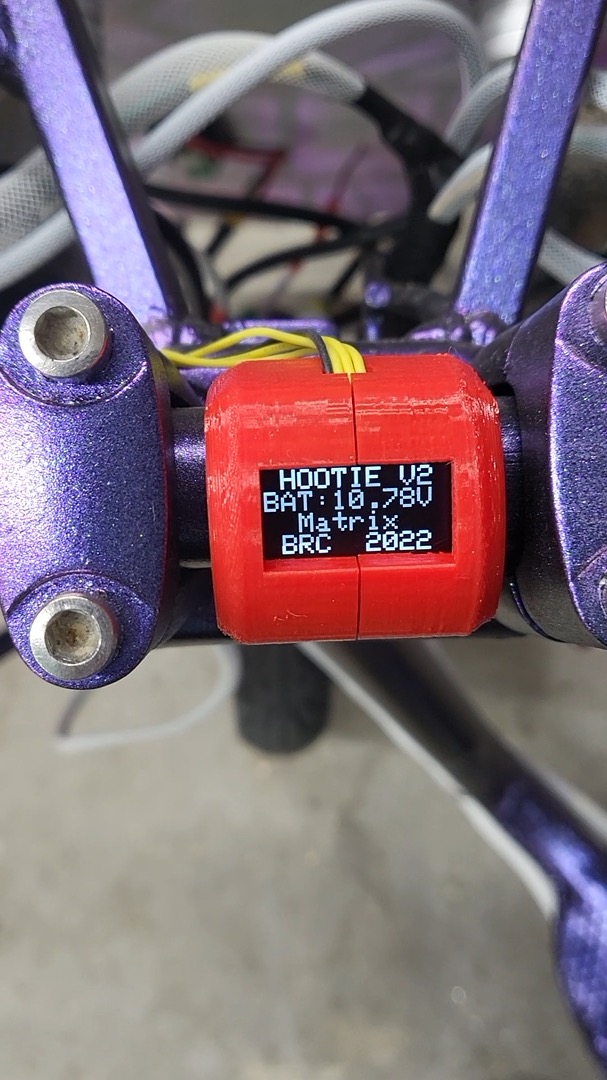
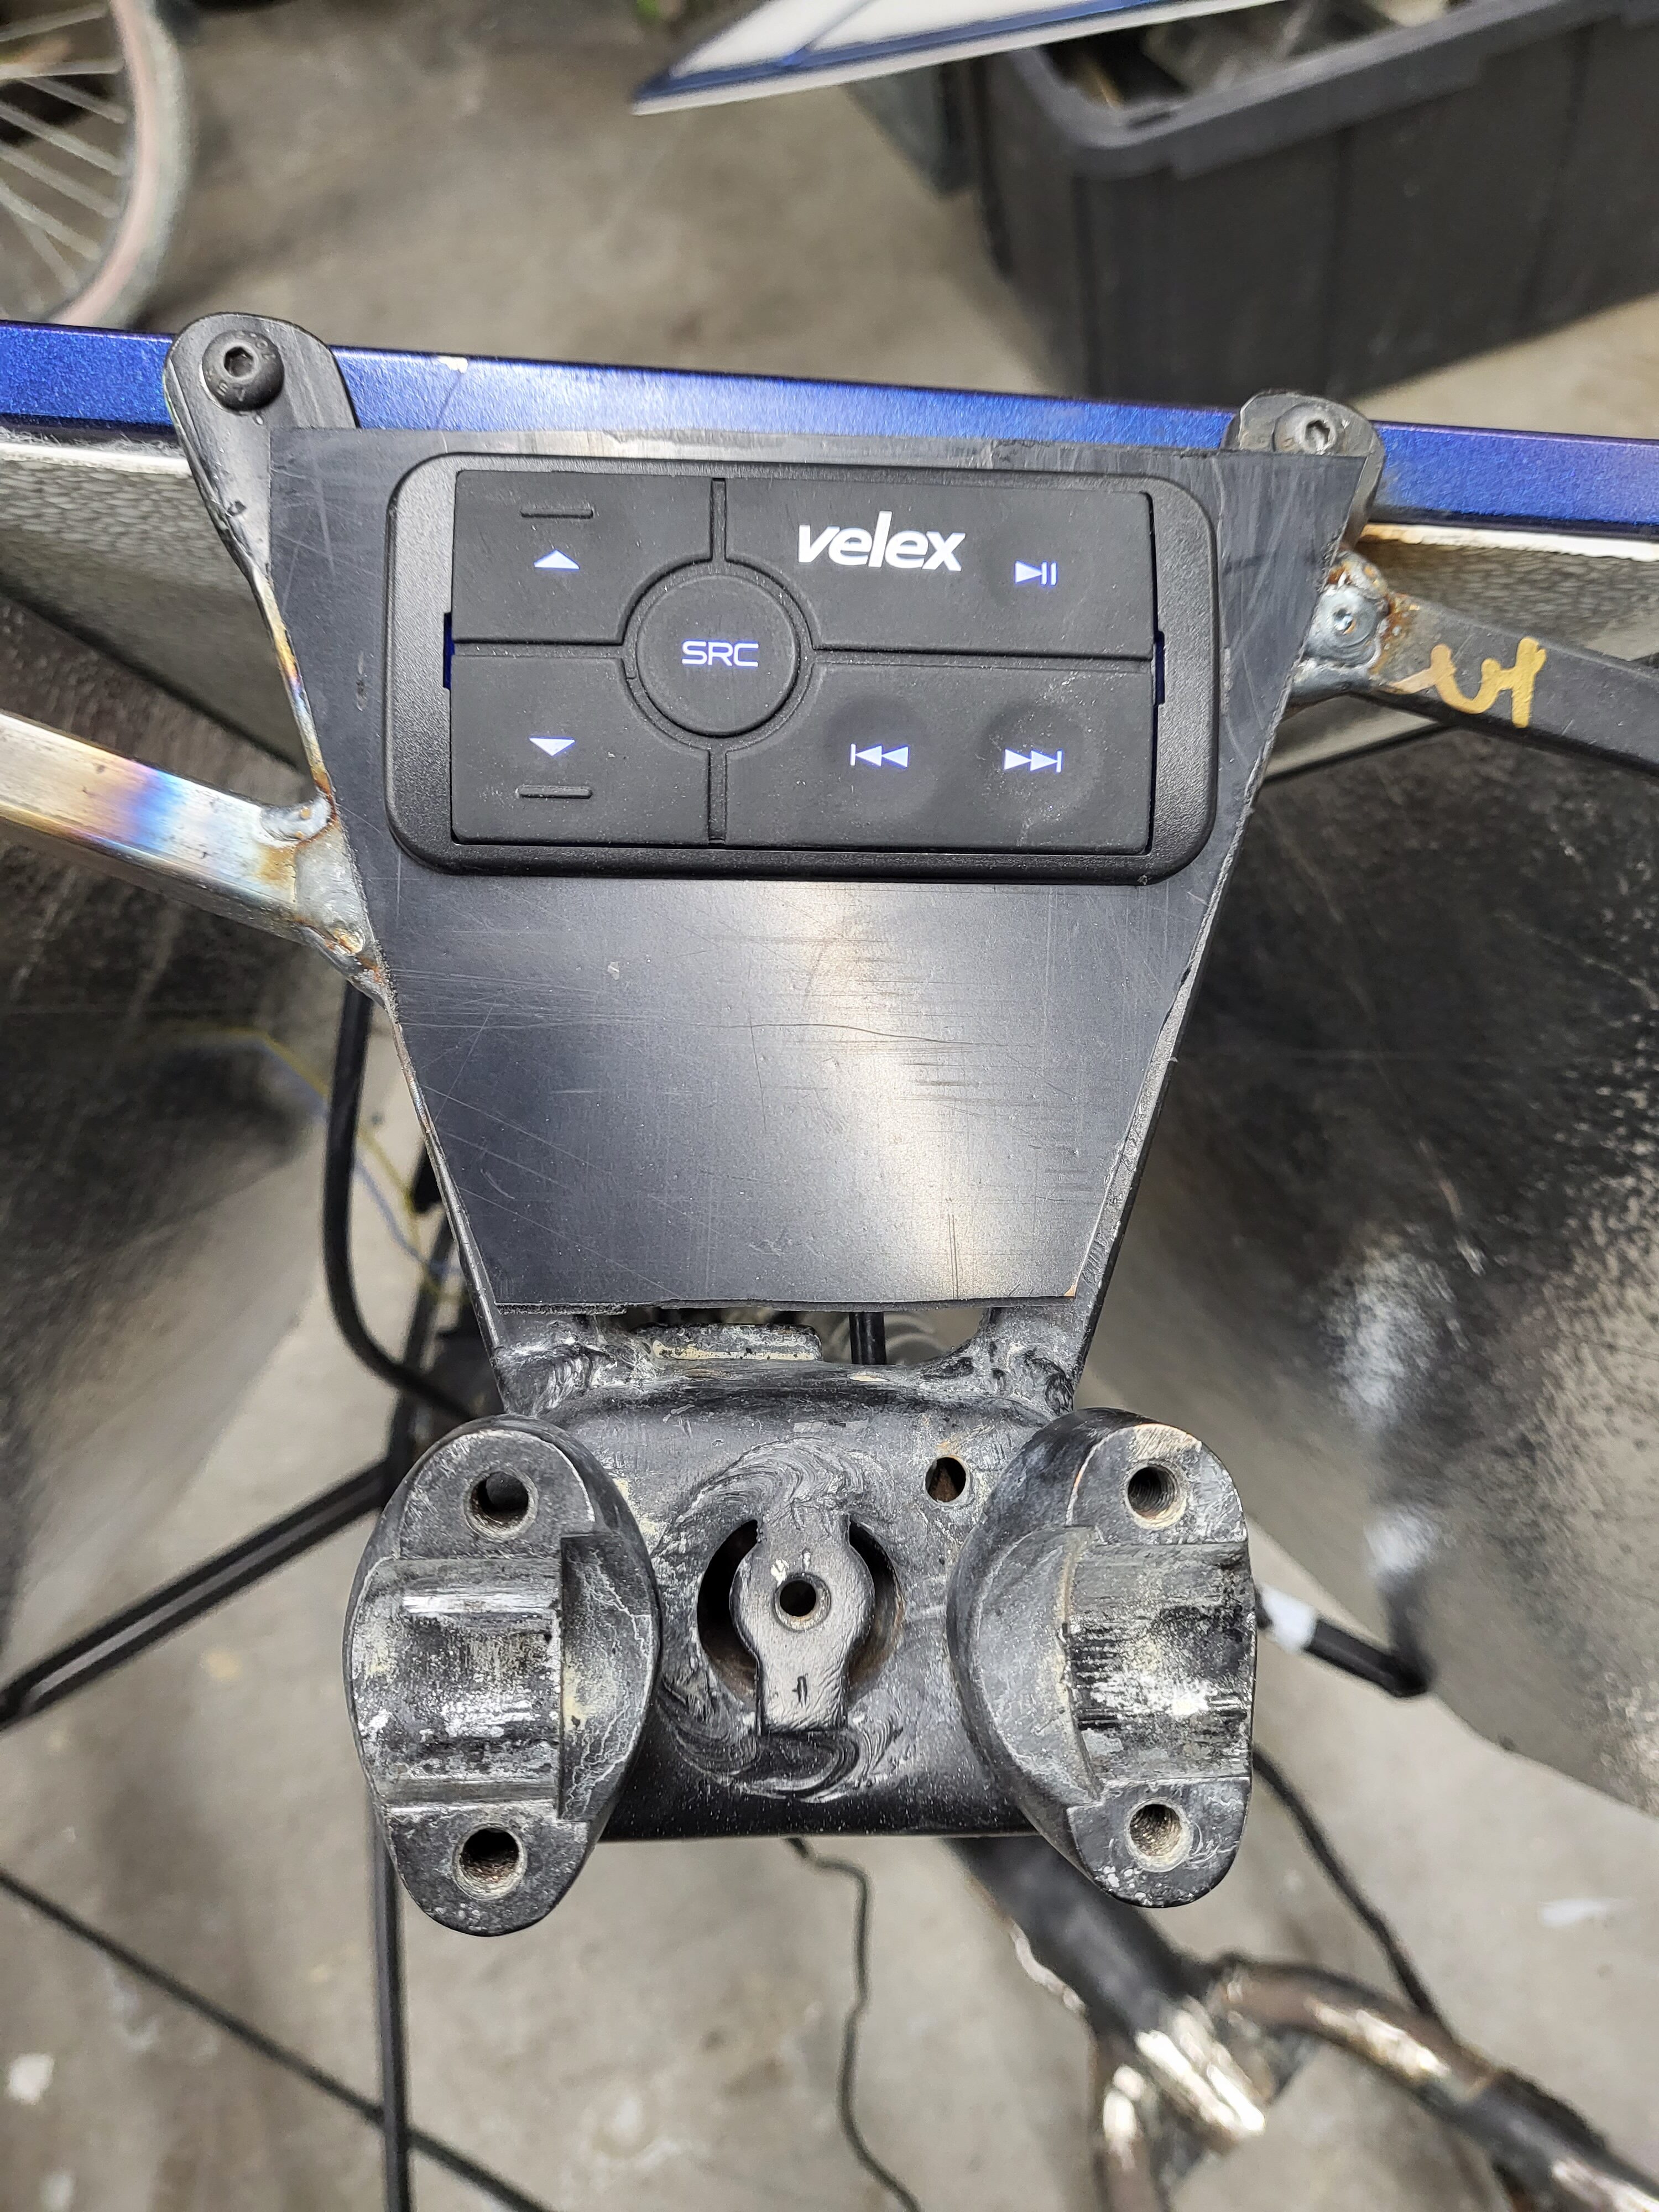
Then I decided to move the audio controller from the handlebars to the frame just below the seat. It was easier to press, saved on running longer wires, and freed up the handlebars for another new feature. An i2c status screen.
It became eveident that a screen was needed to at a minimum display the Lipo pack’s voltage. The mode that the panels were displaying saved me from having to look down at one of the side panels. The screens is 128×64 slides in custom 3D printed housing that mounts on the handlebars.
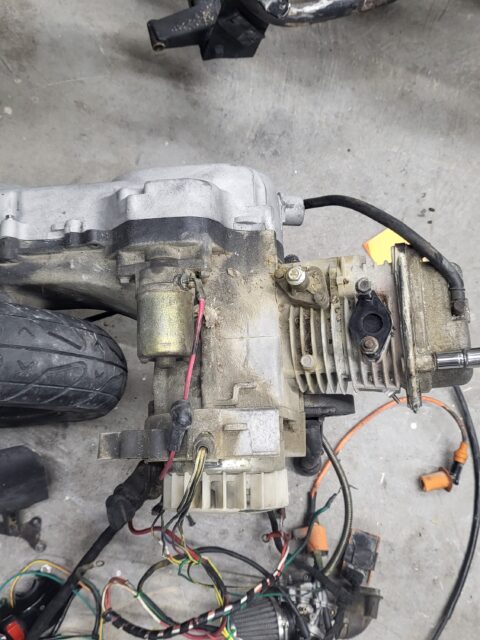
The iconic Hootie V2’s motor was looking rather worse for wear after the thrilling escapade at the 2021 Burning Man. The harsh desert conditions had taken their toll, leaving the motor needing more than just a little TLC.
It was high time for a paint job!
But first, we needed to strip it back to its original state. The journey began with an intensive media blasting session, meticulously clearing away every hint of old paint and grime to reveal the bare, raw metal underneath. This critical step ensured a clean slate – an ideal base for the exciting transformation that lay ahead.
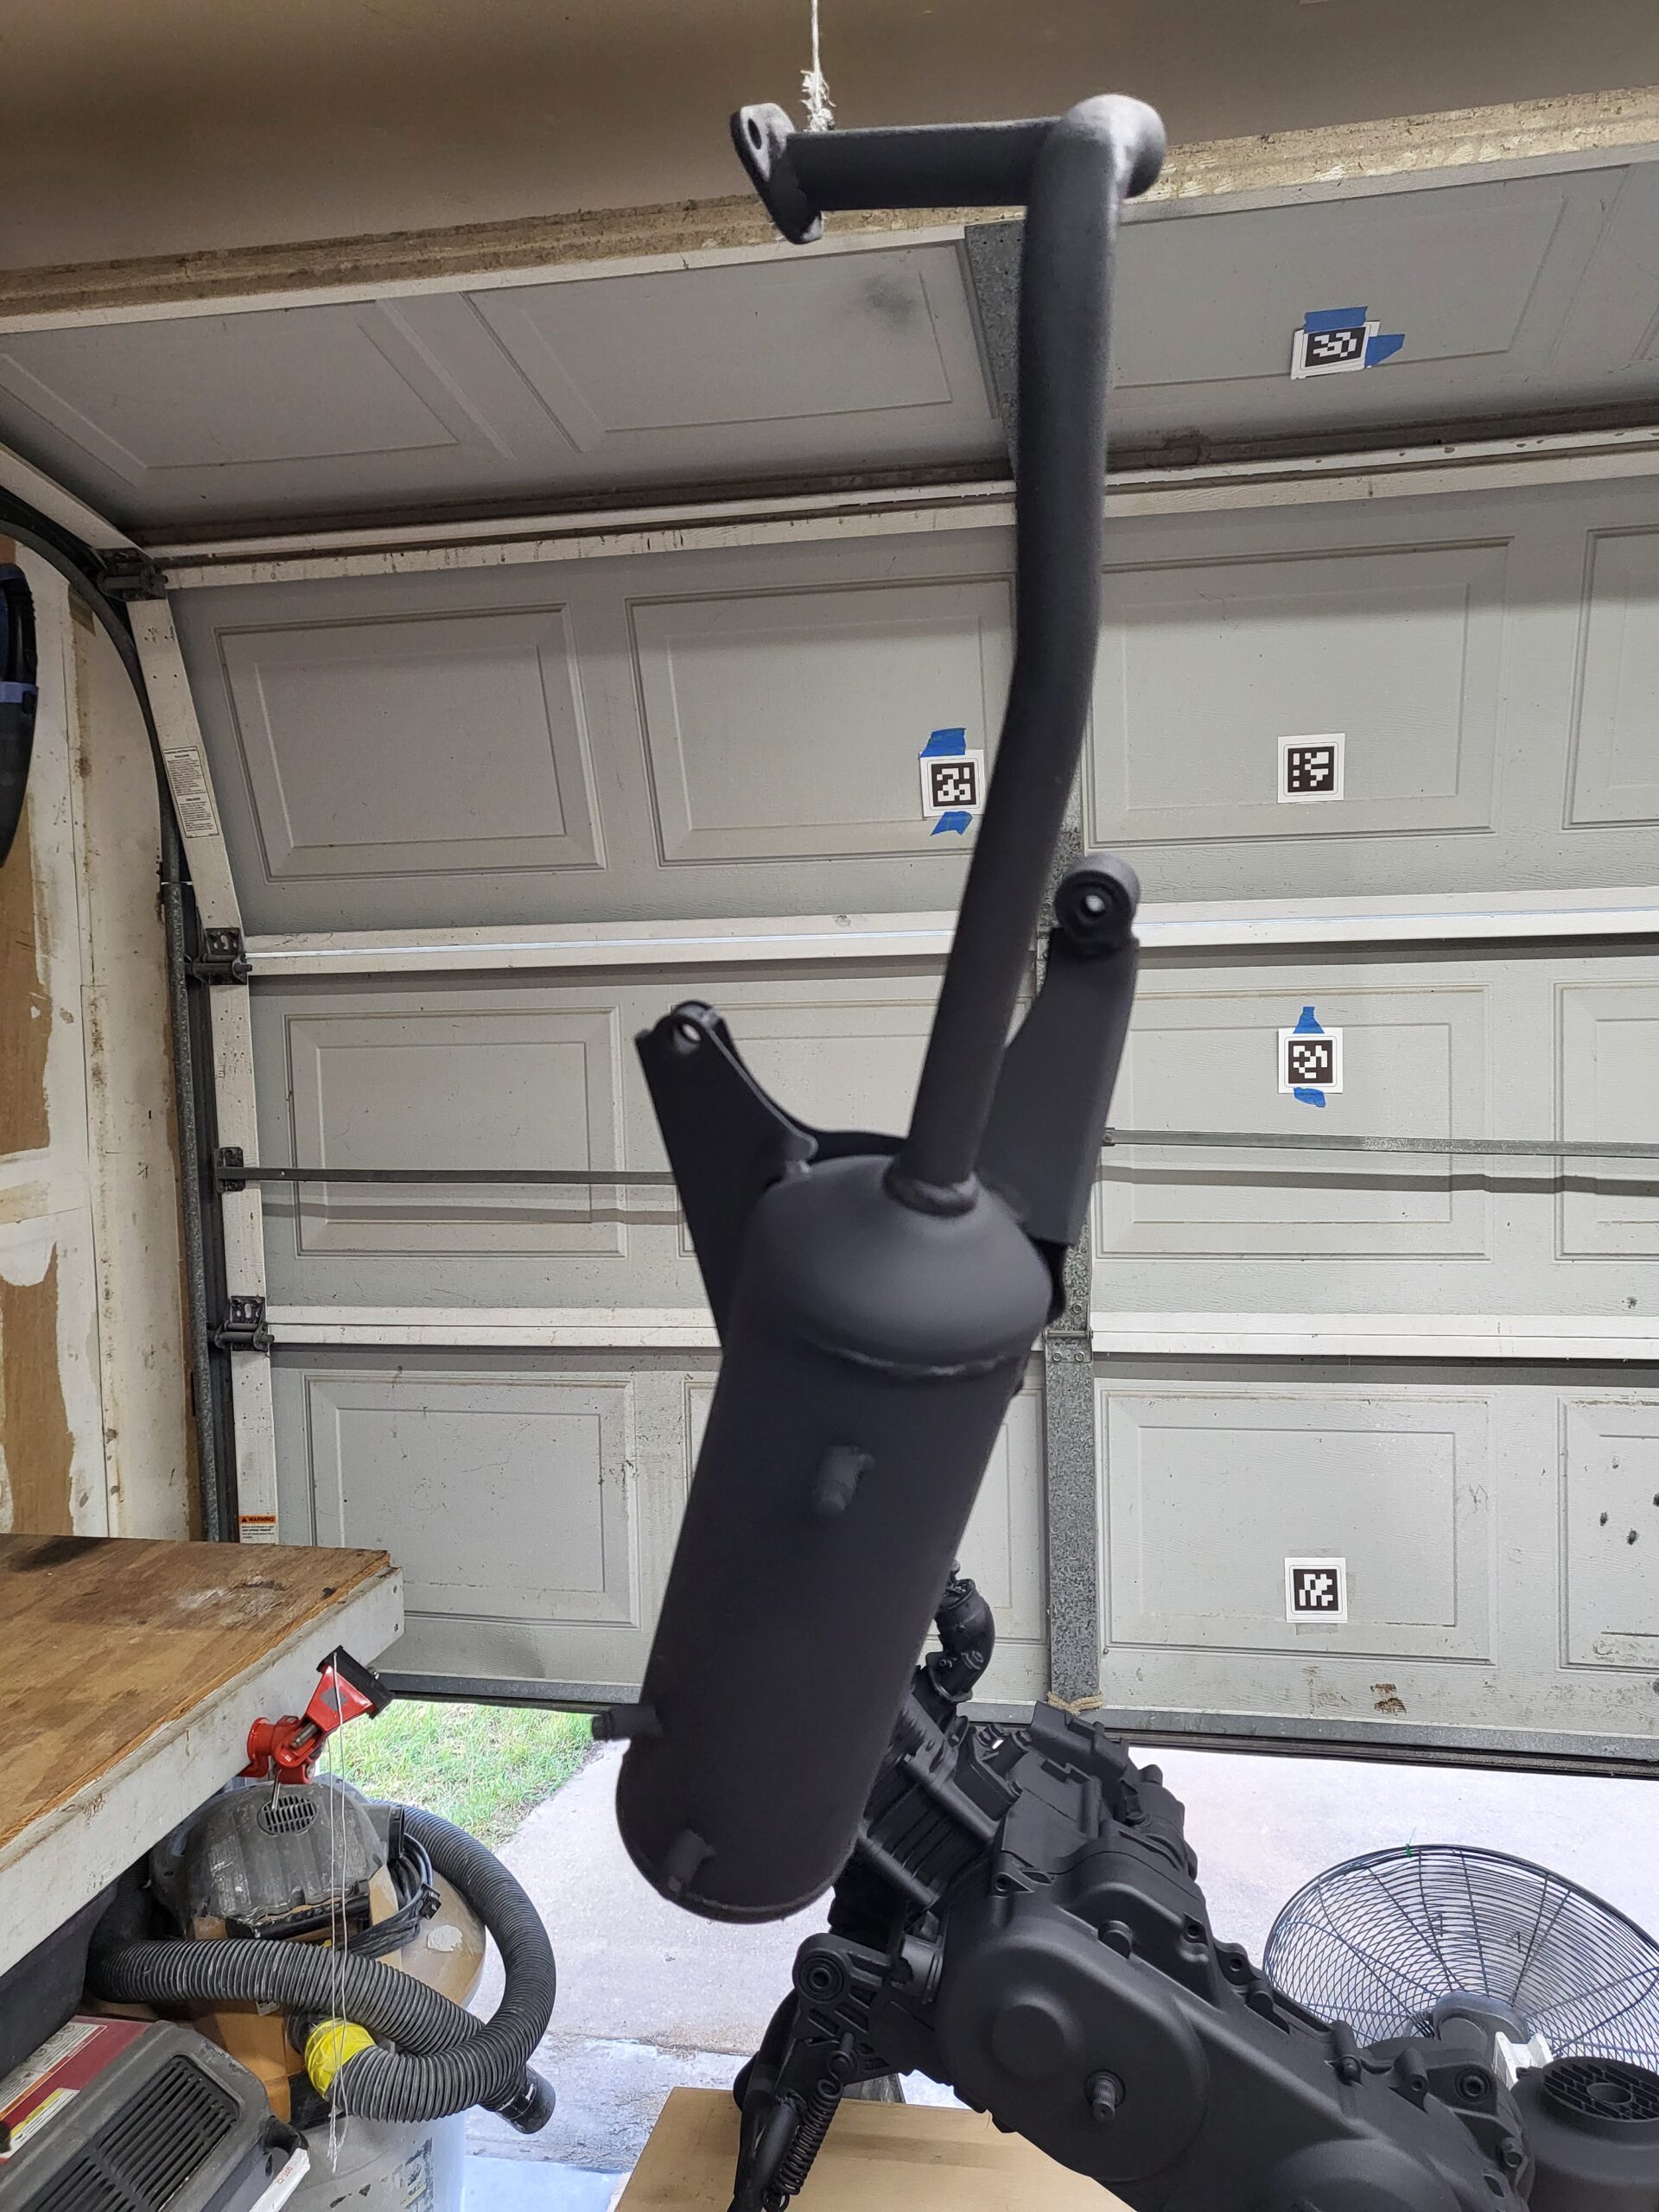
With a pristine surface to work on, out came the painter’s tape, meticulously outlining the areas to protect. This was followed by the first layer of paint – a coat of VHT Flame Proof black spray paint. This served as a robust and visually appealing base for what was to come next.
Then came the most exciting part of the project – the inclusion of mica powders. And not just any mica powders, but color-shifting ones from Eye Candy! Fortuitously, I had a stash left over from a previous epoxy project. I was thrilled at the prospect of putting them to good use. So, I stirred up a custom blend using the leftovers and mixed it with KBS Coating’s XTC clear coat. But before committing it to the motor, I conducted several tests to ensure the final appearance would meet my vision.
The outcome was simply extraordinary – surpassing even my wildest expectations! The dazzling play of colors was like nothing I had ever seen. What’s more, the mica admirably withstood the extreme heat of the motor and even the exhaust without showing a single blemish – a testament to its durability.
Stay tuned to see the Hootie V2 with its fabulous new look, ready to take on more adventures!
I made a bunch of progress but I also added to my to-do list; 🤦 I tend to do that.
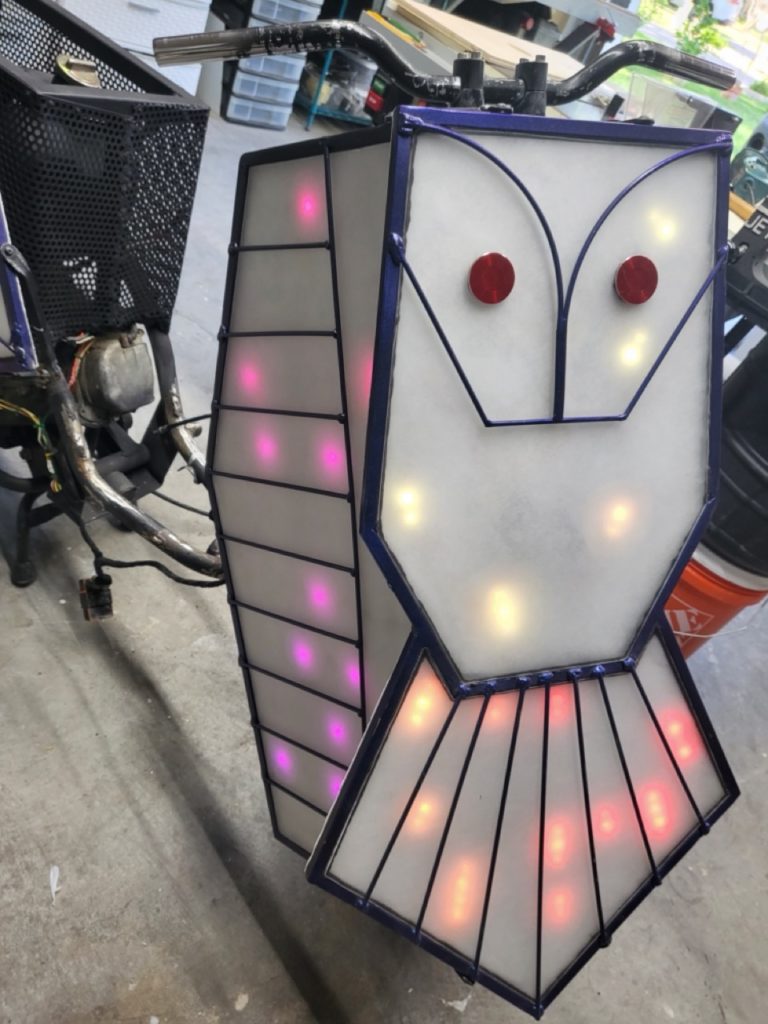
First off, I finished the audio system. The rear led panel and amp were mounted. The wiring has been completed and it is ready to be mounted once the frame is painted. I have been testing it out in the Texas sun and heat to make sure we don’t have any issues on the playa.
I am considering cutting an ABS plastic sheet to make a panel to cover the gap between the LED panels and the handlebars. This image is a POC of how the audio control remote will mount in said ABS panel.
Next, I fabricated mounts for the new front panels and welded them to the forks. The mounts were made the same as the original panels, half-inch square steel tubes with one side flattened and a hole drilled into the flat side.
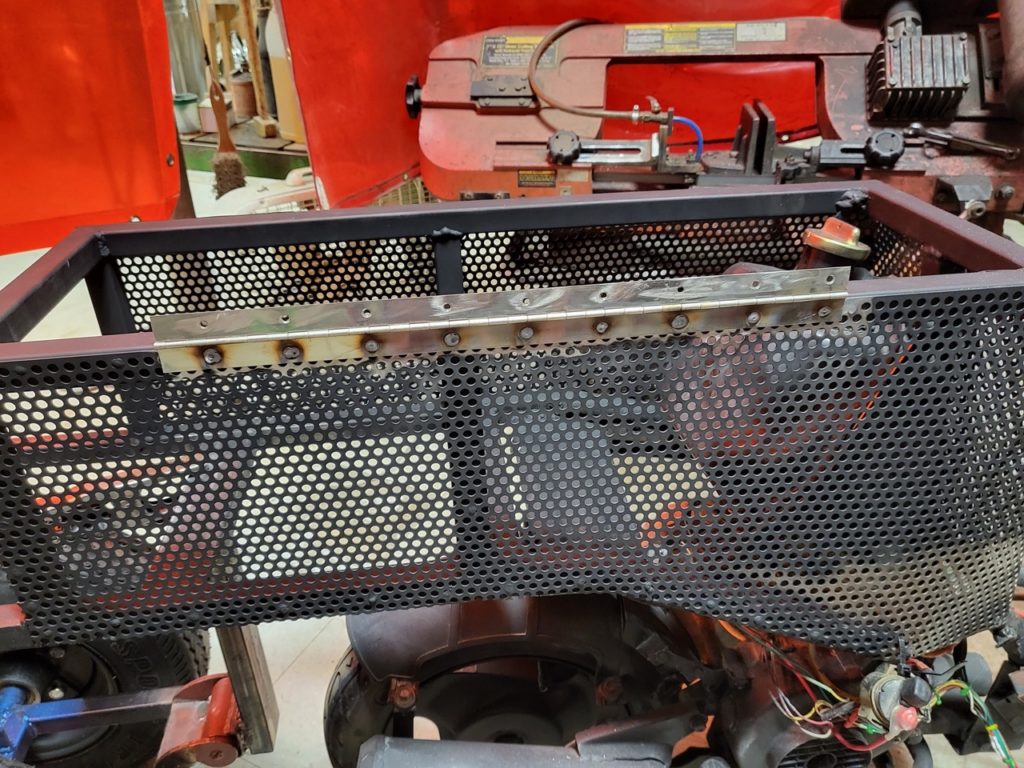
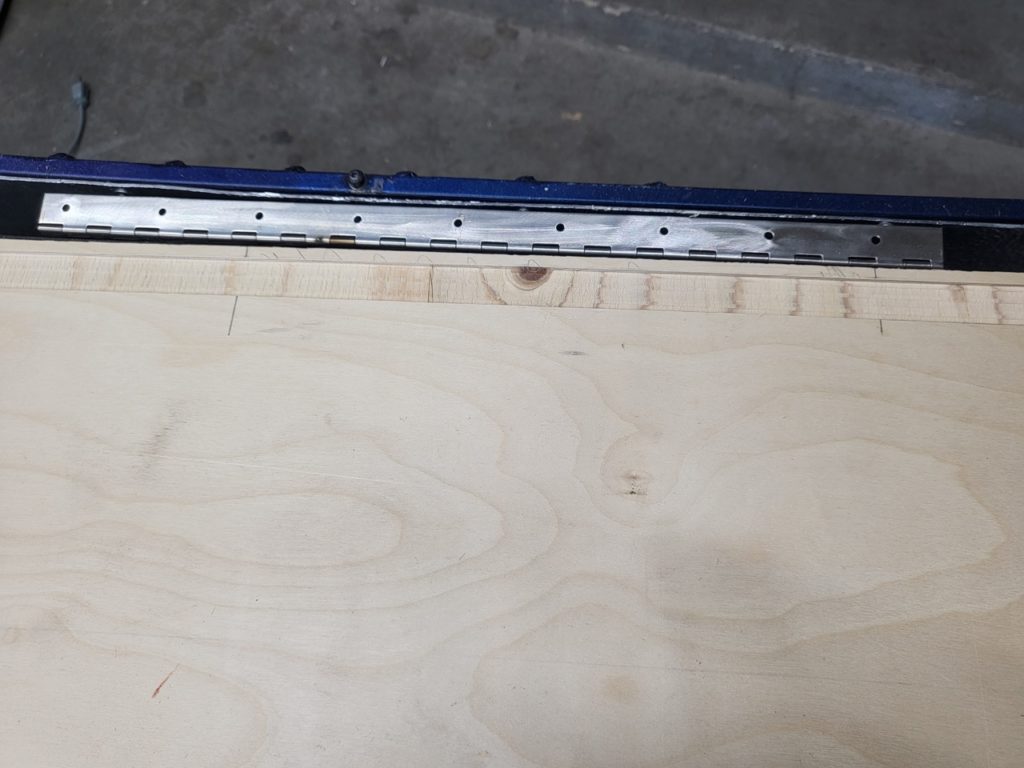
The same day I welded on the piano hinge that will allow the seat to flip up revealing the petrol tank, Li-ion packs, and storage. I used all my dado blades to make a wide dado in the bottom of the seat that the hinge will be recessed into. There is just enough space to let the seat open while bypassing the side LED panel.
Hinge welded to frameDado in bottom of seat
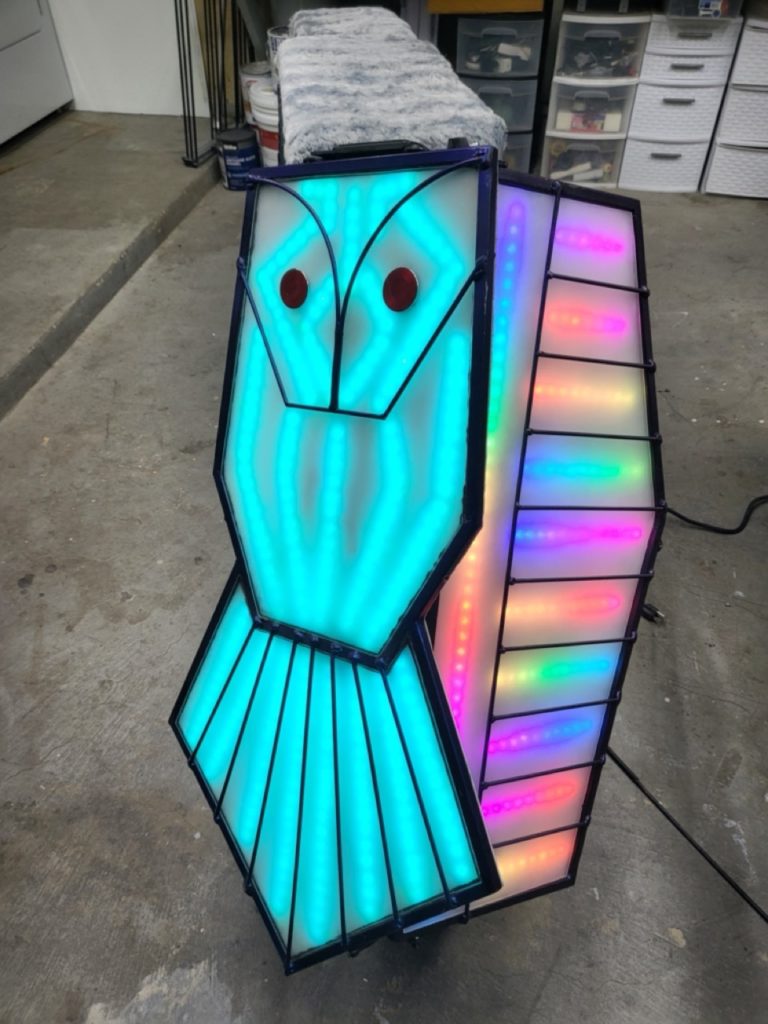
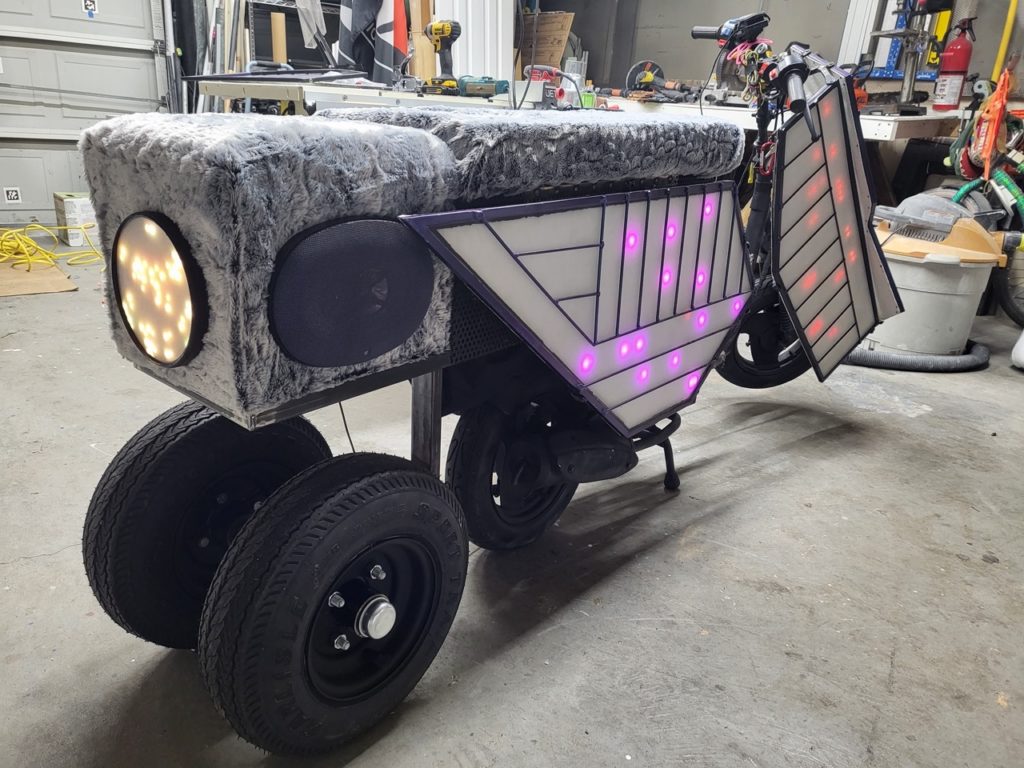
Speaking of the side panels… the mounts for these were mostly removed with the new frame so they needed to be re-welded. The side panels were originally mounted at an angle. I felt this gave the design more motion but this time I mounted them parallel with the seat to make it more comfortable for passengers.
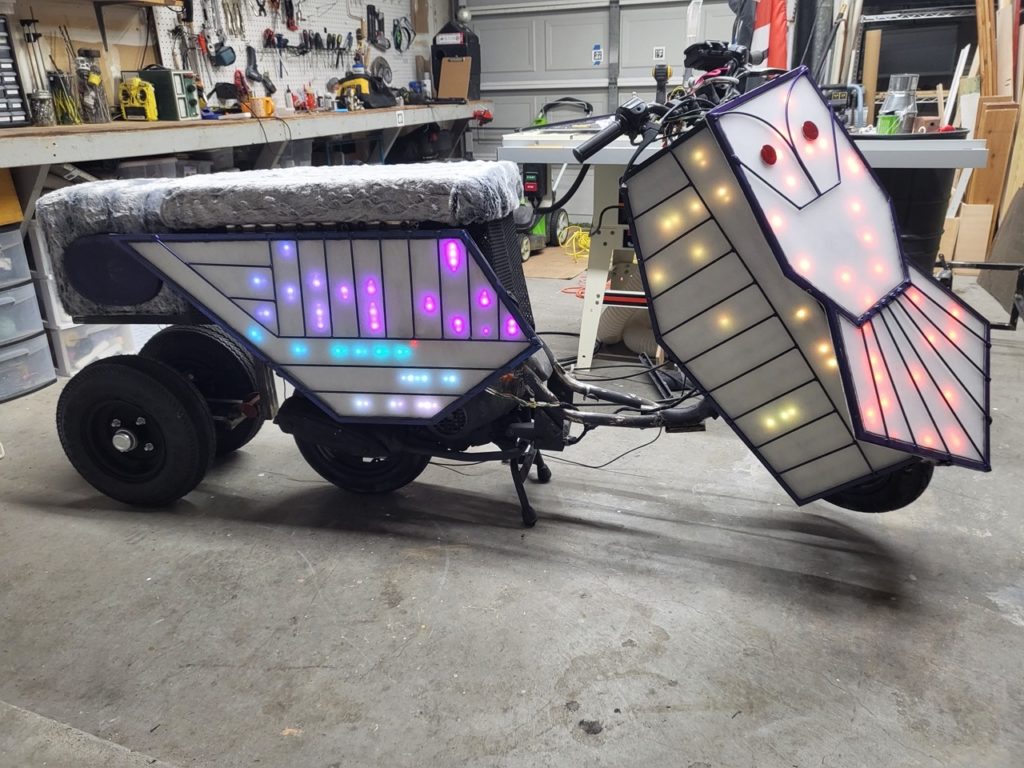
This is close to the final design of version 2This is close to the final design of version 2
TODOs:
Weld driver footrest to frame Weld Passenger Foot Pegs Weld bottom to seat storage Remount Headlights Rework Rear Suspension Paint the whole frame Paint the motor Finish painting the wheels Finish cleaning up the wiring 3D Print Foot Rest Pad Build more Li-ion battery packs (recycled cells) Re-paint the original three pannels (maybe)